How to Change Font Size on Windows 11/10/8/7? [Full Guide 2022]
As computers play a vital role in our daily lives, it's essential to remember the importance of adapting our devices to suit our needs. From adjusting the brightness and ergonomics to setting the optimal font size on our screens, every detail matters in promoting healthy computer usage habits.
Font size determines the size of text on a computer screen, and can be a challenge for those with weak eyesight, making it hard to read from a small font size, or uncomfortable to read from a very large one.
If you're experiencing issues while reading from your computer screen, it's time to adjust the font size on your Windows device. This can be done by going to Settings, then Display, and finally adjusting the font size to a comfortable level for your eyes.
How to Change Font Size on Windows 11/10/8/7?
Changing font size on Windows can be tricky, as the navigation process varies across different versions, including Windows 11, 10, 8, and 7. To increase or decrease the font size, you'll need to locate the specific setting in your operating system.
1. Change Font Size on Windows 10
To change the font size on Windows 10, you can use the Display settings. Go to Settings > System > Display, and then adjust the "Change the size of text, apps, and other items" slider to your desired font size. You can also adjust the font size separately for the Start menu, taskbar, and other elements.
Step 1. To open Windows settings, click the Windows button on your keyboard, scroll down to the Settings icon, and click on it.
Step 2. To access the Ease of Access settings, click on the Settings icon, then select Ease of Access from the list of options. This will open the Ease of Access settings screen.

Step 3. On the next screen, you will find the Make Text Bigger option at the top, which includes a slider to adjust the font size. The sample text is visible on top, allowing you to see the changes as you adjust the slider. To apply the changes, simply click the Apply button.

If you can't find the font size setting using the provided steps, you can also search for the term "Make Text Bigger" on the search bar of the Settings screen.
2. Change Font Size on Windows 11
If you're a Windows 11 user, you can easily find and change the font size by following these steps. Although Windows 11 has just been launched, many people have already upgraded to this version. To make the most of your user experience, you can customize the font size to suit your comfort level.
Step 1. To open the Windows Settings, click the Start button and select Settings, or search for Settings in the search bar, or find it in the recent apps section.
Step 2. To access the Accessibility settings, navigate to the Settings screen, then click on the Accessibility option on the left.
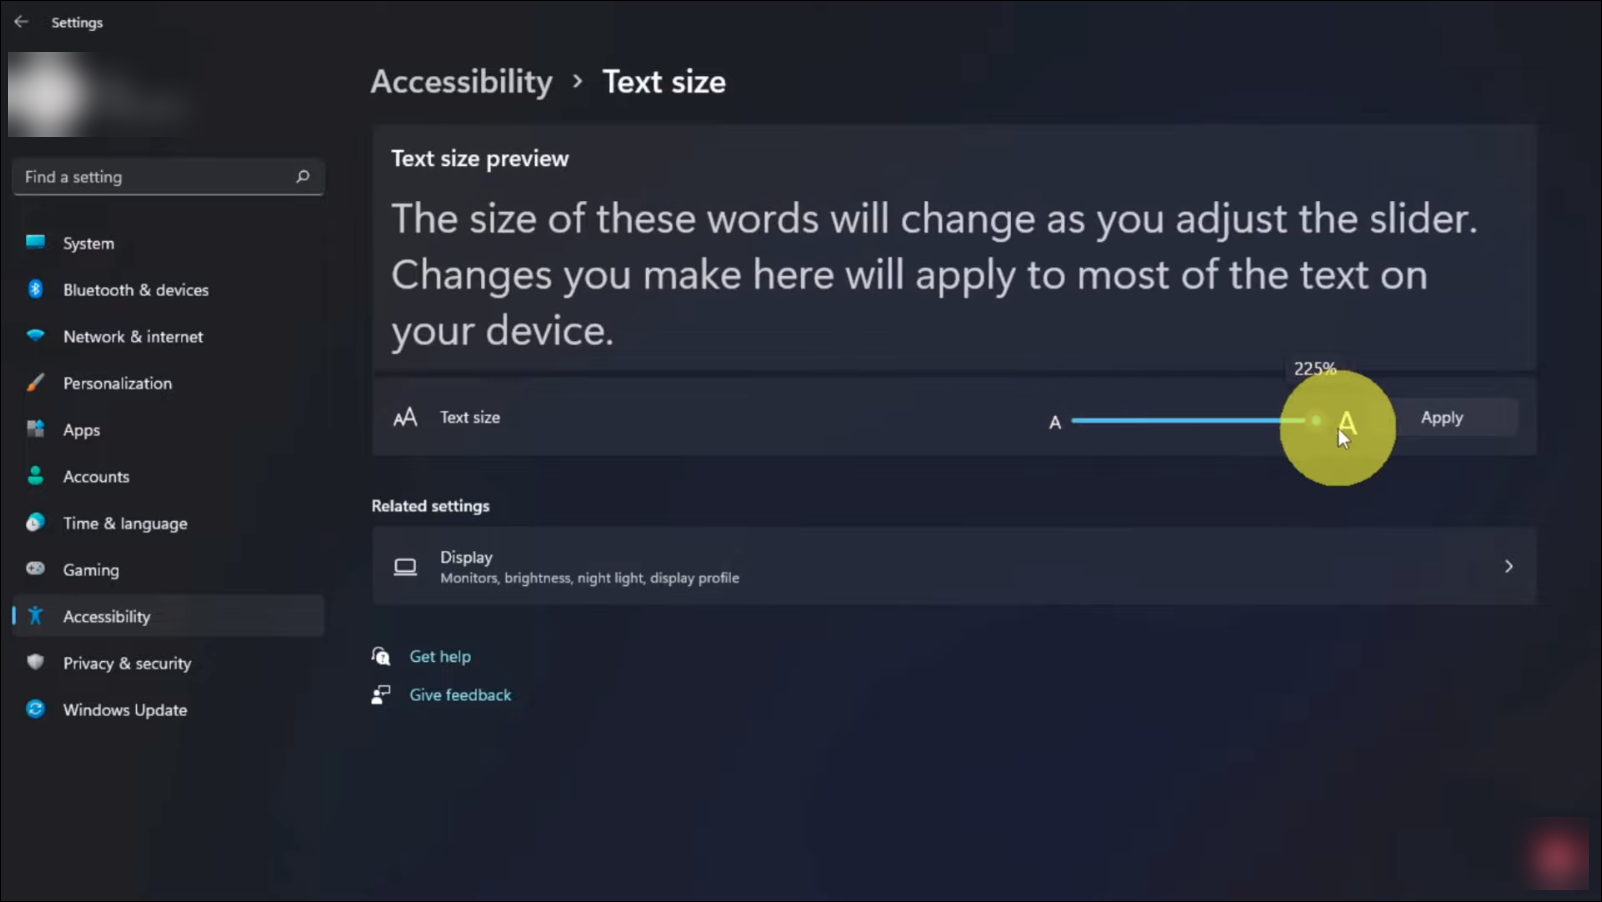
Step 3. To access the Text Size option, click on the Accessibility settings and select the Text Size option at the top.

Step 4. You will see a slider to change the font size, with sample text above it. Adjust the slider to your liking and tap "Apply" to make the changes permanent.
3. Change Font Size on Windows 8/7
To change the font size in Windows 8 or 7, go to Control Panel, then Appearance and Personalization, and finally Display. From there, you can adjust the size of the text in the system, as well as the size of the items in the taskbar and start menu. This will help make the interface more readable for users with visual impairments or those who simply prefer a larger font.
Step 1. Right-click on a blank space on your desktop screen.
Step 2. Select "Screen Resolution" by clicking on it.
Step 3. Now, click on the "Make text and other items larger or smaller" option on the next screen.

Step 4. A slider allows you to increase or decrease your font size, and you can also select a preset font size for all displays by ticking the "Let me choose one scaling level for all my displays" option.
Step 5. To change the font size, select the text you want to modify, click on the "Home" tab in the toolbar, and then click on the "Font" button. In the "Font" dialog box, select the desired font size from the "Size" dropdown menu.

Changing font size on Windows is a straightforward process, but sometimes you may also need to change the font size in a PDF. In addition to changing font size on Windows, you can also use a PDF editor like Qiling PDF Editor to modify the font size in your PDF files.
How to Make Part of Screen Text Bigger?
To enlarge a specific part of the screen using the Magnifier feature on Windows, you can turn the feature on first. This allows you to zoom in on a particular area of the screen, making it easier to read or see details when your cursor is on that spot.
Follow the steps below to turn on the Magnifier feature.
Step 1. To access Windows Settings, open the Start menu or use any Settings shortcut you may have, and then proceed with your desired action.
Step 2. To make Windows easier to use, click on "Ease of Access" and then navigate to the next screen.
Step 3. Click on the "Magnifier" option from the left bar.

Step 4. To turn on the Magnifier feature, toggle the button to turn it on, and it will instantly start magnifying the screen where your cursor is.
The shortcut to turn on or off the feature of turning off the screen when the phone is not in use can be used to save battery life and reduce eye strain. This feature can be activated by long pressing on the power button, which will bring up a menu that includes the option to turn off the screen. By selecting this option, you can quickly turn off the screen without having to navigate to the Settings app each time.
To turn On the Magnifier feature - Windows + Plus(+)
To turn Off the Magnifier feature - Windows + Esc
You can customize the Magnifier feature on what Zoom level you prefer, what view you want, and more, with settings found on the same Magnifier Settings screen.
Related Articles
- Should I Get a NAS or External Hard Drive for Backup?
- 2022 Top 5 Mac Cleaning Software [Unbiased] - Qiling
- What Is a File Server? Definition and How It Works.
- [Beginner Guide] What Is PCIe? What Is It Used for?