Best Way to Backup PC to Synology NAS (2024)
The most important thing for computer users is to utilize backup options to keep their data safe. A prominent number of users pick Synology NAS for their data backup. But they end up with incomplete backup, or their system takes a lot of time. The reason is they might be using the wrong approach to backup PC to Synology NAS or back up Windows 10 to Synology NAS.
If you are one of those users, you should read this blog. In this guide, we will share some ways through which you can backup and restore data quickly to Synology NAS.
You might be wondering why you need to use Synology NAS instead of others. Here we have some benefits of using it over it.
- 🧑🔬Unlike other storage servers, it doesn't demand you to create a physical connection between the device and the server.
- ⛑️Synology has adopted multiple steps to avoid data breaching or loss. It has a huge collection of internal hard drives for data safety.
- 🫀Another benefit that you will get from Synology NAS is it works on a centralized storage concept.
Due to all these advantages, professionals use Synology NAS for their data safety.
Can I Connect the PC Directly to Synology NAS for Backup
People normally follow two main methods to connect a PC to a NAS. The first method is through a USB. If you are asking to connect a PC to Synology using this approach, there is a big "No." You can't connect your PC to Synology NAS using a USB.
But you can connect this server directly to the PC through an IP address. For this purpose, you have to follow these steps.
- Create an IP manually on both PC and NAS
- Find Synology NAS using a finder application
- Copy-Paste the IP in the address bar
By following these steps, you have connected Synology NAS with your PC directly. You don't need to perform any other task unless your system is creating some technical errors.
How to Backup Windows PC to Synology NAS (3 Easy Ways)
You must have connected your PC to Synology NAS using the above steps. It is time to learn the best way to back up your PC to Synology NAS. We have enlisted three major methods you can follow easily without technical knowledge.
| Method | Types of Backup | Required Time | Difficulty |
| Qiling Disk Master👍 | You can back up the entire hard drive, system, and partition to keep your data safe. | 5-10 minutes while setting up for the first time | Easy🔥 |
| Backup and Restore | Can take your system back to the normal stage by keeping files that were available at that time | 10-30 minutes | Medium |
| File History | Enable to save specific files to a particular folder in the network | 10-15 minutes | Medium |
Method 1. Best Way to Backup PC to Synology NAS - Qiling Disk Master
Undoubtedly, a backup task is not as simple as it seems to be. But you can efficiently accomplish it using a reliable program like Qiling Disk Master. It is one of the best software available online for backing up your data without losing even a single file.
Using this software, you can keep your files safe from any system failure accident, malware attack, and accidental removal of data. In short, you can create a system image using this software and avoid data loss.
Here, we have enlisted some of the main features that make it a better choice to back up your PC to Synology NAS quickly.
| Feature | Description |
| 💽Offsite Data Saving | Qiling Disk Master software will keep storing an offsite file copy whenever you save it on Synology NAS. |
| 💾Useful Backup | It will not back up empty files/drives. Using its intelligent framework, it will only back up the used files/drives to cover less space. |
| 🔐Excessive Security | This backup software not only saves offsite file copies but also saves them to cloud storage. |
| 🖥️Complete System Backup | You can use its disk cloning feature, using which you can copy the entire disk and replicate it quickly. |
If you are looking for efficient backup software, you should give this a try. It will enable you to utilize basic to advance all features in this toolkit.
Here is what you should do to backup your OS to NAS:
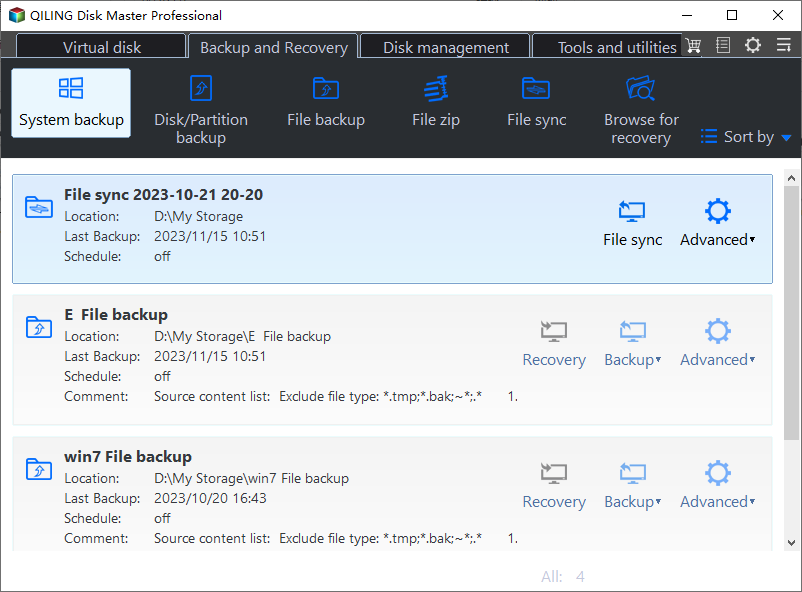
Step 1. Launch Qiling Disk Master and choose "Backup and Recovery" main tab page.

Step 2. Among the four available categories, click "System backup" to start back up.

Step 3. The system partition will be automatically selected, you only need to select the location.

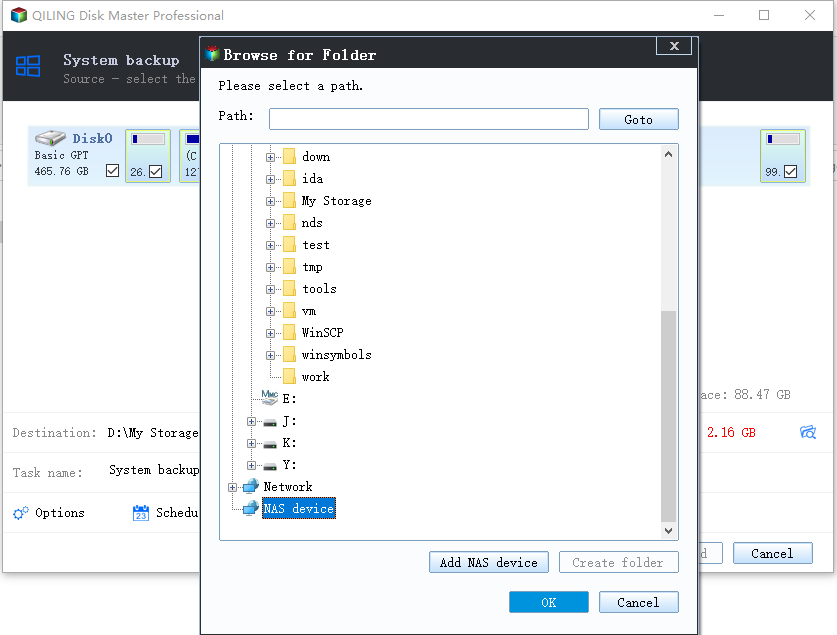
Step 4. Local Drive, Cloud, and NAS are available for you to save the backup file. You can also connect an external hard drive to preserve the system backup files.

Step 5. You can customize the settings in "Options" at the left bottom. After that, click "Proceed", and the process will begin.

*After finishing the backup process, you can check the backup status, recover, open, or delete the backup by right-clicking the backup task on the left.

How to Backup Windows 11 to Synology NAS (3 Working Ways)
Do you want to backup Windows 11 to Synology NAS? Check out the three convenient ways to use Windows 11 backup to Synology NAS and make recovery and collaboration easy.
Share it to Twitter or Reddit if it is helpful:
Method 2. Use Backup and Restore to Backup PC to NAS
You can also backup files to Synology NAS through a built-in feature of Windows, i.e., Backup and Restore. It is pretty simple to set up a network and use it for backing up your files. Here, we have listed a few steps that you should follow to get the task done.
Step 1. Go to Settings of your system.
Step 2. Search for Backup and Restore.
Step 3. Click on Set up backup from the window opened on your system.
Step 4. Choose Save on a network from the right side of the screen.
Step 5. Click on the Browse button and add the network location.
Step 6. Enter Network Details, including username and password.
Step 7. Click on the OK button to get the process finished.
These simple and easy steps can help you back up your PC to Synology NAS using a built-in feature. You can also perform advanced settings in your system by choosing the on-screen options.
Share it to Twitter or Reddit if it is helpful:
Method 3. Use File History to Backup Files to NAS
Sometimes, you may not find the Backup and Restore backup option reliable for you. In this case, you can use another Windows built-in feature named File History. If you don't know how to use this feature, follow these steps to learn it completely.
Step 1. Go to Settings and then open Backup settings.
Step 2. Choose More options from the screen.
Step 3. Tap on See advanced settings given below the related settings.
Step 4. Tap on Select a network location from the screen to add a network.
Step 5. Insert NAS IP into the address bar.
Step 6. Choose the Folder where you want to take your saved data
Step 7. Click on the OK button on the screen to enable this option
With this built-in feature, you can backup files to a specific folder you have chosen in the above steps. It will let you complete the task without using any third-party tool. But the problem is you may lose the data when your system fails to proceed smoothly.
File History vs. Backup and Restore | Which Is Better?
This article will describe their merits and demerits and compare them against each other. Read more >>
The Final Words
In the above blog, we have shared 3 simple ways to backup PC to Synology NAS. It might be possible you have understood them properly. But if you are looking for software to back up data without losing a single file, you should choose Qiling Disk Master.
It will keep saving everything from your NAS to its cloud storage once you have asked it to do so. In simple words, you will not lose system images, files, and folders, even if your computer is facing some technical errors.
FAQs on How to Backup PC to Synology NAS
1. What is the best backup strategy for Synology NAS?
The best backup strategy for Synology NAS is to use Qiling Disk Master software. It will help you store everything in its storage and restore it whenever you want.
2. Can I connect the PC directly to Synology NAS?
Yes, you can connect the PC directly to Synology NAS using the IP address in the browser and log in with the username and password set for NAS.
3. What is the difference between sync and backup in Synology?
In backup, you will only copy files from one location to another to keep them safe from any unexpected error. In Sync, you can copy files manually as well as delete them if you find them unnecessary and useless.
Related Articles
- How to Install Windows 11 on New PC Without Operating System | 2 Ways
- How to Create Portable Windows 10 to USB Drive (Windows 11 Support)
- Top 2 Ways to Transfer OS from Laptop to Desktop🔥
- Ghost Windows 7 Using Hard Drive Ghost Software
- [Tutorial] How to Backup Excel File Automatically in 2 Tested Approaches
- Top 10 Best Desktop Imaging Software [2024 Reviews]