6 Solutions for Windows 10 Can't Create Recovery Drive
Some Windows users reported an error when trying to create a recovery drive on a USB flash drive or local drive, receiving the message "We can't create a recovery drive. A problem occurred while creating the recovery drive" indicating a failure in creating a Windows 10/8/7 recovery drive.
Don't worry. Here, we have found practical solutions to help you out. Check out why and find fixes for "can't create the recovery drive" now:
PAGE CONTENT:
- Why Can't I Create a Recovery Drive
- How to Fix We Can't Create Recovery Drive on Windows 10 (6 Methods)
To resolve the issue where the recovery drive creation gets stuck, fails, and displays the error message "We cannot create a recovery drive", you can try the following: Run the Windows Update troubleshooter, restart your computer, and then try creating the recovery drive again. If the issue persists, try running the System File Checker (SFC) tool, and if that doesn't work, try running the DISM tool to repair the system image. If none of these steps resolve the issue, you can try resetting the Windows Update components.
Why Can't I Create a Recovery Drive
A Windows recovery drive is a bootable DVD or USB drive that contains a copy of the Windows operating system, allowing users to access and restore a failed or crashed Windows system, specifically Windows 10, 8, or 7.
1) The drive you're trying to use is larger than 4GB. 2) The drive you're trying to use is a network drive.
- The option to back up system files to a recovery drive requires a minimum of a 16 GB USB flash drive.
- Antivirus blocks you from creating the recovery drive.
- The issue may be caused by a corrupted USB flash drive or a corrupted Windows file system.
- Windows can't format everything on the drive to create a recovery drive because the drive is too small or there's not enough free space on the drive. You can try deleting some files or moving them to a different drive to free up some space, then try again.
- When the winre.wim file gets lost or deleted, you will see the error message. This file is crucial for Windows recovery and is usually located on the system reserved partition.
- Windows 10 is unable to create a recovery drive because some required files are missing. This issue can occur due to corrupted system files, incomplete Windows installation, or missing system components.
How to Fix We Can't Create Recovery Drive on Windows 10
If you're encountering the "We can't create a recovery drive" error on your computer, there are several potential causes, including corrupted system files, issues with the recovery partition, or problems with the USB drive. To resolve this issue, you can try running the built-in System File Checker (SFC) tool, checking the recovery partition for corruption, or using a third-party tool to create a recovery drive. Additionally, ensuring that your USB drive is properly formatted and has enough free space can also help.
#Solution 1. Prepare another USB flash drive
#Solution 2. Disable Antivirus software
#Solution 3. Check & repair system files corruption
#Solution 4. Check and format the USB drive
#Solution 6. Create a USB recovery drive in another way
Solution 1. Prepare Another Big USB Flash Drive
To create a recovery drive for Windows 10 64bit, you'll need a USB drive with a minimum capacity of 16GB.
To create a Windows 10/8/7 recovery drive, it's recommended to use a 32GB or larger USB drive, as it provides enough space for the recovery tools and options. This will ensure that you have a reliable and sufficient recovery drive to help you troubleshoot and recover your system in case of any issues.
Step 1. Unplug the old USB drive and plug the new big one into PC.
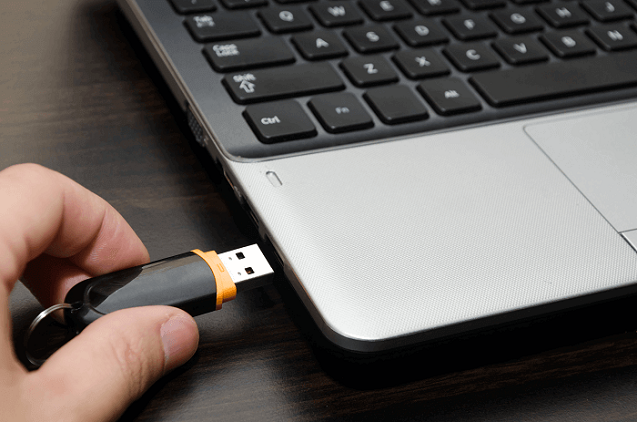
Step 2. Start to recreate a recovery drive to your USB drive in the same way.
For a step-by-step guide, click and follow this link for help: Windows 10 recovery USB Drive.
You May Also Interest:
Create Windows 10 Repair Disk from Another Computer
In Windows 10, you can use a recovery disk on a different computer, but it depends on the type of recovery disk. If you have a USB recovery drive, you can use it to boot and reinstall Windows 10 on any computer that supports UEFI or BIOS. However, if you have a recovery disk created with the Windows 10 Media Creation Tool, it's specifically tied to the computer it was created on and may not work on a different computer.
Solution 2. Disable Antivirus software
If your antivirus software is blocking the recovery drive creation, try temporarily disabling it to see if that resolves the issue.
Step 1. Open antivirus software on your computer and disable them.

Step 2. Open Windows Defender, disable to antivirus feature.
If you've successfully created a recovery drive after closing your antivirus software, you should re-enable it once you're finished.
Solution 3. Check & Repair Corrupted System Files
Corrupted system files can prevent Windows from accessing an external USB drive, causing connectivity issues.
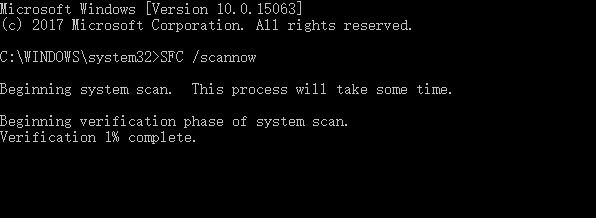
Run a System File Checker (SFC) scan to check for any file corruption and repair them if found. This scan will scan for corrupt system files on the computer and repair them.
Step 1. Press "Windows + X", click "Command Prompt (Admin)".
Step 2. In the Command Prompt, type the command sfc /scannow and then press "Enter".
Solution 4. Check and Format USB Drive
To ensure the USB drive is available for creating a recovery drive, check its health state and format the flash drive using the following steps:
Step 1. Back up all of your USB drive content, connect the USB drive to the computer.
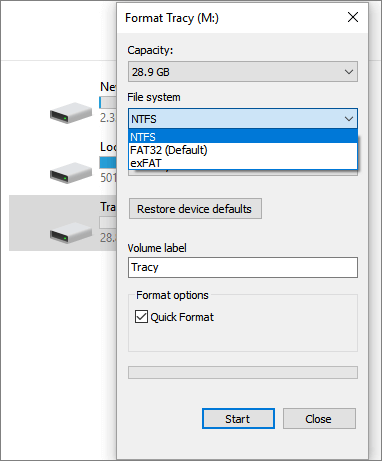
Step 2. Enter "This PC", right-click your USB drive, and choose "Format".
Step 3. Click "File System" and use the drop-down arrow to select FAT32 for the drives.
Step 4. Tick "Quick Format" and click "Start".
You May Also Like:
How to Format 128GB USB to FAT32
If your USB drive is too large (32GB or bigger), you may encounter issues formatting it using File Explorer or Disk Management. Click the link for assistance.
Solution 5. Run DISM Tool
The DISM tool is used to repair and prepare Windows images for deployment, and can be run through the Command Prompt to attempt to resolve issues.
Step 1. Press Win Key + X, click Command Prompt (Admin).
Step 2. Type dism.exe /online /cleanup-image /scanhealth and then press Enter.
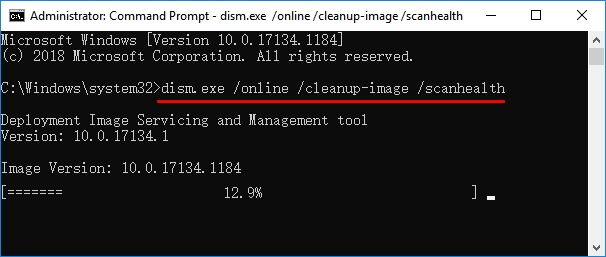
Wait for the operation to complete, then you'll see the "The operation completed successfully" message.
Step 3. Type dism.exe /online /cleanup-image /restorehealth and press enter.
It will take some time to finish.
Solution 6. Create USB Recovery Drive in Another Way
If Windows is unable to create a recovery drive, a third-party bootable USB creation tool can be used as an alternative to create a Windows USB recovery drive. This method offers a last but effective way to resolve the issue.
Qiling Backup is a system backup software that allows users to back up their Windows OS and restore it from a bootable disk in case of boot issues, serving as a reliable alternative to Windows recovery drives.
To run this intuitive software, simply create an OS backup plan for your computer and restore the OS any time now. This software allows you to flexibly create an OS backup plan, making it easy to have a backup of your operating system at any time.
#1. Back Up Windows OS
Step 1. Download and launch Qiling Backup.
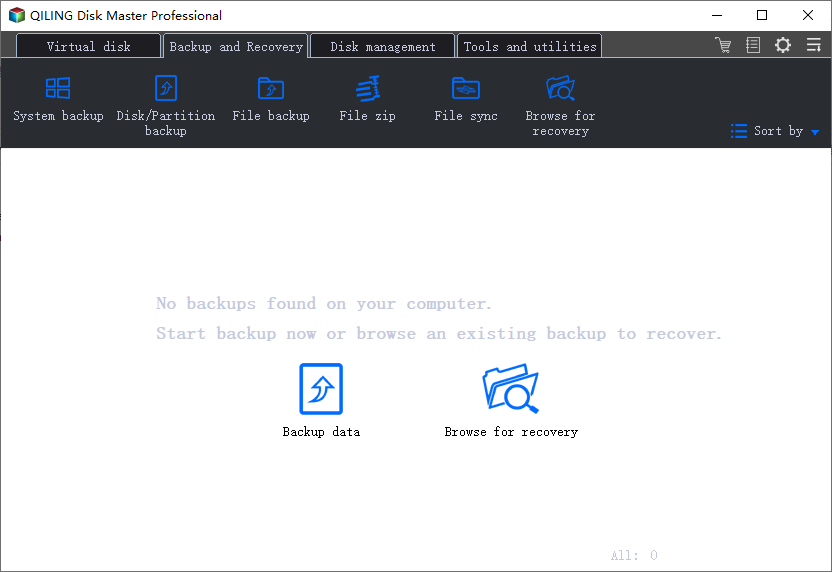
Step 2. To back up your Operating System (Windows 10/8/7), click on "System backup" on the "Backup and recovery" page. This will automatically detect and display the operating system information in the next window.
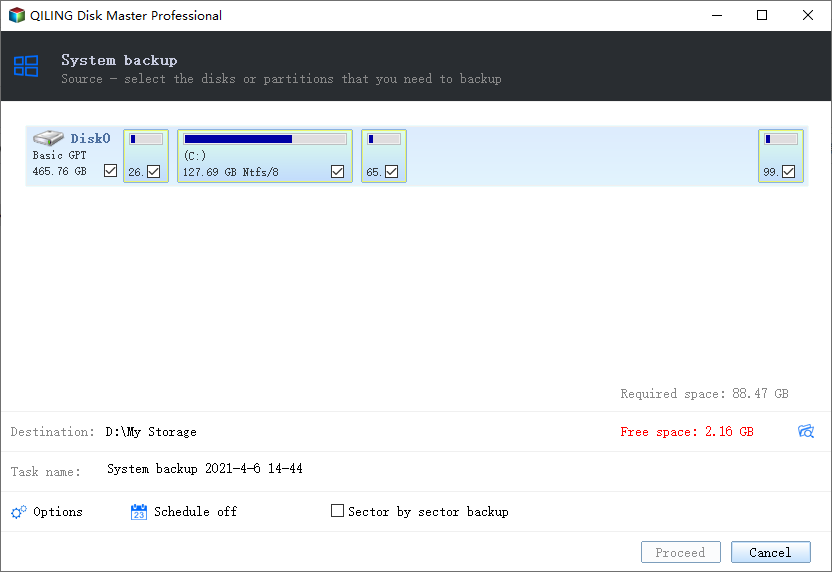
Step 3. Select the backup destination, the software will choose the most suitable location by default.
Step 4. To schedule a backup, click the "Schedule" option, which opens the Backup Scheme window. Here, you can create a backup plan to back up your operating system at a later time, on a daily, weekly, or monthly basis, or even upon a specific event. This will automatically back up your OS.
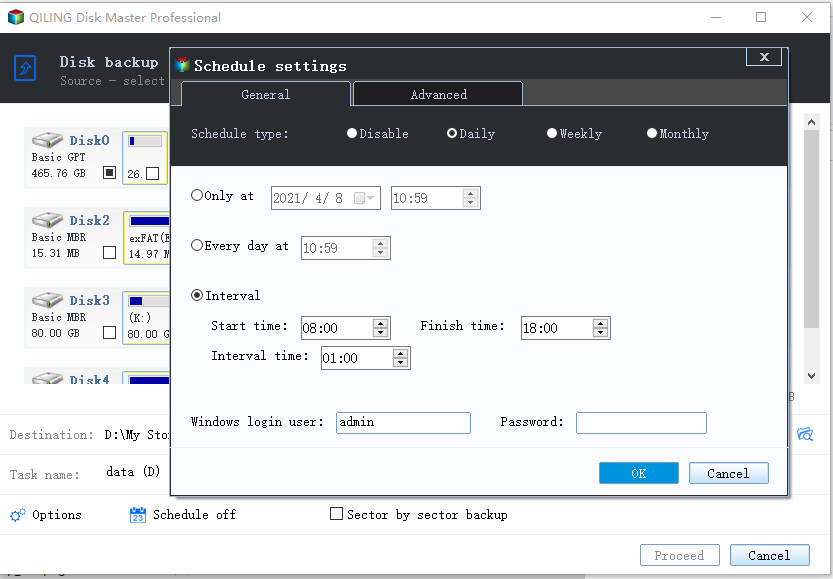
Step 5. Save all of the changes. Click "Proceed" to start Windows 10 system backup.
After creating an image backup of your OS, you can create a WinPE disk on your USB flash drive. If your computer can't create a recovery drive, you can try booting your computer from the WinPE disk instead.
#2. Create USB Recovery Drive Alternative - Bootable Disk
Step 1. Prepare a USB drive which can be written and read.
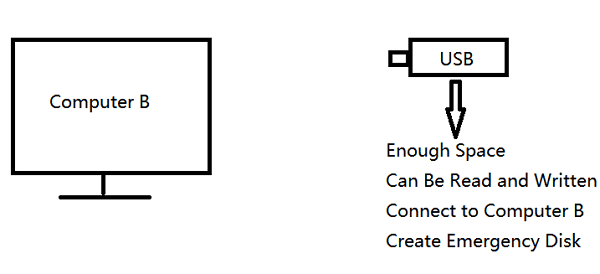
Step 2. Launch and install Qiling Backup on the Computer B
Step 3. Open the tool and click "Tools" > "Create bootable media".
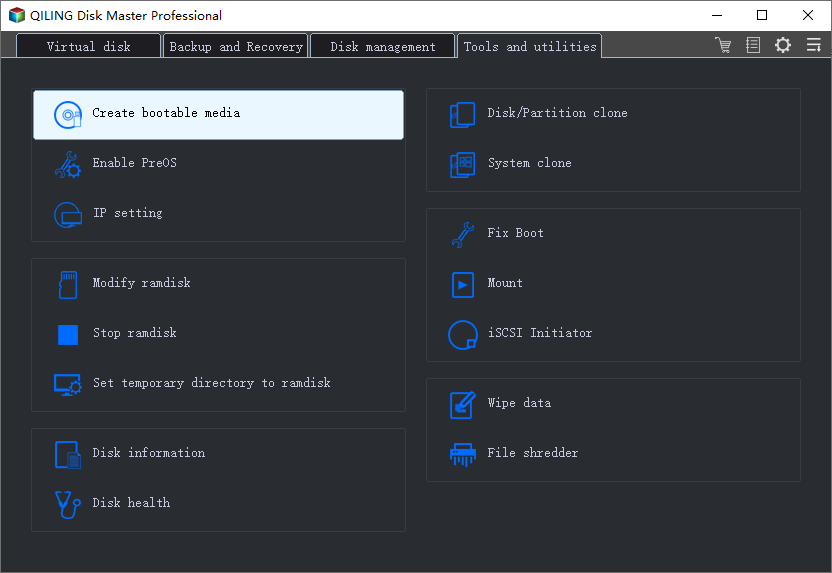
Step 4. Click "Create bootable media".
Step 5. Select a bootable media type: here we choose USB drive.
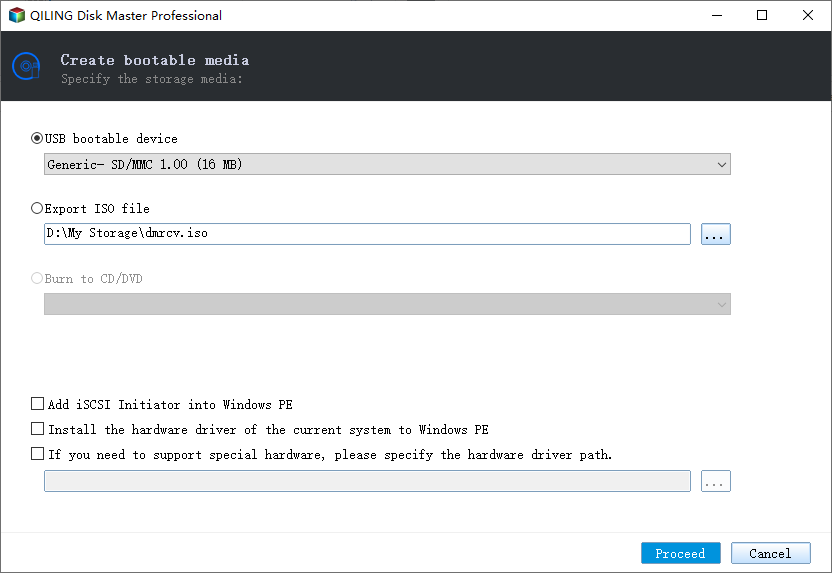
Step 6. Click "Proceed" to create a bootable disk.
When you finish creating this USB bootable disk, you can always restore your computer to a healthy state by using it to boot up your computer and run a system restore or system recovery process. This allows you to revert back to a previous point in time when your computer was functioning properly, effectively fixing any issues that may have arisen during the creation of the bootable disk.
Fixing "Can't Create a Recovery Drive" Is Possible, Take Action Now
The page explains the main reasons that may prevent you from creating a Windows recovery drive, and reassures users that it's not a problem if they encounter the "We can't create the recovery drive" error.
We've collected 5 manual solutions to fix the issue, but if none of them work, you can still consider turning to third-party system backup software, such as Qiling Backup, for help.
It's efficient and reliable to rescue your system from sudden OS crash or failure error anytime.
Related Articles
- Free Windows 10/8/7 Incremental Backup
- How to Clone MBR Disk to GPT Disk/SSD
- How to Backup Data without Booting into Windows
- Can You Create Windows 10 Recovery/Repair Disk from Another Computer
- Best Free Norton Ghost Alternative for Windows 10