Free FAT32 Formatter Tool
Download Free FAT32 Formatter Tool
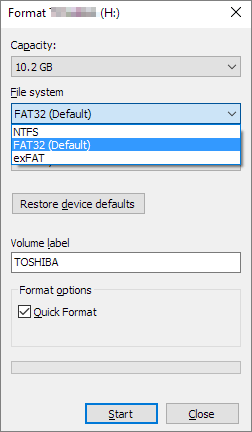
When formatting a Toshiba USB flash drive on a Windows 10 computer, the available file system options are NTFS, FAT32 (Default), and exFAT. The correct choice depends on the intended use of the drive, with NTFS being suitable for most Windows users, FAT32 for compatibility with older systems, and exFAT for cross-platform use.

NTFS
NTFS is compatible with all Windows versions, but is read-only on Mac OS X by default. It's commonly used for Windows system drives and internal drives that will only be used with Windows.
FAT32
FAT32 works with all versions of Windows, Mac OS X, and Linux, and is commonly used on USB drives and required by some game consoles.
FAT32 has a file size limit of 4GB and a maximum partition size of 8TB, preventing the storage of files larger than 4GB on a FAT32 drive.
exFAT
exFAT is a file system ideal for USB flash drives and external drives, offering compatibility with Windows and Mac OS X, and no file size limit, but may not be supported by older devices.
The difference between NTFS, FAT32, and exFAT has been clarified. To format a USB flash drive to FAT32 or reformat a drive to FAT32, you can use a free FAT32 formatter tool. This tool can also convert NTFS to FAT32.
Effectively Apply FAT32 Formatter in Three Ways
1. Free FAT32 Format Tool - Qiling Partition Master
Qiling Partition Master is a free tool that can format or reformat internal and external drives in Windows, including FAT32 formatting, and is compatible with Windows 10/8.1/8/7/XP/Vista. It can also convert NTFS to FAT32 without losing data, making it a useful solution for managing disk and partition issues.
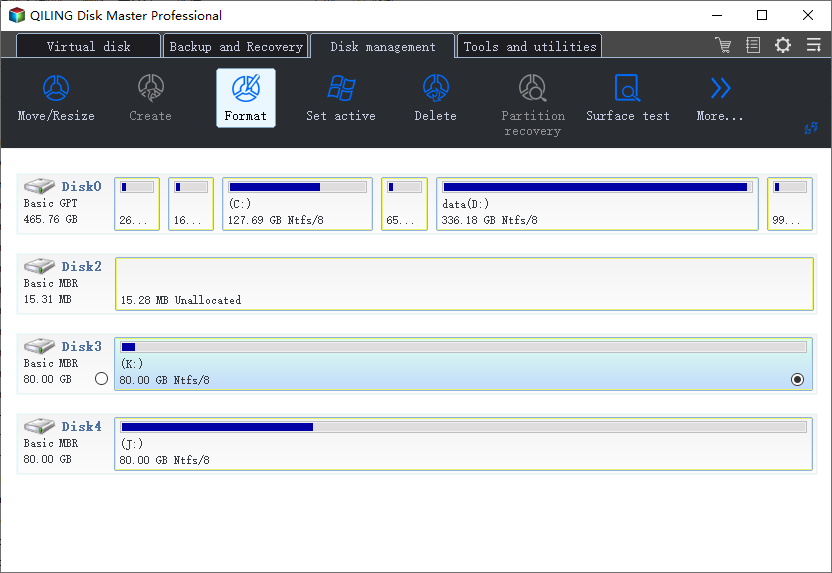
Step 1. Launch Qiling Partition Master, click the partition you intend to format and choose "Format" in "Disk management" page.

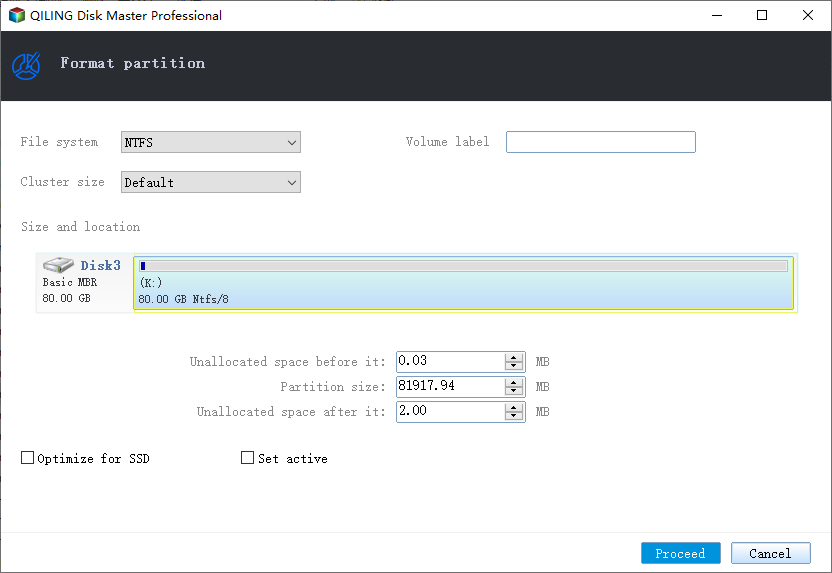
Step 2. In the next window, set the Partition label, File system, and Cluster size for the partition, then click "Proceed".

Step 3. Then you will see a warning window, click "OK" in it to start formatting the partition to FAT32/EXT2/EXT3/EXT4.
A smaller cluster size on a disk means less wasted space, but it also means a larger file allocation table (FAT), which can slow down the operating system.
Qiling Partition Master can perform various operations on a FAT32 formatted disk, including resizing/moving, extending, shrinking, and creating new partitions, in addition to executing other hard drive partition operations.
2. Built-in FAT32 Formatter - Windows Disk Management
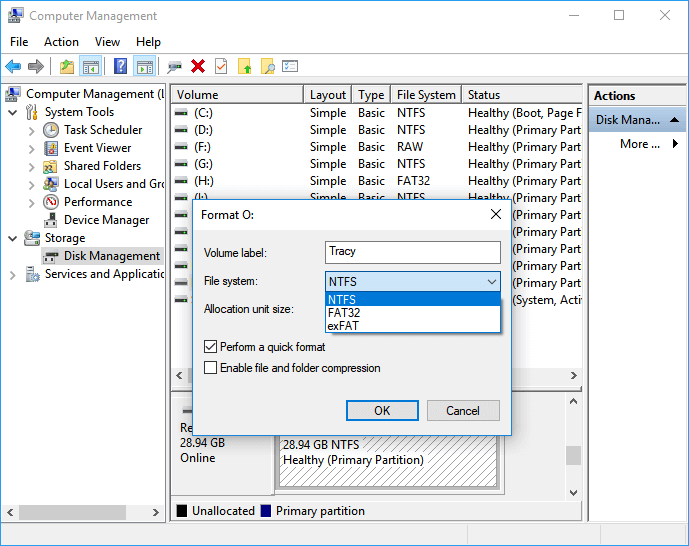
When plugging a USB drive into a Windows computer, you can directly format it to FAT32 using the built-in Windows Disk Management. However, if the drive's default file system is not preformatted as FAT32, you can only format it to NTFS, which is the default file system in Windows. If the first attempt fails, you can try using a FAT32 formatter tool as a second option.
1. Press Windows + X to open Disk Management.
2. Select the target partition of your disk that you want to format to FAT32 and click Format from the right-click menu.

3. Appilable FAT32 Formatter - Diskpart
The last fat32 format tool in Windows 10 is a more complicated method. To use it, follow these steps:
Step 1. Open search box and input diskpart.
Step 2. Copy the following commands.
- list disk
- select disk *
- list volume
- select volume *
- format fs=ntfs quick
Step 3. Then type exit. (You can not format disk larger than 32GB to fat32, go back to method one.)
4. Another Built-in FAT32 Format Tool - PowerShell
In addition to disk management and diskpart, Windows also offers a free FAT32 format tool through PowerShell, providing users with a range of options for managing and formatting their storage devices.
Step 1. Press Windows + X shortcut on your keyboard. Select "Windows PowerShell (Admin)".
Step 2. Type the command line and press Enter.
format /FS:FAT32 (Drive letter):
Like the following screenshot - format /FS:FAT32 o:

You May Want to Know about FAT32 Format Tool?
1. How to Format USB to FAT32 for Free?
You can use tools like Qiling Partition Master, Windows Disk Management, Diskpart, and PowerShell to format a drive to FAT32.
How to Use Free FAT32 Format Tool:
Step 1. Download and install Qiling Partition Master.
Step 2. Click target partition and select Format function.
Step 3. Follow the instruction and execute the operation.
2. Why Can't Format to FAT32?
By default, Windows built-If your USB drive is above 32GB, you will need to use a different formatting tool, such as Rufus, to format it into a larger file system like NTFS. However, if it's below 32GB, you can use built-in tools like the Command Prompt in Windows or the Disk Utility in macOS to format it into FAT32. Simply insert the USB drive, open the relevant tool, and follow the prompts to format it.
Related Articles
- How to Format 64GB SD Card/USB Flash Drive to FAT32
- Partition Magic VS Qiling Partition Master, Which Is Better & How to Select
- Beginner's Guide - Install A New Hard Drive/SSD in Windows 10/8/7
- Access GPT Protective Partition Without Losing Data
- How to Format Hard Drive Windows Server
- How to Format 128GB SD Card to FAT32