Migrate OS to M.2 SSD with M.2 SSD Clone Software
"I need to migrate Windows 10 OS from SSD to M.2 SSD which I newly bought. But I've never done this, need some suggestion about how to quickly migrate OS to M.2 SSD. Any idea I'd love to hear."
Cloning the old SATA SSD to the new M.2 SSD is a bit difficult for common users. And there will always have various kinds of problems during the process. In this post, we will introduce the detailed procedures of how to clone SSD to M.2 SSD from beginning to end as well as several third-party tools which could help you ease the process.
Notice:
For some users who had tried to clone SSD to M.2 SSD but failed before, one possible reason is that your SSD was formatted with MBR instead of GPT. Converting the old SSD from MBR to GPT would perfectly solve the problem. We will tell you how to do it in the next parts.
PAGE CONTENT:
- #1. Preparation: Backup Files and Remove Other Disks
- #2. Convert the Old SSD from MBR to GPT
- #3. Change the Boot Mode from Legacy BIOS to UEFI
- #4. Clone SSD to M.2 SSD
- #5. What to Do After Finishing the Clone
#1. Preparation: Backup Files and Remove Other Disks
First of all, make a backup of all your important files and data. You can back up the data to a cloud drive, or to an external drive with backup software. It's really important! No one can ensure data safety during the cloning process.
Then if there are any other drives on your computer, please unplug them in case you format these drives by accident.
#2. Convert the Old SSD from MBR to GPT
As we've mentioned before, if your old SSD is an MBR, then it is highly possible that you would fail when you reboot your computer and get the Inaccessible Boot Device errors. So here we'd like to recommend a handy tool - Qiling Partition Master, for you to convert your SSD from MBR to GPT in simple steps. For detailed steps, please refer to: How to Convert MBR to GPT.
#3. Change the Boot Mode from Legacy BIOS to UEFI
After you've converted the old SSD to GPT, you need to change your computer's boot mode to UEFI. Here are the detailed steps:
Step 1. Restart your computer, press the corresponding key when you see this message: Press [key] to enter setup. It could be F2, F12, or DEL. The message might vary from your computer brand.
Step 2. In the BIOS Setup Utility, select Boot from the top menu bar.
Step 3. Select the UEFI Boot Mode field and use the +/- keys to change the setting to UEFI.
Step 4. Press F10 to save the change and exit.
#4. Clone SSD to M.2 SSD
Now it comes to the steps of cloning SSD to M.2 SSD. You can clone it by yourself, but there are many third-party tools that can ease the mission. Here we recommend the clone feature of Qiling Backup. The cloning feature in Qiling backup software makes it easy for you to migrate the system to a new disk and upgrade your current system.
Download Qiling Backup now and follow the guide below to start cloning.
Notice:
If you are trying to clone Windows 10 to a new HDD or SSD disk, please do remember to empty the disk in advance.
One more thing that you can do is to convert your HDD/SSD disk to MBR or GPT - exact the same as your current system disk, which will allow you to effortlessly boot system after cloning Windows system.
Let's see how to clone your Windows 10 OS to a new HDD/SSD without reinstallation Windows OS now:
Step 1. Connect the new HDD/SSD to your PC.
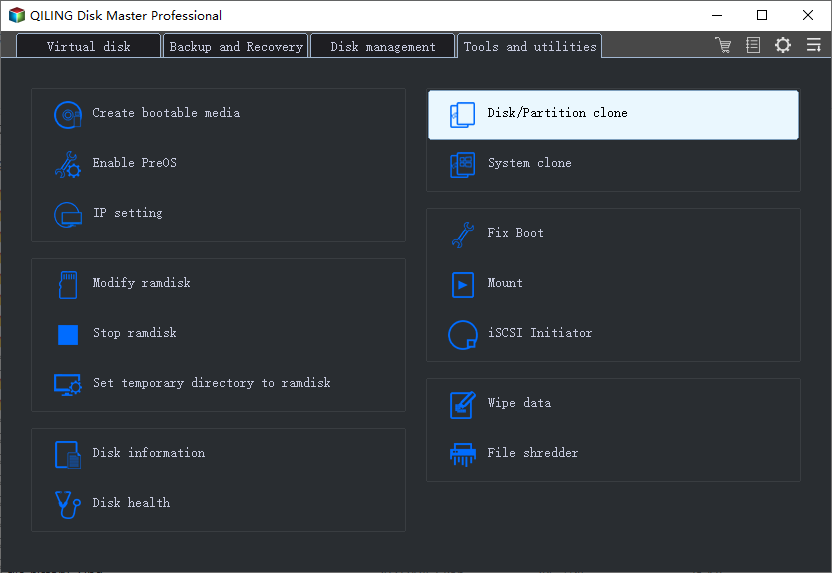
Step 2. Run Qiling Backup for Windows 10 Clone.
Select "System Clone" on the tool page by clicking the icon at the right panel.
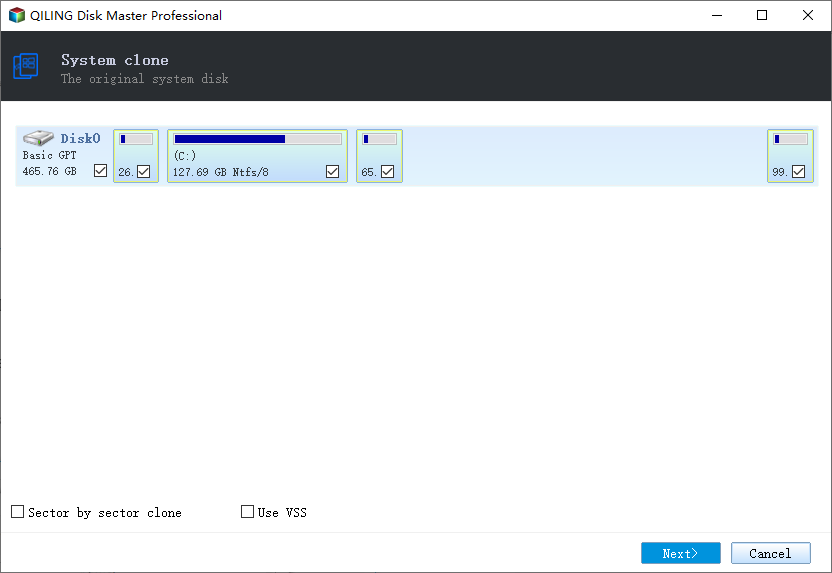
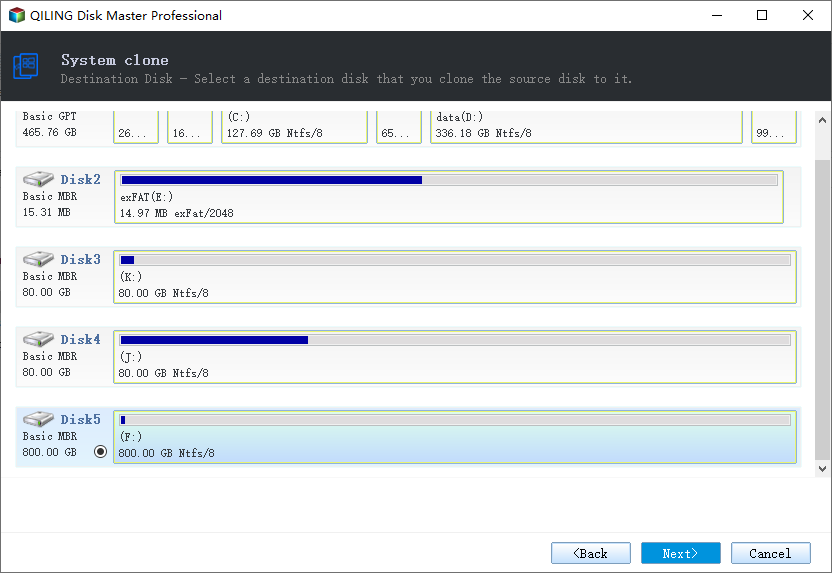
Step 3. Choose the destination disk - HDD/SSD to save Windows 10 system
Choose the new HDD or SSD as your target disk for saving the cloned Windows 10 system.
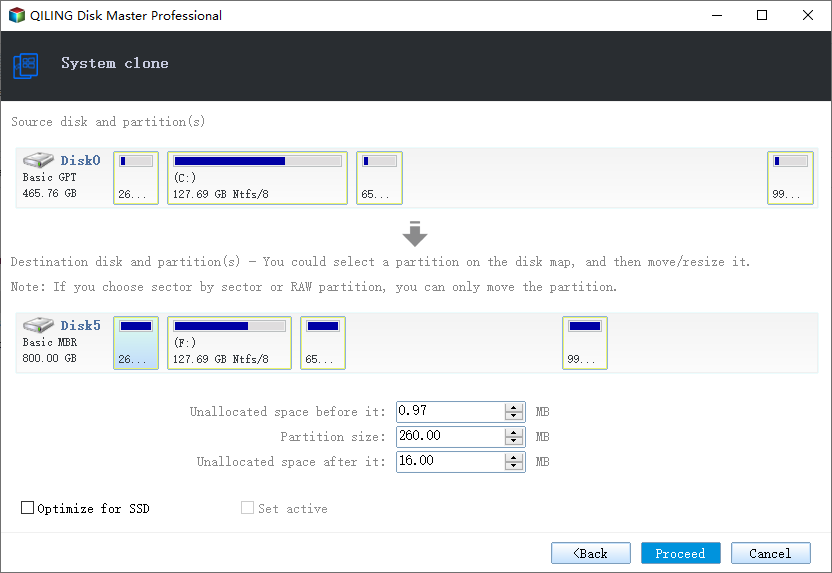
Step 4. Then click "Proceed" to start cloning Windows 10 to HDD/SSD now.
After this, insert your new HDD or SSD into your computer and reboot PC, change the boot order to set computer boot from new HDD/SSD with cloned Windows 10 system:
- Restart PC and press F2 or F8 to enter BIOS settings.
- In the Boot option, select new HDD/SSD as the new boot drive and save all the changes.
- Exit BIOS and restart the computer, you should be able to see Windows 10 running on your new disk without any problems.
#5. What to Do After Finishing the Clone
With Qiling Backup, it will resize the partition on your new M.2 SSD during the cloning process. So you don't need to manually resize it. After the cloning process is done, you have two ways to start the computer.
Way 1. Turn off your computer, unplug the old SATA SSD and replace it with the new M.2 SSD, then turn on your computer again.
Way 2. If your computer can have two hard drives, you can keep both the two SSDs on your computer. Restart the computer, enter BIOS Setup Utility, change the BIOS settings to boot from the new M.2 SSD.
Additional Help - How to Replace the Old Disk with M.2 SSD
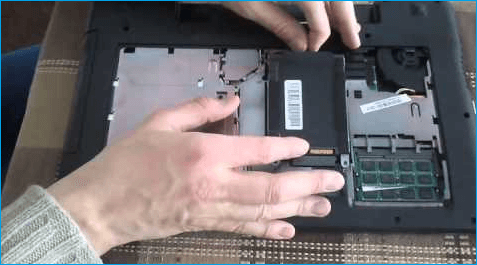
After you have cloned your Windows 10/8/7 to M.2 SSD, you can replace your old disk with the cloned M.2 SSD. Here are the steps to replace the old HDD. Here is an example of replacing the OS disk with an M.2 SSD.
Step 1. Turn your laptop off and then disconnect both the power cable and any other connected cables. Then unscrew the back panel and remove it to get access to your OS disk.
Step 2. Use your tools to secure your drive to the laptop. You'll need to unscrew those before you can remove the drive.
Step 3. Lift the old drive up about 30 or 45 degrees and pull it out. In its place, install the SSD and put the back panel on.
Step 4. Boot up from the M.2 SSD. Turn your laptop on. If your laptop boots as normal and you see all of your programs and settings just the way they were before (except much faster), all went well.
If you want to continue using the old disk for saving data and protecting the Windows system, you can format the old hard drive for free.
Conclusion
You can clone OS to M.2 SSD easily with the help of Qiling backup and recovery software. In order to clone your Windows OS successfully to an M.2 SSD, you need to check that the new drive is compatible with your PC's motherboard and carefully install the drive correctly.
How to Clone SSD to M.2 FAQs
You may have extra questions after cloning Windows operating system to SSD. Read these questions and answers below to get additional help.
1. Do M.2 SSDs need drivers?
No, both SATA and PCIe M.2 SSDs will use the standard AHCI drivers built into the OS. However, you may need to enable the M.2 SSD in the system BIOS before being able to use it.
2. What is M.2 SSD?
M.2 was developed by the PCI-SIG and SATA-IO standards organizations and is defined in the PCI-SIG M.2 and the SATA Rev. 3.2 specifications. It was originally called the Next Generation Form Factor (NGFF), and then formally renamed to M.2 in 2013. Many people still refer to M.2 as NGFF.
3. What screw do I need for M.2 SSD?
The correct screw size is 2.0 x 3mm (CM2x3-3.3). If you are in the USA, then you can usually find the screws at Ace Hardware stores. Make sure you check the length. Some of the screws at hardware stores are too long.
4. How do I transfer data from SSD to NVMe?
- Connect your NVMe SSD to your PCI-SIG
- Download Qiling disk cloning software and select Clone.
- Select the source disk and choose NVMe disk as your destination disk.
- Click Proceed to start cloning SSD to NVMe.
Related Articles
- Auto Backup VMware with Best VMware Backup Software
- How to Upgrade Windows 7/10 System Hard Drive without Reinstalling Windows
- How to Backup Windows Data to QNAP NAS Drive
- How to Clone Encrypted Hard Drive to SSD/HDD
- How to Clone Windows 10 Operating System