How to Format Hard Drive from USB with Bootable Format Tool
What Can You Do with Bootable USB Hard Drive Format Utility?
Formatting a hard drive can be a relatively simple task, but it can become complex if your operating system won't boot or your disk isn't working properly. In such cases, creating a bootable USB drive can be a lifesaver. You can use a bootable USB drive created by a third-party HDD format tool or a Windows installation disk to format your hard drive. These tools are effective utilities that can help you format your hard drive from a USB drive, making the process much easier and more manageable.
Method 1: Format Hard Drive from USB with Bootable format Tool
To format a hard drive from a USB drive, you can use the Qiling Partition Master software to create a bootable format tool that allows you to run the software on the problematic computer and format the hard drive without the operating system. This involves creating a bootable USB drive on a fully functional computer (Part 1), then applying it to format the hard drive on the computer without OS (Part 2).
Part 1: Create a Bootable USB Drive
To create a bootable drive, refer to the page on creating a bootable drive with Qiling Partition Master. This tool allows you to create a bootable drive with ease and convenience.
To format your hard drive on a problematic computer, create a bootable USB drive using a format tool. Once created, connect the USB to the computer and open Qiling Partition Master from the USB. Follow the steps in the program to complete the formatting process.
Part 2: Format Hard Drive from USB
Notice:
If you want to format all the partitions on your hard drive, you can either format them one by one or choose to delete all the partitions and then create new ones.
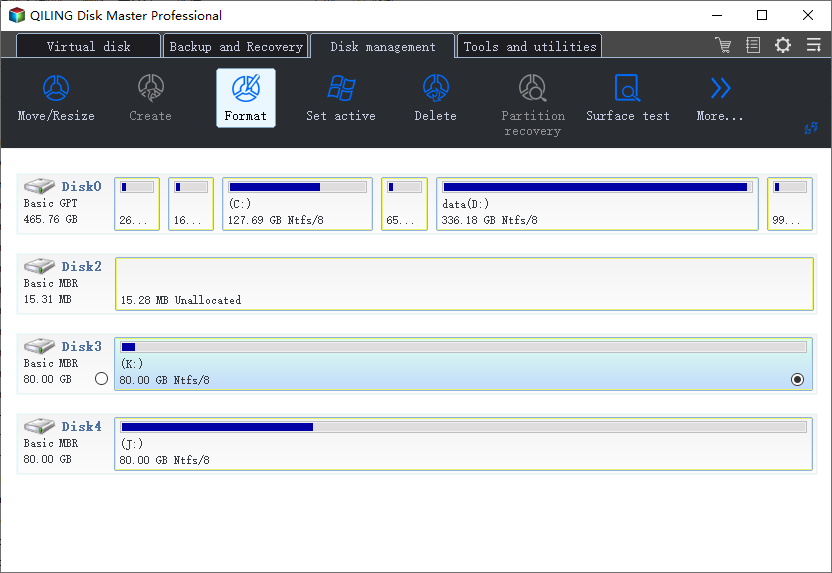
Step 1. Click the hard drive partition and choose the "Format" option in the "Disk management" page.

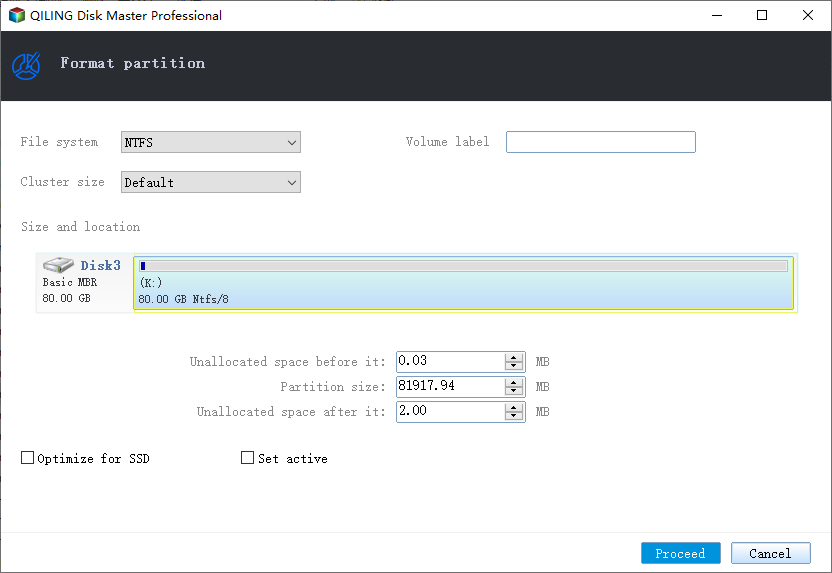
Step 2. In the new window, set the Partition label, File system, and Cluster size for the partition, then click "Proceed".

By following the guide above, you can successfully use a bootable USB to format your hard drive. Don't forget to use a partition tool that can perfectly meet your needs.
Method 2: Format HDD from USB using Command Prompt
Other than using the third-You can also use a Windows Installation disk to format your hard drive from a USB, but this method is more complicated than using a bootable format tool.
Step 1: Create a Windows installation disk and boot your PC from it.
Step 2: Navigate Repair Your Computer --> Command Prompt.
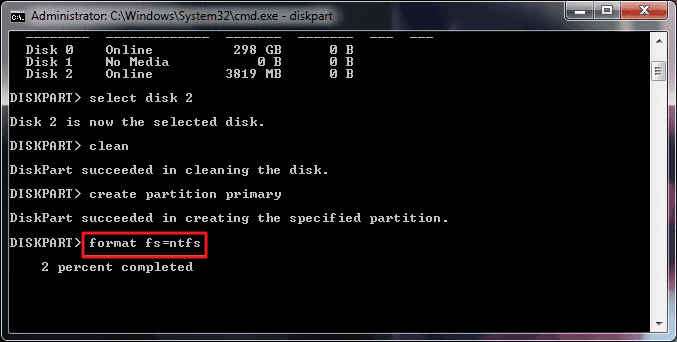
Step 3: In the Command Prompt window, type diskpart and press "enter".
Step 4: Type list disk and press "Enter" to list all the disk drives.
Step 5: To select a disk and its corresponding number, refer to the listed disk information, where you can find the target disk number.
Step 6: Type clean to wipe all files and folders on the selected disk.
Step 7: Type create partition primary and press "Enter".
Step 8: After diskpart successfully created the specified partition, type "format fs=ntfs" (or "format fs=exfat") and press Enter to format the drive with a file system, such as NTFS or exFAT.
Step 9: At last, assign a drive letter to the newly created partition by typing assign.
Partitioning and formatting a hard drive from a USB drive using the diskpart command prompt can be a tedious and time-consuming process. However, if you're looking for a simpler alternative, a third-party bootable USB format tool can make the task much easier.

Can You Format Hard Drive from BIOS?
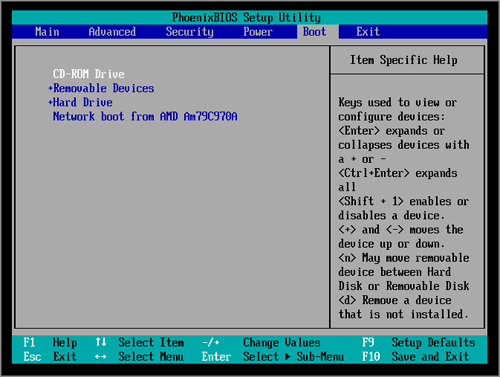
To format a hard drive from BIOS, you can enter the BIOS settings by pressing the corresponding key (usually F2, F12, or Del) when the computer boots up. From there, you can navigate to the boot order settings and change it to boot from the hard drive. Then, you can save the changes and exit the BIOS settings.
To format a hard drive from BIOS settings, you have two options. You can either enter the BIOS settings by pressing a key such as F2, F12, or Del, depending on your system, and look for a section that allows you to format the drive, or you can use the built-in disk management utility to format the drive from within the BIOS settings.
Option 1. Boot into BIOS and Format in Windows
To access BIOS settings, press F1, F2, F8, or Del key repeatedly as your computer boots up. This will take you to the BIOS setup screen, where you can make necessary changes.
To access the BIOS settings, press the F2 key on your keyboard. Navigate to the "Advanced BIOS Features" section and select it using the arrow keys.

After changing the BIOS settings, exit the screen and reboot your computer. Insert the bootable USB or CD/DVD, and your computer will boot from USB or CD, DVD.
After booting the computer, you can format the hard drive in Windows Explorer or Windows Disk Management.
Option 2. Boot into BIOS and Format Using CMD
Step 1: While booting up your computer, consecutively press F1, F2, F8 or Del key to enter BIOS settings.
Step 2: Change the boot order to boot from USB/CD/DVD.
Step 3: Reboot your computer from the bootable disk, and when your disk loads, click on "Use this recovery tool to fix problems starting Windows." From there, navigate to Windows installation and select Command Prompt.
Step 4: In the Command Prompt window, type format c: /fs: ntfs and hit Enter.
Which Way Do You Prefer Formatting A Hard Drive?
Formatting a hard drive is necessary in situations where the boot partition fails to boot or when reinstalling an operating system, and it's best done in a bootable environment. Fortunately, you can freely format a hard drive from a USB drive or from BIOS settings, making it easier to access and manage your hard drive.
Regardless of whether you choose to format a hard drive from a USB or BIOS settings, you'll need to create a bootable USB or disc to boot into Windows. However, using Qiling USB bootable format software is a relatively easy process that can be completed in just a few clicks, making it a good option for average users. In contrast, creating a Windows recovery disk can be more complicated, and using the command line to format a hard drive is a more advanced process that's not recommended for first-time users.
Related Articles
- Fix Diskpart Clean Not Working on Disk/USB/SD Card [5+ Fixes]
- Best Free GParted Windows Alternative Tool
- How to I Permanently Shred Files? Your Complete Guide Is Here
- How to Run CHKDSK Without Admin Rights
- How to Restore USB Drive/Flash Drive/Pen Drive Back to Full Capacity
- Beginner's Guide - Install A New Hard Drive/SSD in Windows 10/8/7
- Free Download 2021 Best Memory Card Format Tool, Format SD Card for Free
- Clone Hard Drive with Paid/Free Cloning Software Windows 10