Partition Manager for Windows 11 Free Download in 2021
Partition Manager for Windows 11
A partition manager is software that helps manage partitions, allowing you to group your data and maximize your system's performance. Partitioning software enables you to create, extend, shrink, and delete partition volumes, which can be particularly useful with Windows 11. This process serves the purpose of organizing your hard disk and can be beneficial in several ways.
Disk partitioning allows you to optimize the space on your disk by separating data into different compartments, or partitions, which can be operated independently, making it easier to manage and maintain your system.
Partitioning will allow you to create autonomous subsystems by keeping alike data in the same folder, separated from other data, which helps with organization and can be a useful technique for staying organized, especially when dealing with complex data.
Benefits of partitioning
- Partitioning is a feature that enables you to divide your hard drive into multiple sections, allowing you to run multiple operating systems on the same system.
- You can compartmentalize your data
- It will improve the overall performance of your system
- Separating important files can help limit the risk of corruption by reducing the likelihood of multiple files being affected by a single issue, such as a software bug or hardware failure. This can be done by storing sensitive data in separate locations, using backup systems, and implementing data redundancy to ensure that critical information remains accessible even if one or more files are corrupted.
- It will help you stay organized
Qiling Partition Manager for Windows 11 (32/64 bit) Free Download
While there are many partition managers available online, few are reliable. Our top recommendation is Qiling Partition Master, which is easy to use and effective in managing partitions on Windows 11. Other options like Paragon partition manager also work well, but Qiling Partition Master stands out for its simplicity and ease of use, making it a great choice for partitioning Windows 11. Additionally, users can also utilize the built-in Disk Management feature to partition their disks.
Basic features
The Qiling partition manager offers incredible features, including its basic functionalities, which are impressive.
- Operate primary and advanced partition functions and maximize disk capacity usage.
- This tool helps to optimize disk space for better-organized business data and simplifies IT disk management, making it an efficient solution for businesses.
- Compatible with Windows 10/11/8.1/8/7/Vista/XP, Server 2019/2016/2012/2008/2003
Advanced Features
Windows 11 offers advanced features for Qiling partitioner to optimize system performance and create an exemplary disk layout, providing features that no other partition manager offers.
- This software allows users to migrate their operating system to a solid state drive (SSD) without having to reinstall Windows, making it a convenient option for upgrading their computer's storage.
- During Windows installation, you can convert the Master Boot Record (MBR) to a Globally Unique Identifier Partition Table (GPT) without losing data by following these steps:
- To increase the space on your C drive, you can either extend the local C drive or add free space to the local disk C.
- Partition your hard drive in Windows 11.
How to Partition Hard Drives with Qiling Partition Manager in Windows 11
Step 1. Check for free space
To divide a disk partition into multiple ones, you must ensure that there is adequate free space to be allotted.
Step 2. Shrink a disk partition to create unallocated space
To resize a partition, start by clicking on the "Resize/Move" feature in the disk management tool, then select the partition with a significant amount of free space. Once selected, you can adjust the partition's size by dragging the edges of the partition or by entering a specific size in the provided field. This will allow you to reclaim space from the selected partition and allocate it to another partition or free space, effectively resizing the partition.
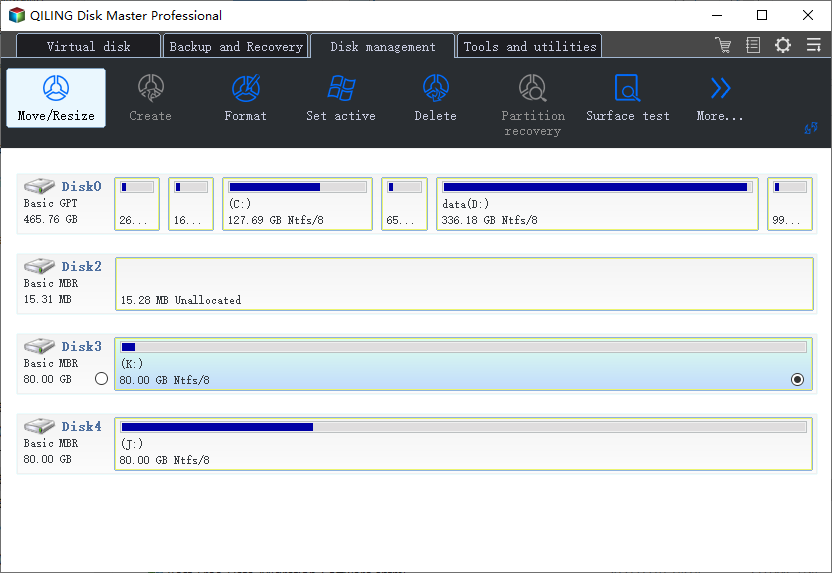
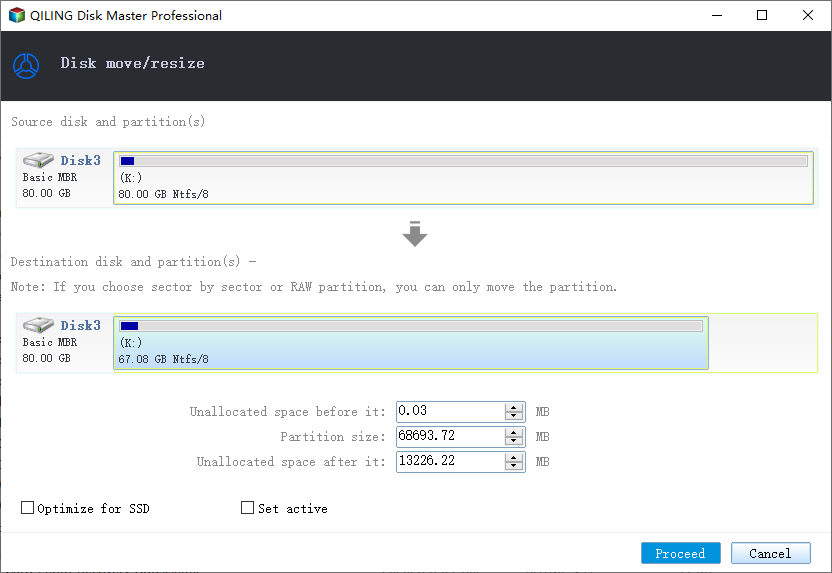
To free up space, drag the partition to the right or left, reducing its size, and then click "Proceed" to apply the changes. This action will create ample unallocated space, and you can monitor the decrease in partition size in the "Partition size" area.
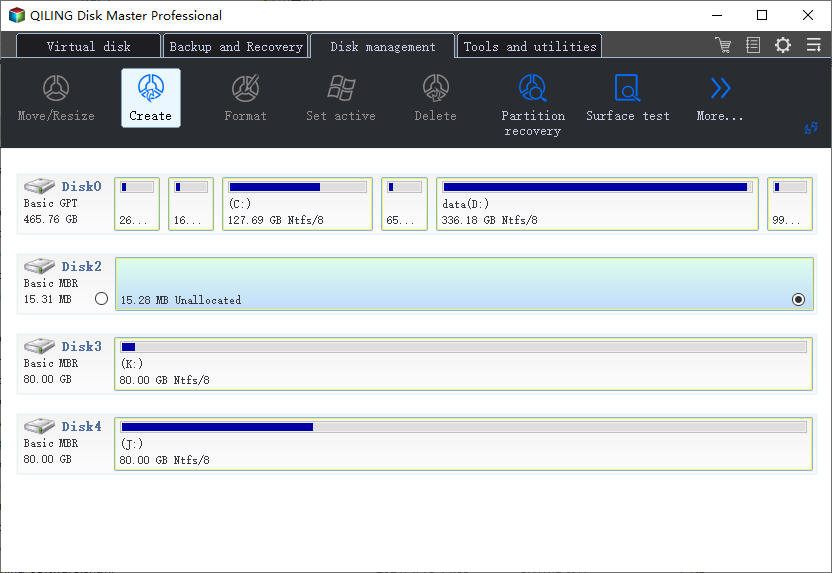
Step 3. Create a new partition on unallocated space
To turn the unallocated space into a usable partition drive with a recognized file system, click on the unallocated space and choose "Create".
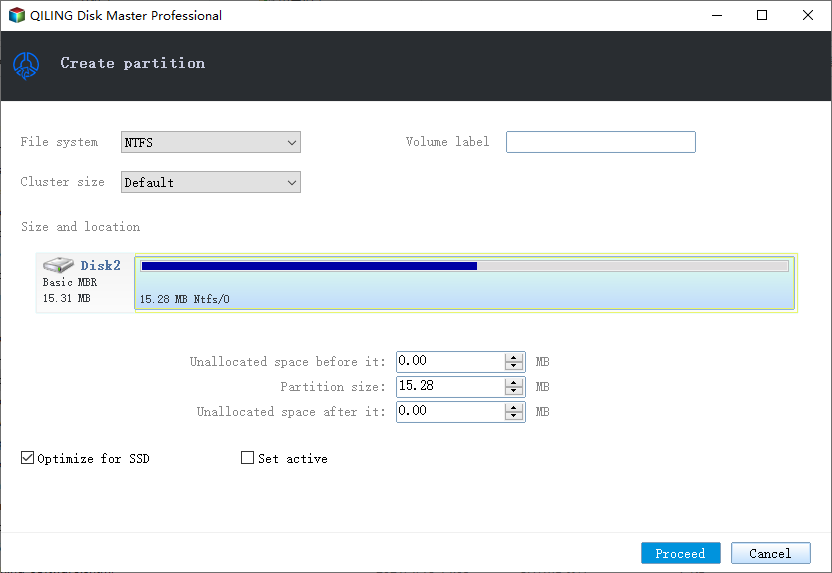
Choose a drive letter, partition label, file system, and other settings in the Advanced Settings, then click "Proceed".
You can easily manage your hard drive or SSD space in Windows 11 by using the built-in features to partition, merge, or extend your partitions without deleting any volumes.
Manage Partitions in Windows 11 without Download Third-Party Software
If you don't want to download third-party software, you can manage partitions through the built-in "Disk Management" utility in Windows. To do this, follow these steps: [insert steps here].
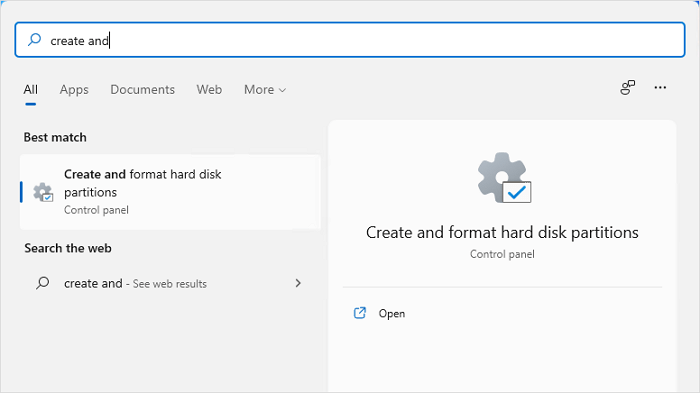
Step 1. To begin the process, open your start menu and type 'Create and format hard disk partitions'.
You can access the Disk Management tool in Windows 11 through the Create and format hard disk partitions option, which will direct you to the Disk Management tool.
Step 2. The tool "Disk Management" offers the option to create, shrink, delete partitions in Windows 11.
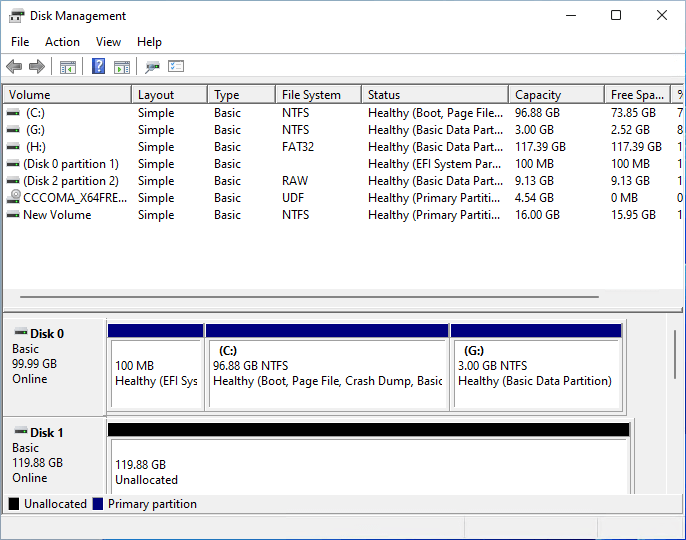
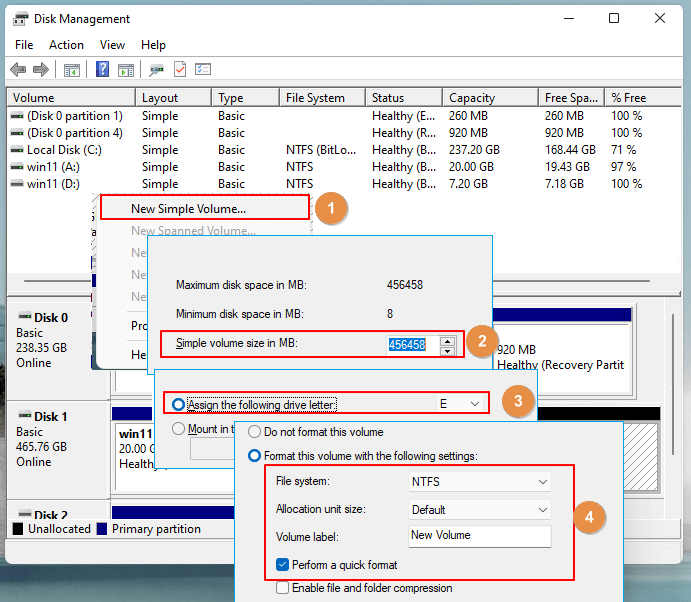
Step 3. To create a new partition, you can either shrink an existing volume to free up space or utilize unallocated space if available. Alternatively, you can create a new volume by selecting the free space and choosing the option to create a new simple volume, ensuring the new volume is sized appropriately for your disk needs.
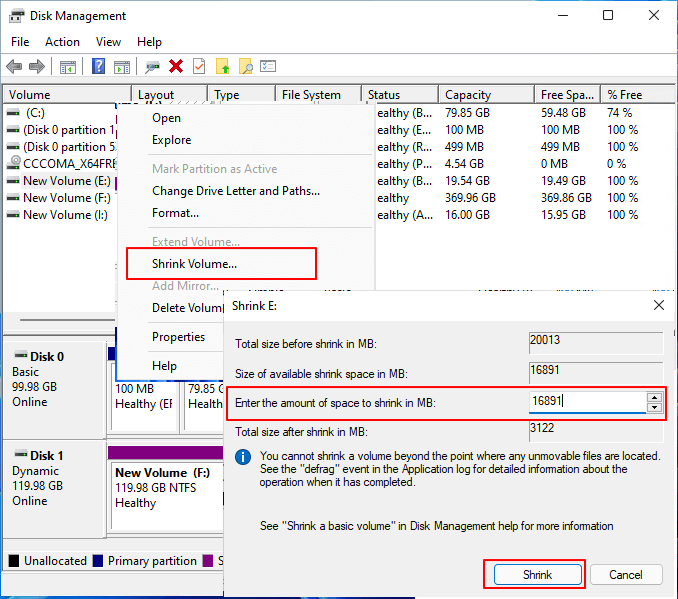
Step 4. If you don't have unallocated space, you can free up space by shrinking the existing partition. Right-click on the partition with free space, select "Shrink Volume", and enter the desired amount of space to free up. Once the space is freed, you can create a new partition by following the same steps as before.
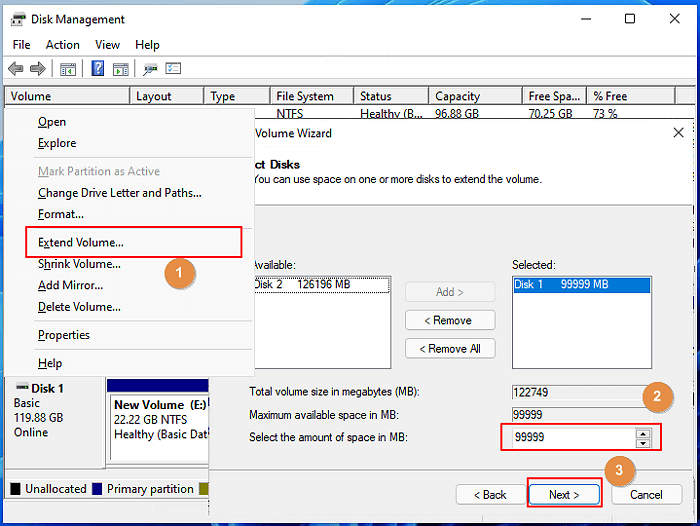
Step 5. In Windows 11, the Disk Management Partitioner allows you to extend the volume of a partition, provided there is available free space. To do this, right-click on the disk you want to extend and select the "Extend Volume" option. This will give you the flexibility to expand the partition and utilize the available free space.
Qiling Partition Master and Disk Management, Which Is Better?
After comparing both tools, we've provided a detailed analysis of their features and capabilities. You can now read our guide and make an informed decision about which tool suits your needs best.
Our verdict on this matter is clear: Qiling Partition Master is the way to go. We're confident that it's a more effective tool than traditional disk management, and using it as your partition manager will be a welcome change. It's a breath of fresh air compared to the usual methods.
Disk Management is not as user-friendly as Qiling Master Partition, which also offers a wide range of impressive features.
We've tested both tools and found Qiling Partition Master to be the best partition manager for Windows 11. It's hassle-free and saves time, making it a great choice.
It is a one-Click Solution is the ultimate tool for all your partitioning needs, and we're confident you'll love it!
Related Articles
- [How-to] Format Disk from MBR to GPT with DiskPart in Windows 11/10
- Extend Volume Greyed Out? Fix Can't Extend Volume in Windows [New]
- 5 Best Windows (11) Disk Utilities Free Download 2022 [Free & Paid]
- How Do I Use Unallocated Free Space in Disk Management | 2022 Windows Tutorial
- How to Resize USB Flash Drive Partition with Magic Partition Software
- Resize Partition Under Windows 7 (32 Bit and 64 Bit)