The Disk Is Write Protected in Windows 11/10/8/7 (6 Fixes)
Top 6 Ways to Fix The Disk Is Write Protected in Windows 11/10/8/7
When your USB/SD card, internal, or external hard drive is write-protected, you won't be able to access or modify the saved data. This issue is often caused by a physical problem with the device, but you can still try a few measures to resolve the issue. To remove the write protection, you can try troubleshooting the device, but in most cases, the problem lies with the device itself. However, it's worth trying the following steps to see if you can resolve the issue.
Fix 3. Uncheck Read-only Status
If you've fixed the write protection error on your drive, but it's still inaccessible, you may want to try using Qiling partition manager software, which can format your drive as fresh as new for data storage.
How to Remove Write Protection on Windows 11,10, 8, and 7
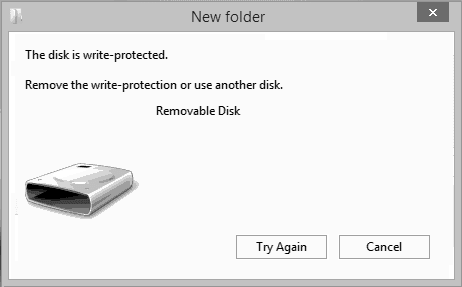
If you're experiencing the "disk is write-protected" error when trying to format a removable disk like a USB flash drive, SD card, CD, or pen drive, don't worry! This error can be frustrating, but it's easily fixable. The good news is that you can remove the write protection on the drive and get back to formatting or writing data to it. By following a simple step-by-step guide, you can resolve the issue and use your removable disk as intended. Just remember to remove the write protection and you'll be good to go!
Fix 1. Remove Write Protection with Physical Switch (SD Card/USB)
On a Windows computer, removable storage devices like SanDisk USB flash drives can become write-protected, making them unusable until the protection is removed. However, if the device has a physical switch, it's an easy fix to resolve the issue.
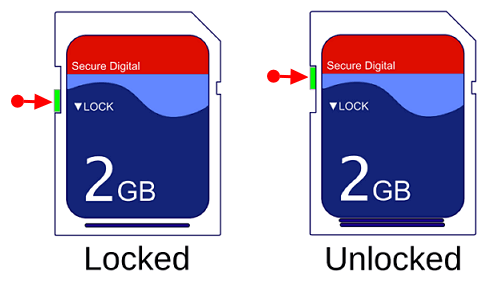
Some USB flash drives and SD cards have a physical switch that can be turned off to prevent accidental data deletion or modification, but if it's locked, the device may become write-protected on all devices, requiring the switch to be turned off to regain access.
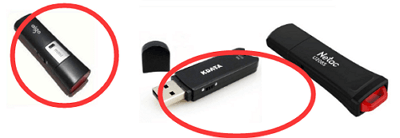
Step 1. Find the physical switch on your USB or SD card.
Step 2. Remove the physical switch from ON to OFF and unlock the device.
Unlock SD card with the physical switch
Unlock USB with the physical switch
Fix 2. Remove Write Protection by Killing Viruses
When connecting storage media like USB flash drives, SD cards, or hard drives to your computer, they can be easily infected and attacked by viruses. This can happen after downloading from an illegal website, causing the device to become locked or inaccessible, resulting in errors like "disk is write-protected".
To protect your computer from viruses, you can download or transfer anti-virus software like Avira to check and kill viruses on your computer.
Step 1. Download and launch Avira.
Step 2. Open this software and click "
Step 3. Wait for the process to complete.

Fix 3. Uncheck Read-only Status to Remove Write Protection
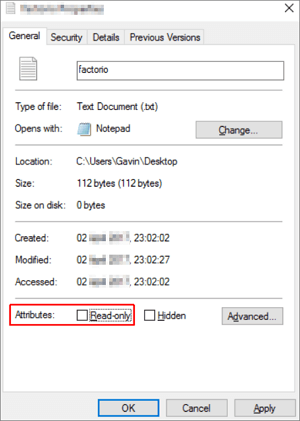
When you can't make changes to a single file, it might be write-protected, so you need to ensure the read-only option is unchecked.
Step 1. Right-click the file with write protection and select "Properties".
Step 2. Ensure the "Read-only" option is unchecked, then click "Apply" to make the change effective.
Fix 4. Run CMD to Clear Write Protection
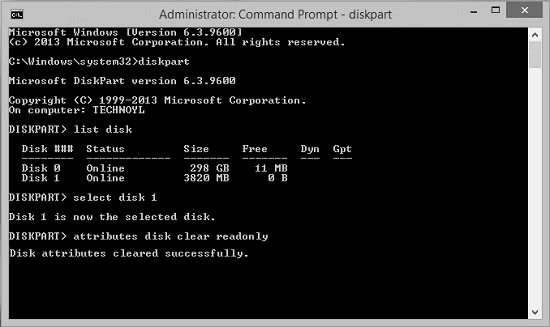
To remove write-protection and solve the "the disk is write-protected" error, you can use Command Prompt. If you're familiar with CMD, follow these steps: [insert steps here].
Step 1. Press Windows + R simultaneously, type cmd, and run administrative "Command Prompt".
Step 2. Type the following command lines and hit "Enter" after each command line.
- diskpart
- list disk
- 1. Insert the write-protected flash drive or memory card into the computer.
- attributes disk clear readonly
Step 3. Exit the Command Prompt.
Fix 5. Remove Write Protection with CMD Alternative
If you're not tech-savvy and not familiar with command lines, don't worry! There are graphical-based solutions to help you remove write-protection from your hard drives, USB drives, and even SD cards.
Fix 6. Edit The Registry to Remove Write Protection
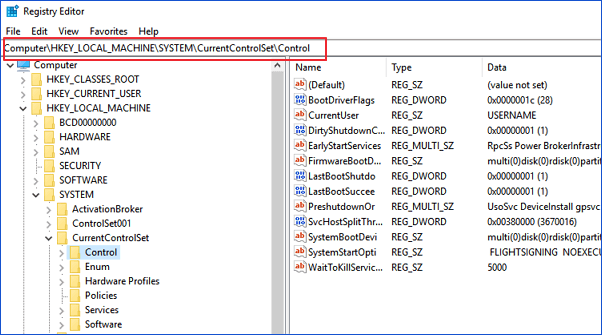
To remove write protection from a USB drive in Windows, you can edit the Registry. First, connect your write-protected USB drive to your computer, then navigate to the Registry Editor to make the necessary changes.
Step 1. Press Win+R and then type Regedit to open Registry Editor.
Step 2. Navigate to the following location to look for a key named WriteProtect:
HKEY_LOCAL_MACHINE\SYSTEM\CurrentControlSet\Control\StorageDevicePolicies
Step 3. If this key exists, right-click it to select "Modify" to change the value from 1 to 0.
Bonus Tip: Format the USB Flash Drive/SD Card
After trying the 6 solutions, if the "the disk is write-protected" error still persists, you can try formatting the external device to resolve the issue. This may solve the problem and make your device work properly. If not, it's worth a try.
To format your USB drive, I recommend using the Qiling partition software, which can format various storage devices, including HDD, SSD, USB drives, memory cards, and SD cards. You can use it to delete a partition and make the device available for reuse. To do this, follow the steps provided by Qiling to format your USB drive.
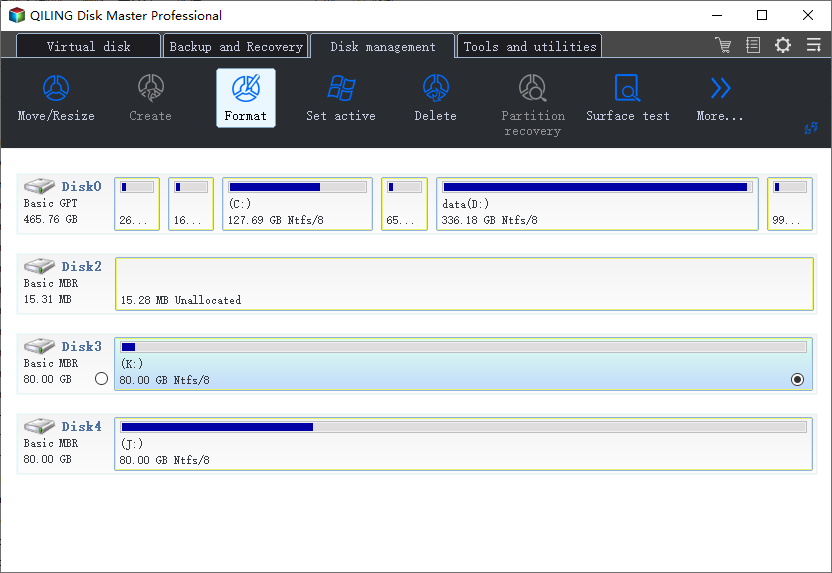
Step 1: Launch Qiling Partition Master. On the Disk management window, select the partition that you want to format and click "Format".
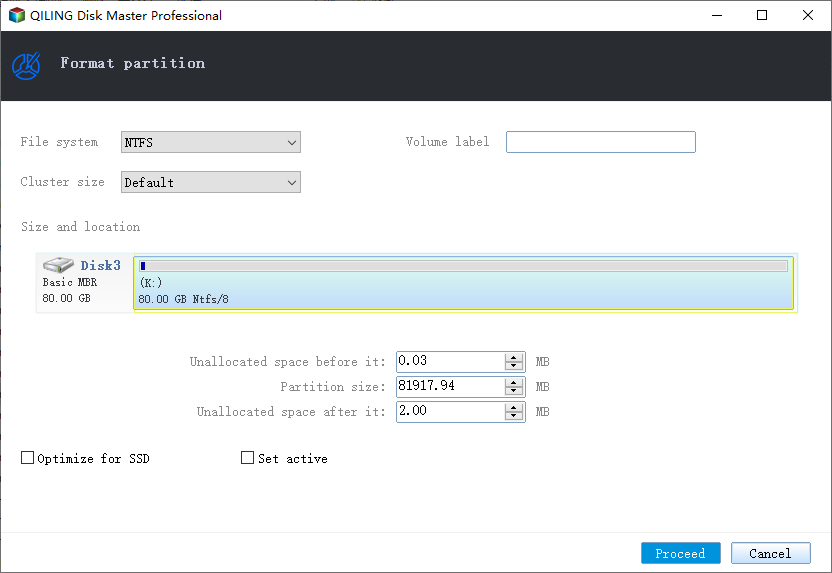
Step 2: Set a new partition label, file system (NTFS/FAT32), and cluster size to the selected partition, and click "Proceed" to continue.
If you lost data after formatting, you can use Deep data recovery software to restore it. This software can recover data from various storage devices, including SD cards, recycle bins, hard drives, and USB flash drives, regardless of the reason for the data loss. You can easily recover your files by following a simple process with this software.
Conclusion
Hopefully, we've found your solutions. Any one of the solutions above can solve the "the disk is write-protected" error effectively. It is time for you to try the solutions above so you can start accessing and changing the data on your storage device. For most write protection problems, physical problems are the cause, so trying Fix 1 first is recommended.
This Disk Is Write Protected FAQs
There are some frequently asked questions about disk write protection. If you're looking for more information, you can read on to get additional help.
What does write-protected mean?
Write-Hardware or software protection refers to the ability of a device or program to prevent new information from being written or old information from being changed.
Why is my micro SD card suddenly write protected?
The lock switch, usually located near the top left side of the SD card or adapter, is responsible for preventing accidental data deletion or modification. If the lock switch is broken or non-functional, the SD card may become write-protected by default, rendering it unable to be written to or modified. This can be a critical issue for users who rely on the SD card for storing important data or files. In such cases, the SD card may need to be reformatted or replaced to regain its functionality.
How do I remove write protection on a USB drive?
What problem are you referring to? I don't see any problem mentioned in our conversation.
- Find the physical switch on your USB flash drive.
- Remove the physical switch from ON to OFF and unlock the device.
How do I remove write protection on the micro SD card?
If you turn off the switch, you will be able to get out of the problem.
- Find the physical switch on your SD card.
- Remove the physical switch from ON to OFF and unlock the SD card.
Related Articles
- 4 Ways to Clone and Copy SD Card to External Hard Drive in Windows 11/10/8/7
- Check Disk Windows 10: How to Check and Scan Hard Drive for Errors
- How to Resize Window Server Partition (3 Ways Available)
- [Solved] Antimalware Service Executable High Disk Usage Windows 11/10 2022
- How to Wipe Partition Data to Protect Privacy
- How to Create/Recover EFI Partition on Windows 11