Windows Backup Did Not Complete Successfully
Scenarios
"My attempts at backups continue to fail with 'Windows Backup did not complete successfully' and when I click the 'Options' button it gives me details of why and says 'The disk where your backups are being saved doesn't have enough free space", which is totally incorrect."
Explanation
There are two common error messages related to Windows Backup failed problem. One is "Windows Backup did not complete successfully", and the other is "the last backup did not complete successfully". Both two messages hint that Windows has failed the backup task.
Many reasons would prevent the backup process from succeeding, below are the most common ones:
- The backup operation did not accomplish before the time-out period ended.
- Files were infected by the virus and had been corrupted. Hence, Windows could not find the target files, or it simply skipped some files.
- The target file to be backed up is corrupted or inaccessible.
- I/O device error, etc.
Troubleshooting
As we know that unfinished backup files, virus-infected files, corrupted files, and i/o device error would interfere with the Windows backup process, we can clean out the damaged files or backup with another tool to solve the problem.
Altogether, this page introduces four ways to solve your problem and restart the backup process.
Fix 1. Delete Old Backup in the Backup Location
If your computer is set to make a schedule backup, then the problem happens might because the previous backup had left unfinished. So, delete the previous backup, and remove all the existing backup files or folders to another drive, and do the backup again.
Fix 2. Full Scan the Computer with Antivirus Software
Another solution is to full scan your computer or the backup drive using antivirus software. This way is to remove malicious software and viruses from both your source disk and destination disk. After finishing the scanning process, try to create the backup again.
Fix 3. Use Another Backup Software and Check for Errors
If none of the above methods works for you, another try is to apply a third-party backup tool. Here we recommend Qiling Backup. Check its key features below:
- Backup and restore files and folders for personal use.
- Automatic backup protects changed data every half an hour.
- Supports users to make scheduled backup.
- Supports users to clone, upgrade, or transfer the system easily.
Download Qiling Backup to solve your pressing problem. It can also keep protecting your files and data in the long ride.
Step 1. Connect the external hard drive or USB flash drive to your PC.
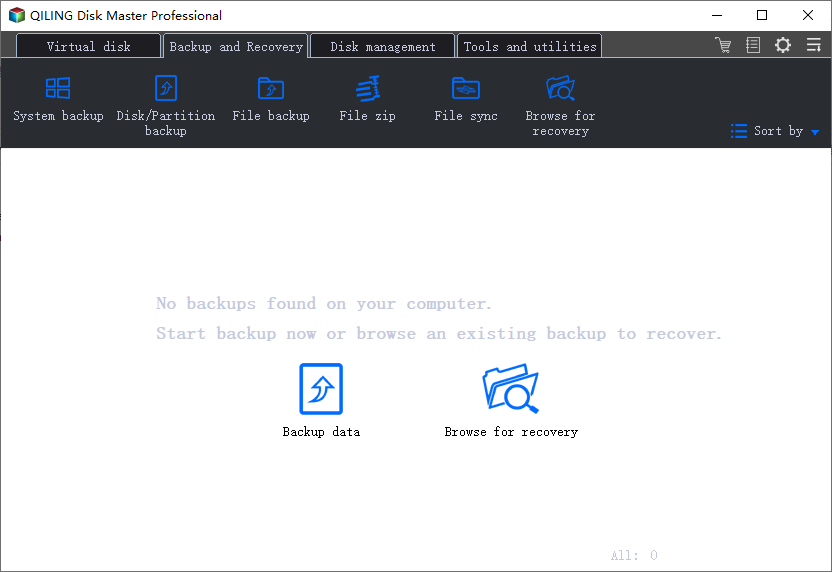
Step 2. Run Qiling Backup and click "File backup" on the main window.

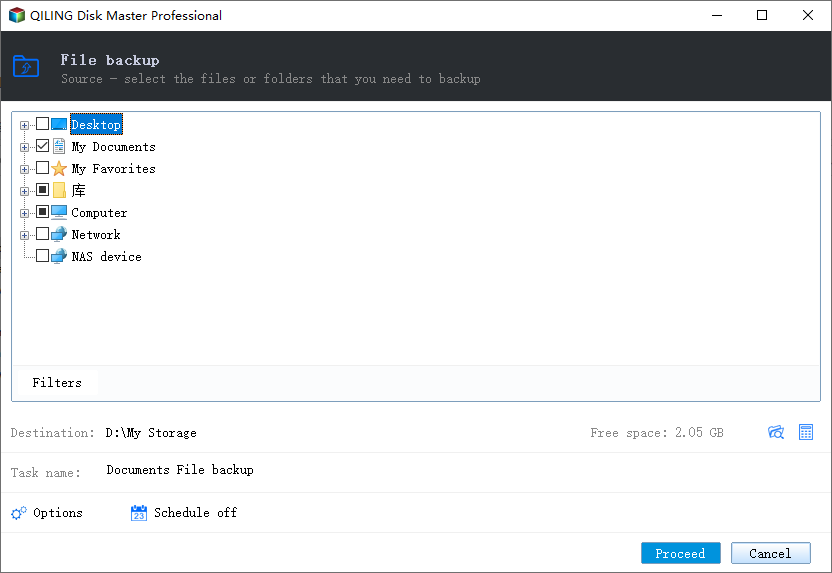
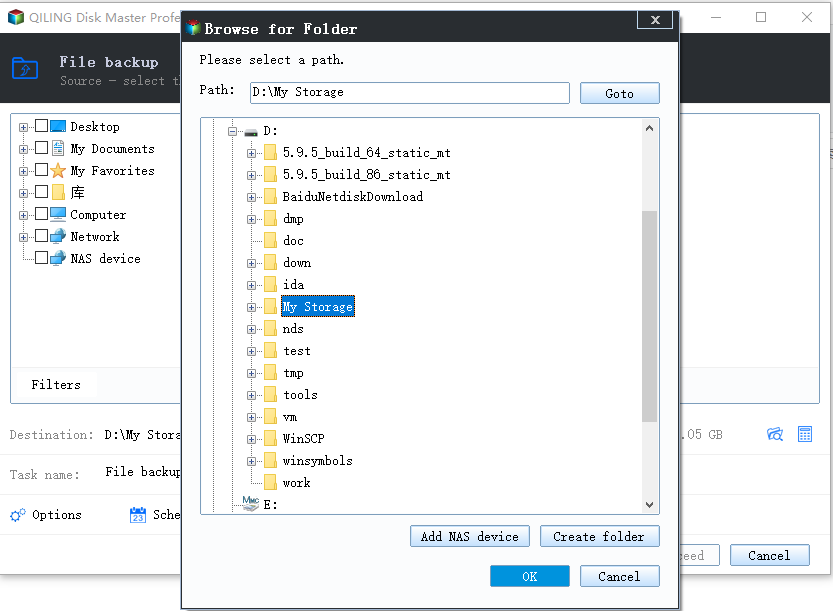
Step 3. Select the files that you want to backup to external hard drive or USB. And then click browse icon to navigate the external hard drive or USB flash drive as the file backup destination.

Step 4. Click "Proceed" to execute the file to external hard drive/USB backup operation.

Check for Errors:
Install Qiling Backup on the drive where you did a backup with the built-in Windows Backup and Restore program. If the software executes the backup without hassle, then the problem is from the program itself you were using. It's time to think about giving it up and turning to the new one.
Fix 4. Run CHKDSK to Check Disk Errors
Step 1. Press Windows Key + X simultaneously, type cmd, and click "OK" to open Command Prompt.
Step 2. Type the command chkdsk D: /f /r /x and hit enter. (d is the drive letter of the hard disk you wish to fix errors on it)
Chkdsk will work hard to locate the bad sectors on the selected drive first, and recover readable information and fix the disk errors.
If you don't have any technical know-how and want to minimize data risks, using third-party software could be a better choice. The Command line is suitable for computer professionals since wrong commands can cause severe problems. Therefore, we strongly recommend you try an automatic command line alternative.
Related Articles
- Free Disk Cloning Software to Clone Disk
- Upgrade Xbox One to Bigger Drive without Losing Game Files in 3 Steps
- How to Use the Best Kingston SSD Cloning Software to Clone HDD to SSD
- How to protect your valuable data with continuous data backup software