How to Find SD Card on Mac | Step-by-Step Tutorial
SD cards are widely utilized as portable storage media for different devices, including MacBook Pro/Air. Files, documents, images, and movies are often stored on these compact, portable memory cards. Learning how to find the SD card on your Mac allows you to view pictures from SD cards and other files.
How to find an SD card on a Mac? The SD card slot on a MacBook Pro/Air or equivalent Mac model must be located and accessed. SD card slots on MacBook Pro/Air models make data transfer and management easy. The MacBook's SD card port is conveniently accessible on the side.
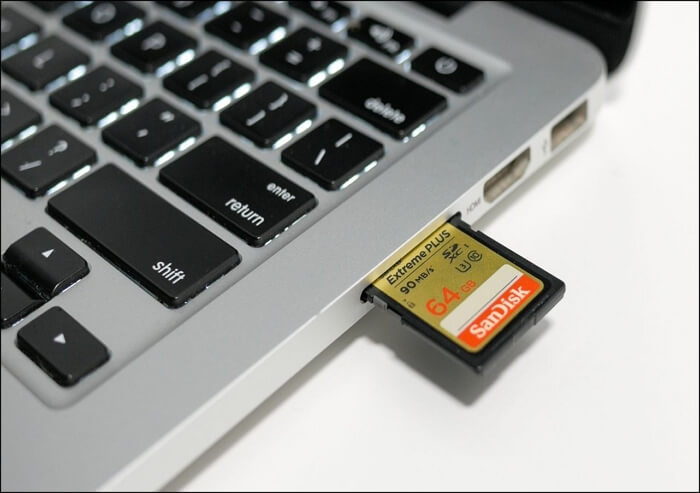
File management and data transfer require finding your Mac's SD card port. Understanding the SD card slot is essential to transferring photographs from your digital camera, accessing data from another device, or increasing storage space.
We will show you how to find an SD card on a Mac in the following steps so you can easily access and manage its information.
How to Find an SD Card on Mac [with Video Tutorial]
Follow the detailed instructions below to locate an SD card on your Mac and access all its information, including hidden files.
Here's how to locate your SD card on your Mac and see its contents, including hidden files:
Step 1. Insert the SD card.
Find your Mac's SD card slot to get started. Most MacBook Pros and Airs have it on one of the sides. Insert the SD card carefully into the slot until you hear a click.
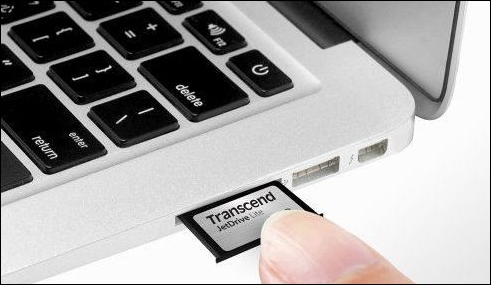
Step 2. Open "Finder".
Launch Finder by clicking the "Finder" icon on your dock or by going to the "File" menu and selecting "New Finder Window".
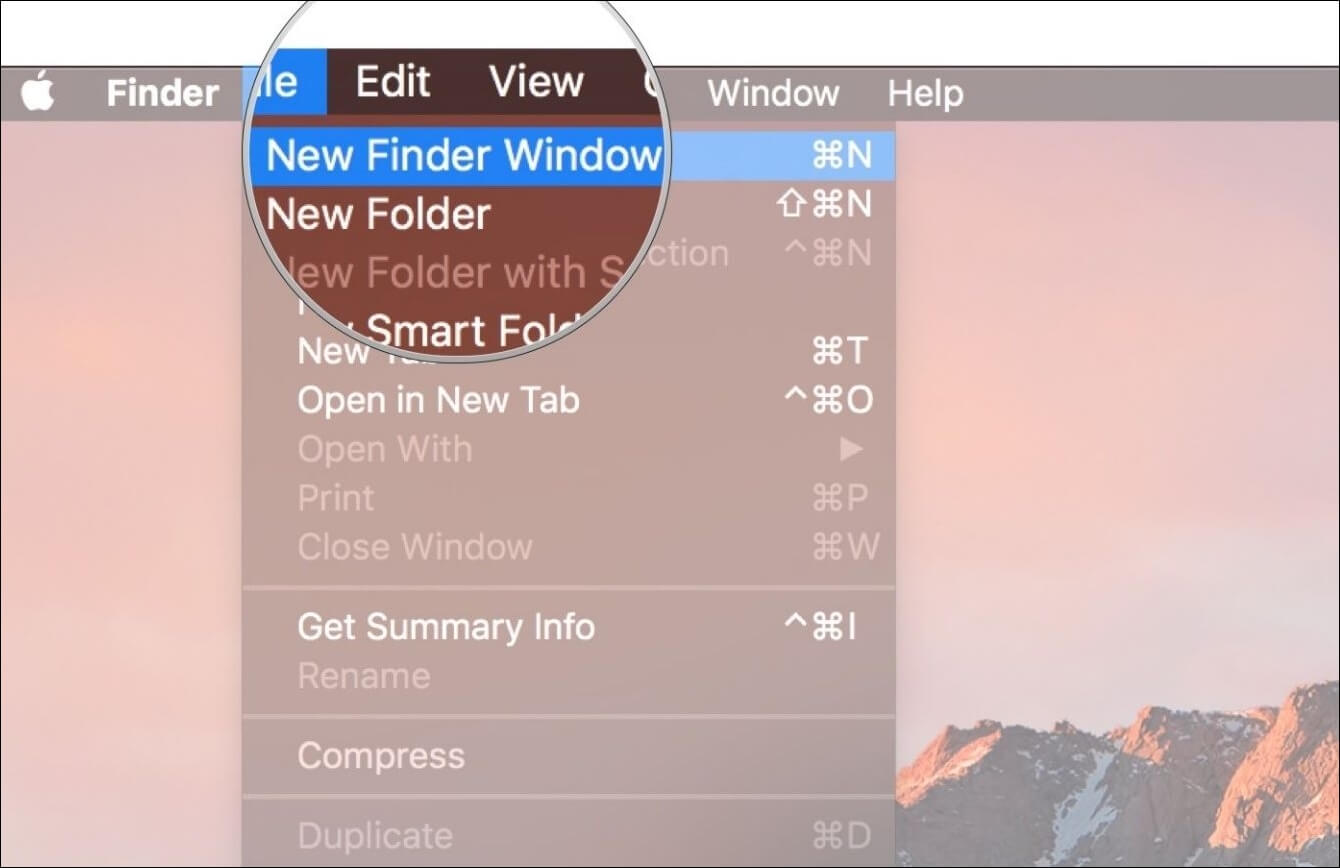
Step 3. Locate the SD Card.
Find the SD Card. Press the "Locations" menu on the Finder window's left side. Here you will see your SD card details. It typically has the manufacturer's name and model number of the SD card.
If the SD card not showing up in Finder, go to the second part of this article: Can't Find SD Card on Mac: 6 Practical Solutions.
Step 4. Access SD Card Content.
To view the contents of your SD card, click on the name of your SD card on the device. After clicking, you will be able to view the folders and files present within the SD card.
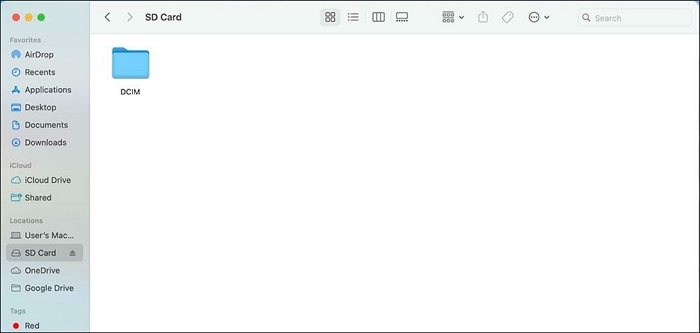
SD card says full but nothing on it on Mac? Don't worry! Files on the SD card may be hidden, so you can't find them; follow the next step to unhide them.
Step 5. View Hidden Files.
Access secret Files. Press the "Command + Shift + Dot" keys simultaneously to access the SD card's secret files, which also show hidden files on an external hard drive on a Mac. If there are any secret folders or files on the SD card, they will become visible.
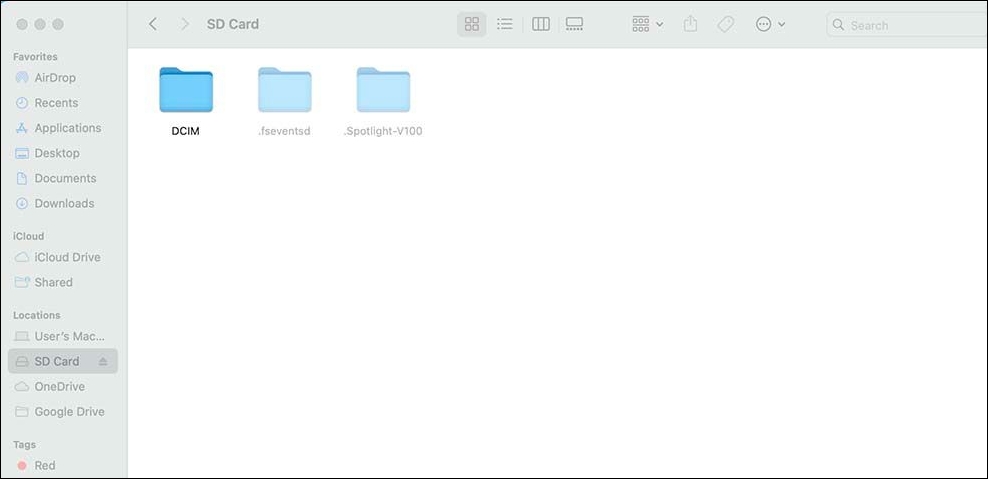
If your SD card video files not showing up on Mac, this method can also help you access your hidden videos on an SD card.
Share this article on social media to help others learn how to find an SD card on a Mac.
Can't Find SD Card on Mac: 6 Practical Solutions
There are various options if your Mac has trouble locating your SD card, such as your SD card is not detected on your Mac. Here are 6 possible fixes to try when attempting to find and remedy the issue:
Fix 1. Check the SD Card Reader
The first fix is to test your device to see if the SD card reader works properly. If the device doesn't recognize your SD card reader, try using a different memory card. If you can use it with other cards, the problem may be subjected to just your SD card.
Fix 2. Check the Connection Issues
The SD card insertion port's connection needs to be verified as the next step in fixing the issue. After removing your SD card and cleaning all of the contacts, you should replace it in the slot. The SD card must be fully inserted and seated for it to function correctly.
Fix 3. Unlock the SD Card
A physical lock switch on the side of certain SD cards prevents the card from being read. If your SD card has a lock, ensure it's not activated.
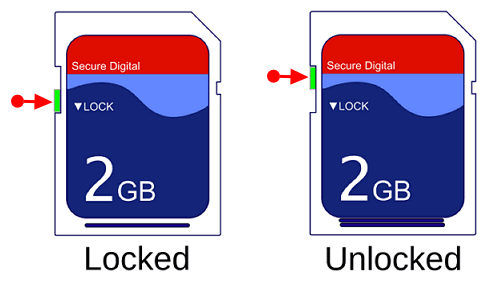
Fix 4. Check the Finder Sidebar
Launch Finder by choosing "Finder" from the Window menu and then "Preferences." Make sure the "External disks" and "Removable media" options are selected in the Preferences window's "Sidebar" tab. The SD card will then appear in the Finder's sidebar.
Fix 5. Restart Your Mac
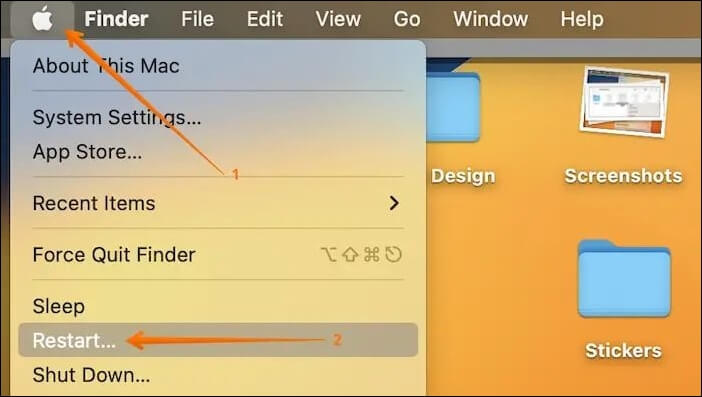
Restarting your Mac or hard restarting your Mac is frequently needed to fix various connection problems. Save your work, click the Apple button, and choose "Restart." After your Mac has restarted, check whether the SD card is recognized.
Fix 6. Format Your SD Card
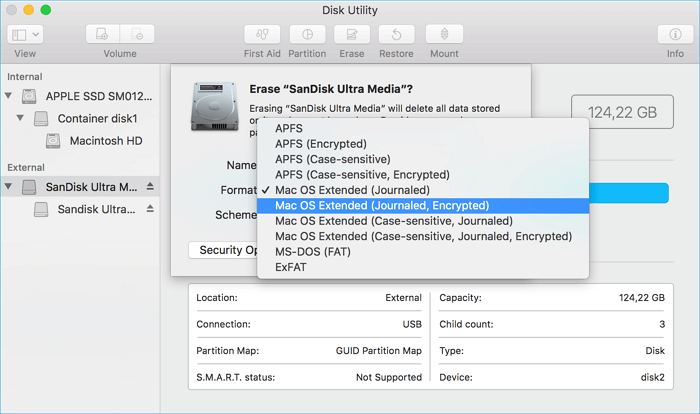
If everything else fails, format your SD card on a Mac. Formatting erases all card data, so back up crucial files. Open "Disk Utility", pick the SD card from the sidebar, choose the "Erase" tab, choose a format, and click "Erase".
Conclusion
If you have an SD card and a Mac, locating and utilizing it is easy. This article should let you find your SD card, explore its contents, and unlock hidden files. However, If you have problems or data loss, we highly suggest installing our robust data recovery program, Deep Data Recovery.
You can get the most out of your SD card use on your Mac and guarantee a smooth and effective workflow by using the methods suggested in this article and dependable SD card recovery on Mac tools when necessary.
How to Find SD Card on Mac FAQs
Here are questions people also ask when searching for how to find an SD card on Mac:
1. How do I access the SD card on a Mac?
The SD card just has to be inserted into the proper Mac slot for it to work; otherwise, any card reader may be used. The SD card will show on your Mac or the Finders Sidebar.
2. Why is the SD card not showing up on Mac?
SD card not showing up on Mac is a common issue that could occur for several reasons. The main reasons are incompatible files, SD card port issues, or damaged SD cards.
3. How to show hidden files on an SD card on a Mac?
Mac has a built-in feature of hiding certain files and directories on SD cards; these could be private files or files in different formats. Launch the finder tab to access these hidden files and press Command + Shift + Period (.) to unveil the hidden files.
4. The MacBook Pro SD card reader is not working; what can I do?
The following should be tried if your MacBook Pro's SD card reader is malfunctioning:
- The SD card slot should be cleaned carefully for dirt or debris.
- You might try inserting the SD card again after restarting your MacBook Pro.
- It is suggested to contact technical support or go to an authorized service facility if the problem continues.
5. How do you recover missing files from an SD card on a Mac?
If you're using a Mac and have lost or erased files from your SD card, you may use data recovery software like Deep Data Recovery for Mac to get them back. This application restores SD cards and other storage media files. Launch the application, connect your SD card to your Mac, and follow the on-screen steps to recover.
Related Articles
- How to Activate Windows 10 for Free Permanently in 2024
- Tutorial on Windows 10: Move Partition to End of Disk [Step-by-Step Guide]
- How to Factory Reset Terminal on Mac [Bash and Zsh]
- How to Install macOS Monterey | macOS 12 Clean Install