How to Fix Windows 11 23H2 Update Failure in 5 Ways
With several new features, system improvements, and bug fixes contained, the Windows 11 version 23H2 was released on October 31 by Microsoft. Many users have successfully downloaded the Windows 11 23H2 update. However, there are voices complaining about the Windows 11 23H2 update failure.
Most reports suggest that the Windows 11 update is stuck on downloading for hours or fails to be installed properly with various errors. If such a troublesome issue has come to you, check this comprehensive article from Qiling. We will present you with 5 effective solutions you can try on.
How to Fix Windows 11 23H2 Update Failure
Before performing the solutions below, make sure your computer meets the Windows 11 system requirements of Windows 11 beforehand to avoid making a futile effort. For example, the update requires at least 64GB of storage space, 4GB of RAM, Trusted Platform Module version 2.0, etc.
Read this article to know more details and learn how to check if the computer is capable of upgrading to Windows 11.
Free Download Windows 11 Check Tool for Windows 11 Compatibility Check
How to check if your computer can upgrade to Windows 11? Free download a Windows 11 checker to see whether your computer meets the requirements to upgrade to Windows 11. Read more >>
Solution 1. Extend the System Partition
Lack of space on the system partition(usually C drive) for the Windows 11 23H2 update is a common cause. If you fail to update Windows 11 to version 23H2, you may want to check if your computer has enough space to download, unpack, and install the Windows update files. You need a way to extend the system partition if it's true that free space on your system drive is less than 64GB.
Lucky for you, a reliable partition manager, Qiling Disk Master Professional, can help you with it.
Follow the tutorial here to extend the C drive.
Option 1. Extend System C drive with unallocated space
- 1. Right-click on the System C: drive and select "Resize/Move".
- 2. Drag the system partition end into the unallocated space so to add it to the C: drive.
- 3. Click "Proceed" to execute the operations and extend the C drive.
Option 2. Extend System C drive without unallocated space
- 1. Right-click a big partition with enough free space on the system disk, select "Allocate Space".
- 2. Select the system drive at the Allocate Space From (*) To section, and drag the end of System C drive into the unallocated space.
- 3. Click "Proceed" to save the changes and extend the C drive.
Read Also:

Top 3 Windows 11 23H2 ISO Downloader With Newest Guide
Windows has announced the rollout of Windows 11 23H2 Update (also known as Windows 11 version 23H2). This article provides three of the best Windows 23H2 ISO Downloaders to help you complete the upgrade better.
Solution 2. Perform Windows Update Troubleshooter
There's a built-in tool called Windows Update Troubleshooter, which is designed to recognize and resolve common problems related to Windows updates automatically. Many issues that are preventing your Windows from installing the update normally can be detected by it. It will repair corrupted cache files, adjust related settings, or offer you solutions with its diagnosis.
Step 1. Open the Settings by pressing "Windows key + I".
Step 2. Navigate to "System" > "Troubleshoot" > "Other troubleshooters."
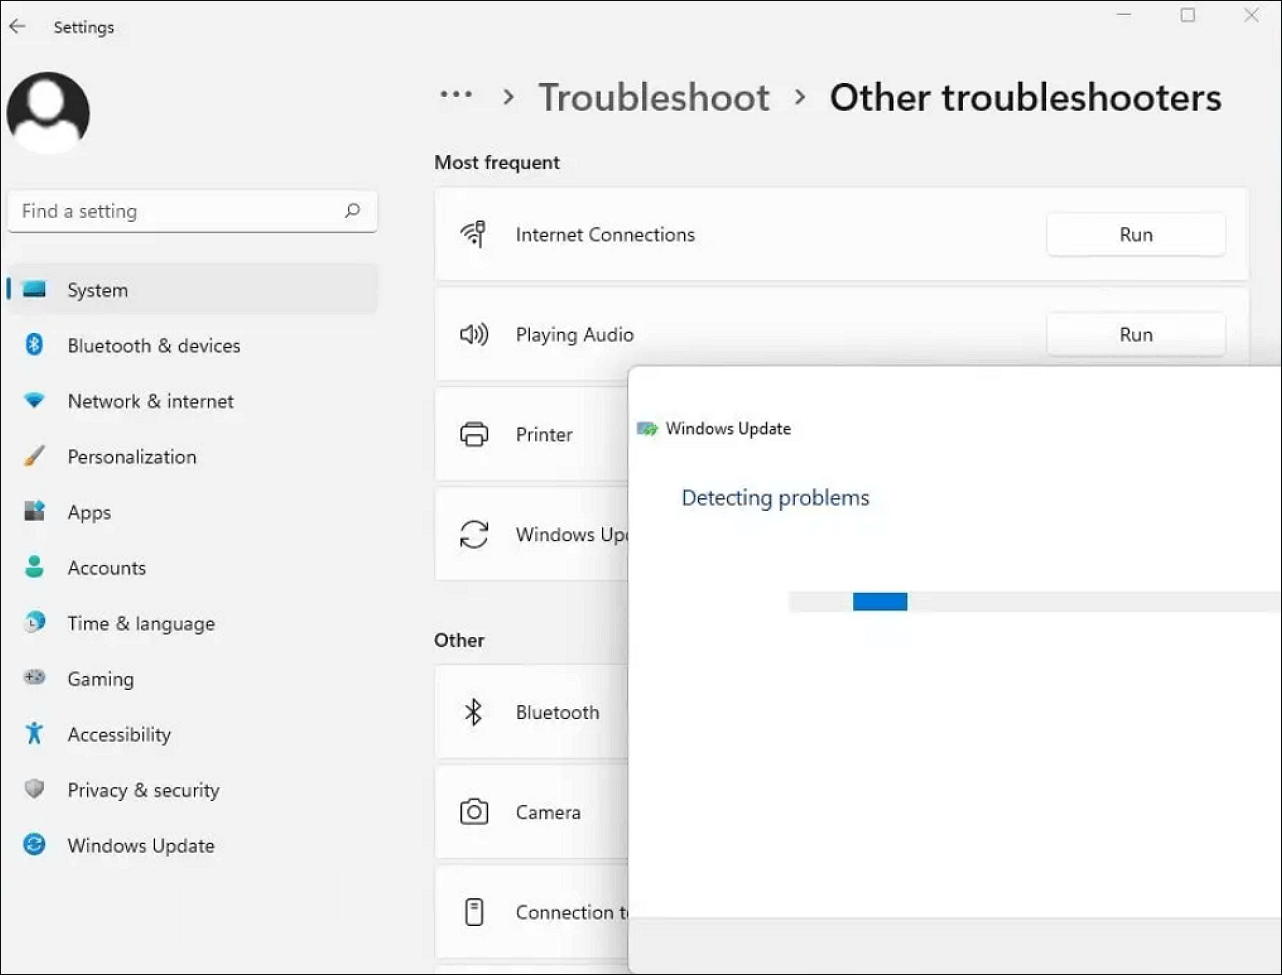
Step 3. Find "Windows Update" and click "Run" beside it to analyze and fix the issues related to Windows updates.
Step 4. Restart your PC after completing the process.
Solution 3. Update from USB Drive
The other method is to update Windows 11 23H2 from a USB drive. The first thing you should do is prepare a USB drive with at least 8GB of free space and make sure there's no important information inside. Then, download a professional tool like Qiling Disk Master for ISO burning. You can manually download the Windows 11 23H2 ISO file on the Windows 11 download page.
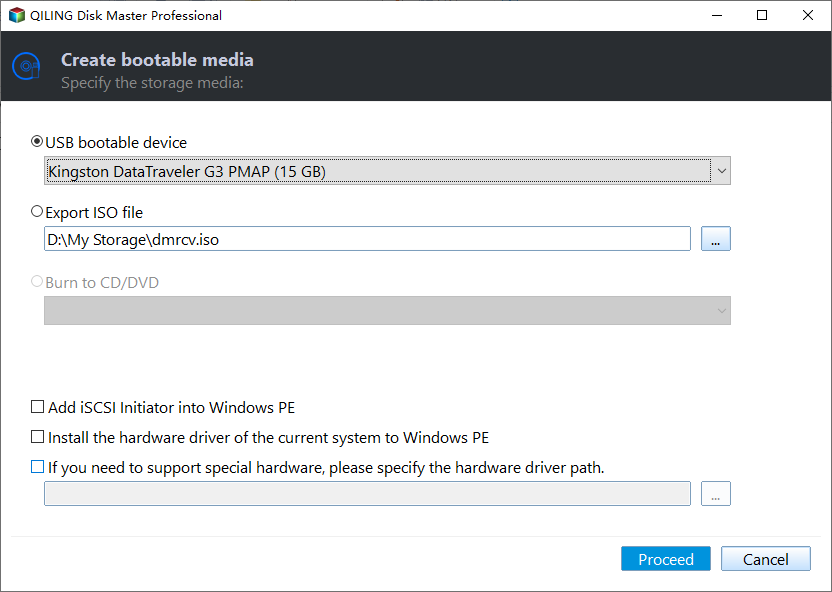
Step 1. Launch Qiling Disk Master and go to the Tools section. Click "Create bootable media" button.
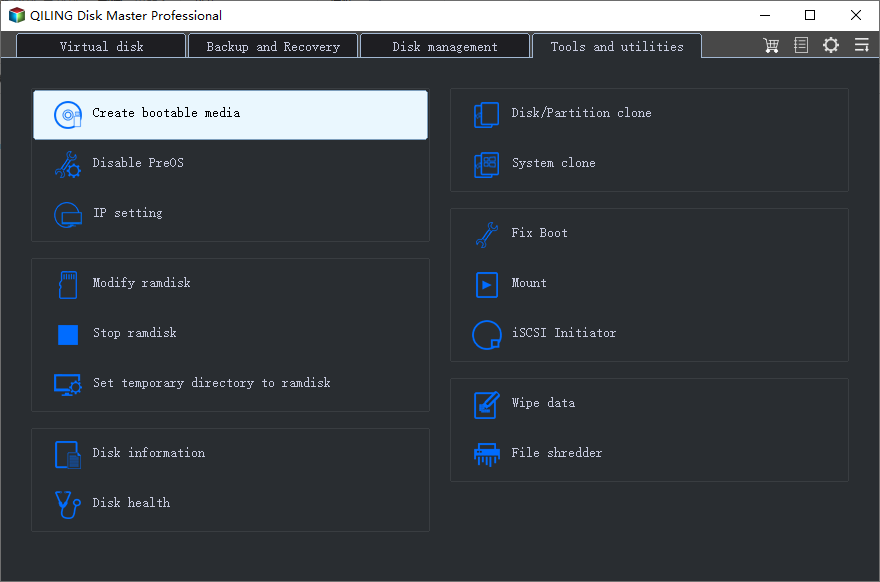
Step 2. Select the target USB as destination and click "Proceed" to execute the operation.
After burning the ISO to your USB drive, you can now install the Windows 11 23H2 update.
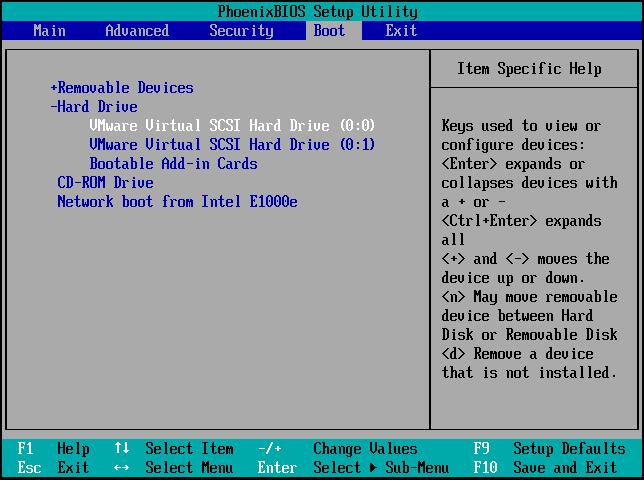
Step 1. Connect the USB to your PC and press "F2/F12/Delete/Esc" to enter BIOS and set your computer to boot from the USB.
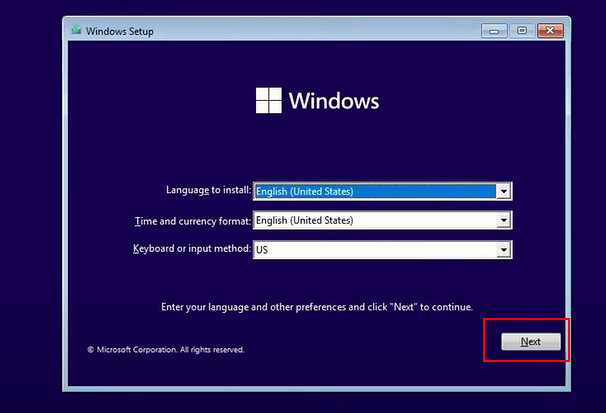
Step 2. Once your computer boots up, follow the on-screen wizard. Select the preferred Language, Time and currency format, Keyboard or input method, and hit "Next".
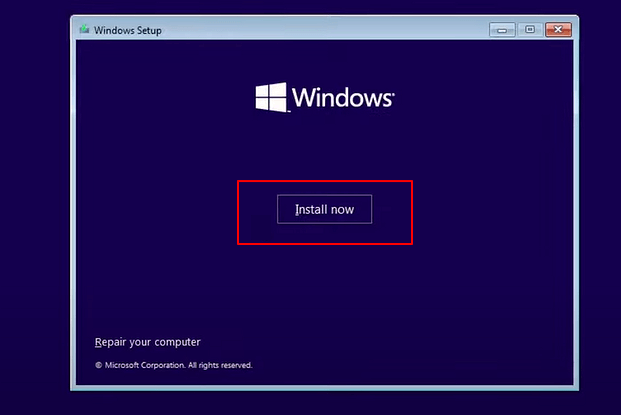
Step 3. Click "Install Now" to continue.
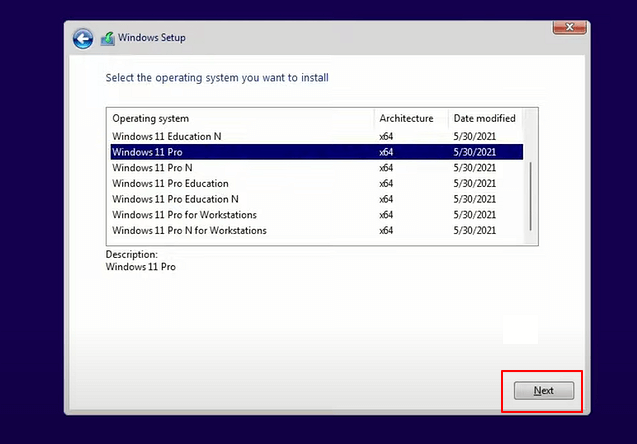
Step 4. Click "I don't have a product key," choose a Windows 11 edition you want to install, and hit "Next".
Step 5. Accept the Microsoft License Term and click "Next". Then, choose the type of installation according to your own case.
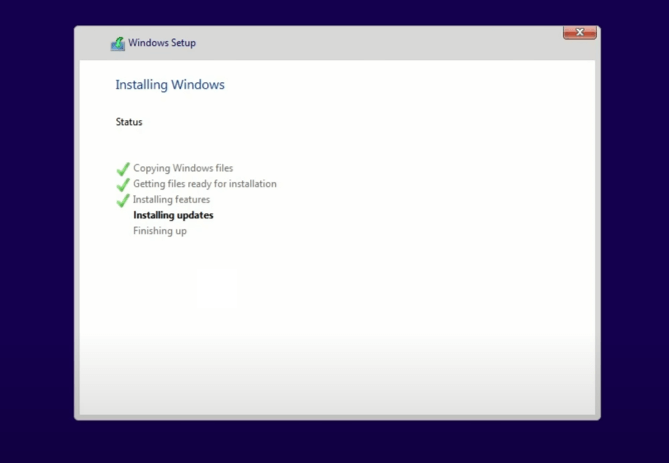
Step 6. Select your target disk and hit "Next". Then, wait for the installation process to finish. Your PC will restart automatically. Finally, follow the on-screen tutorial to set up the computer.
If you find these methods helpful with Windows 11 23H2 update failure, share the post on your social media to help more users.
Solution 4. Run SFC and DISM command
Another possible reason for Windows update failure is corrupted system files. If there are some missing or damaged vital system files, your computer will have trouble installing an update. Therefore, you can try executing the System File Checker (SFC) and the Deployment Image Service and Management Tool (DISM) commands to scan and resolve such issues.
Step 1. Press the Windows key and input cmd in the search bar. Run Command Prompt as administrator.
Step 2. Type in the following commands and hit "Enter":
DISM/Online/Cleanup-Image/RestoreHealth
Step 3. After the DISM scan process is complete, input the command and hit "Enter":
sfc /scannow

Step 4. Once the process is finished, close the Command Prompt and check if you can install the update now.
Solution 5. Reset Windows Update Components
The Windows update components on your system might become corrupted or misconfigured over time. This can also cause the Windows 11 23H2 update failure. If other solutions cannot fix the issue, try to reset the Windows Update components.
Step 1. Press the Windows key and input cmd in the search bar. Run Command Prompt as administrator.
Step 2. Then, input the following commands and press "Enter" each time to stop the Windows Update and its related services:
- net stop bits
- net stop wuauserv
- net stop appidsvc
- net stop cryptsvc
Step 3. After that, hit "Windows key + E" to open File Explorer. Then, navigate to C:\Windows\SoftwareDistribution\Download.
Step 4. Delete all files and folders(updated cache files) inside the folder. (Press "Ctrl + A" to select all, and hit "Del" to delete them.)
Step 5. Run the following commands and hit "Enter" on each line to restart Windows Update and its related services:
- net start bits
- net start wuauserv
- net start appidsvc
- net start cryptsvc
Step 6. Restart your computer and see if you can install the update.
Read also:
Possible Reason Behind Windows 11 23H2 Update Failure
If you want to know the reason why your PC cannot run Windows 11, below are some common causes listed.
- Invalid system requirements. If your computer doesn't meet the essential system requirements, like there's insufficient storage space, you cannot successfully install the update.
- Incomplete update download. If you have downloaded an incomplete update for some reason, it can lead to update failures.
- Corrupted system files. If the critical system files are missing or damaged, it will cause issues with installing Windows updates.
- Invalid internet connection. Unstable or slow internet connection can interrupt Windows updates from downloading.
- Conflicts with third-party apps. Some third-party applications have conflicts with the update process, which might prevent the update from being installed.
Don't forget to share this informative and practical article with your friends!
Conclusion
If your Windows update is not working, it might be invalid system requirements, corrupted update files, damaged system files, etc. In this informative article, we listed 5 corresponding solutions for you to resolve the Windows 11 23H2 update failure. Among all the methods, the easiest and most efficient one is to use Qiling Disk Master to resolve certain system requirements issues and manually update Windows 11 from a USB drive. Hope these methods are useful to you.
FAQs on Windows 11 23H2 Update Failure
If you have any other related questions about Windows 11 23H2 update failure, check the FAQs listed below.
1. Why does my Windows 11 update keep failing?
The "Windows 11 cumulative update failed to download and install" issue can be caused by unstable internet connection, insufficient disk storage space, damaged systems files, or conflicts with third-party software.
2. How big is the Windows 11 23H2 update?
The Windows 11 23H2 update download size is about 5GB, regardless of whether you plan to install version 23H2 via the upgrade or clean install process. If your computer has already been activated in the version of Windows 10, a new product key will not be needed to activate Windows 11 23H2.
3. What to do if Windows Update is stuck?
You can try restarting your PC via the reset button or powering it off and then get it back on with the power button. Windows system may start normally and finish the update process. If the installation is truly frozen, the only choice is to hard reboot.
Related Articles
- Fixed: CHKDSK Failed to Transfer Logged Messages to the Event Log with Status 50
- How to Reinstall Windows 10 Without CD (3 Ways)
- Monster Hunter Rise Save File Location [Detailed Information]
- Solve System Reserved Partition on Wrong Drive: Everything You Should Know