How to Format SD Card on Chromebook [With Specific Steps]
We can easily add additional storage to a Chromebook by plugging in an SD card, and when we attach or purchase external storage for future use, we typically format it.
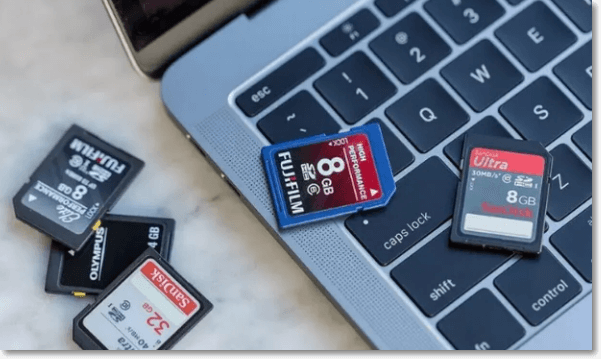
Formatting SD cards on a Chromebook can be straightforward, but sometimes the process doesn't work as expected. To format an SD card on a Chromebook, you can use the built-in formatting options, but if that doesn't work, there are alternative methods to try. Before formatting, it's a good idea to back up any important data on the SD card to prevent loss. Additionally, if your Chromebook is having trouble reading an SD card, these methods can also help resolve that issue.
How to Format SD Card on Chromebook?
Formatting an SD card on a Chromebook is a straightforward process that can be done directly from the Chrome OS File Manager. Without the need for additional apps or complex actions, you can easily format your SD card by following a simple set of steps.
- Notice:
- Formatting will erase the data permanently. It is advisable to create a backup.
Step 1. To insert the SD card into a Chromebook, simply locate an available SD card slot on the device, usually found on the side or top of the Chromebook, and gently push the SD card into the slot until it clicks into place. Be careful not to push too hard, as this can damage the SD card or the Chromebook's port. Once the SD card is securely inserted, you can access its contents by navigating to the Files app on the Chromebook and selecting the SD card from the list of available storage devices.
Step 2. Find the "Apps" icon and click to open it.
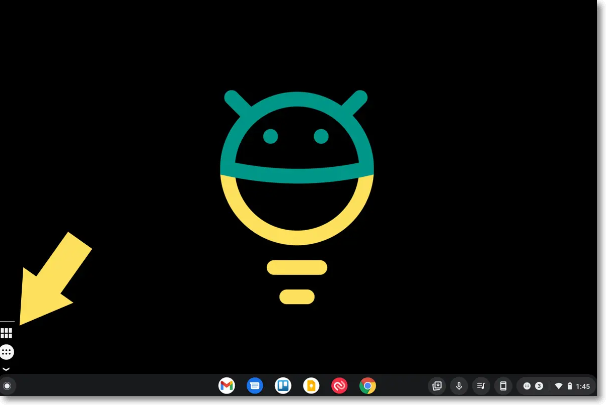
Step 3. Go to Settings and Choose Files.
Step 4. To access the side menubar, navigate to your device and right-click on it.
- Notice:
- If you have connected multiple devices, make sure to select the correct one.
Step 5. Now, select Format device.
Step 6. To delete all data on a device, you'll be prompted with a disclaimer to confirm your intention. Click "OK" to proceed with the deletion.
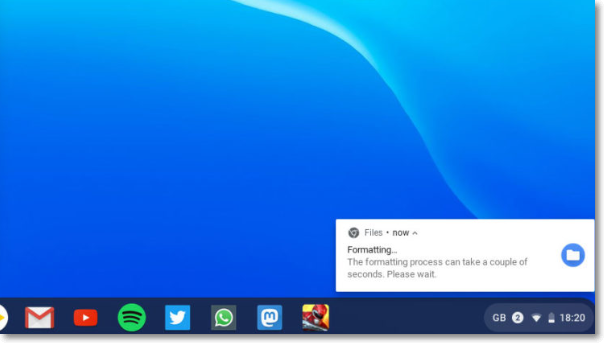
The Chromebook will display a notification in the lower right corner when the process is complete, so be patient. Alternatively, you can also view instructions on how to backup an SD card to Google Photos.
Chromebook Not Read SD Card? Fix!
If your SD card is not showing up on the Chromebook, stop blaming your card, the problem may lie in the Chromebook. In this section, we'll look at how to fix Chromebook not reading SD cards.
Fix 1. Update Your Software
Chromebooks often struggle to read SD cards due to software issues, which can be resolved by ensuring the system is updated. If the Chromebook is not updating automatically, follow these steps:
Step 1. To get started, simply turn on your Chromebook and connect it to a stable internet connection.
Step 2. To proceed, click the time icon located at the bottom right corner.
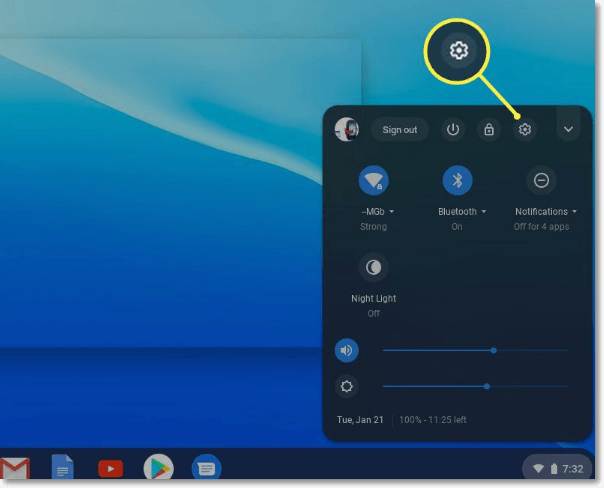
Step 3. Under the displayed Menu, select Settings.
Step 4. Click on the three vertical dots at the top right side of the Chrome browser window. Then, click on the About Chrome OS section at the bottom left side of the window.
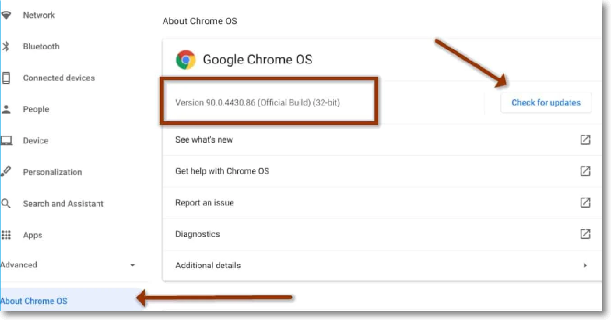
Step 5. You will see a pup up "Google Chrome OS" which displays the current version of the operating system you are currently running.
Step 6. Click on "Check for Updates" and if any updates are available, you'll receive a notification to restart the system to apply the update. Click on the notification to download and install the newer version.
- Notice:
- Remove your SD Card before the update.
Step 7. If the Chromebook still isn't reading the files, try using a different SD card to rule out any issues with the original card. If the issue persists, it may be worth trying to troubleshoot the SD card reader itself.
Fix 2. Hardware Reset
Hardware Reset is another valid method to get your Chromebook ready to read the SD card. The following steps will help you to read the SD card:
Step 1. Shut down your Chromebook properly.
- Notice:
- The system should be turned off completely for a hardware reset, so closing the lid is not sufficient. A full shutdown is necessary.
Step 2. Remove the SD card from the Chromebook.
Step 3. To turn on the system, press the Power key and hold the Refresh key for at least 10 seconds.
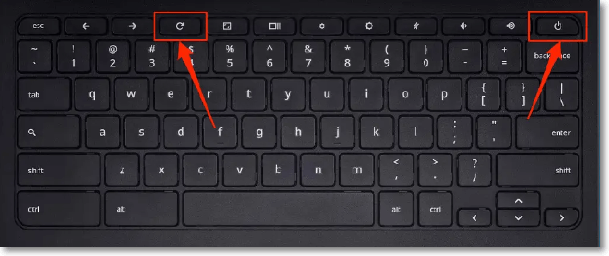
Step 4. I'll wait and see if the system restarts normally.
Step 5. Place the SD card into the device and check if it can be read. This can be done by looking for the card in the device's file system or by running a diagnostic test to see if the card is recognized.
Fix 3. Try to Reformat the SD Card
If two of the above-If the mentioned methods do not resolve the issue, you will need to reformat the SD card. To do this, follow these steps: [insert steps].
Step 1. Connect your SD card to the Chromebook.
Step 2. Open the Files app.
Step 3. Find the SD card that is needed to be reformatted.
Step 4. Right-click on the SD drive and click on "Format Device".
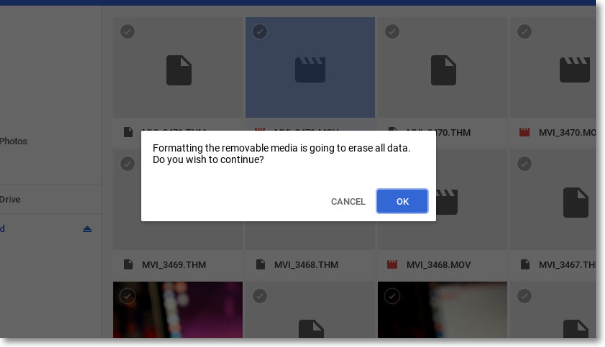
Step 5. Click "OK" in the window pop-up, asking if you wish to erase all the data.
You can now check the SD card and add files to it.
Conclusion
Now that you know how to format an SD card on a Chromebook, you're all set. The steps outlined in the article should help you get the job done. If your Chromebook still can't read the SD card, you can try other methods mentioned. However, if none of these work, it's possible that your SD card is corrupted, so make sure to back up your data before proceeding.
Format SD Card Chromebook FAQs
Here are the most Frequently Asked Questions to satisfy your additional queries.
1. Why can't I format my SD card on my Chromebook?
Your SD card might be corrupted or damaged, which can prevent your Chromebook from reading it, making it impossible to format.
2. How do I format my SD card without losing data on my Chromebook?
To prepare for formatting your SD card, select it as the storage device in your Chromebook and create a backup of your data in another location. Before proceeding, double-check the file name, image type, and folder to ensure everything is in order. This will help prevent any potential data loss during the formatting process.
3. Does FAT32 work on Chromebook?
Your Chromebook can access files on external devices using FAT (FAT16, FAT32, exFAT) and HFS filesystem types.
Related Articles
- Mac Won't Update? Here Are 7 Ways to Fix macOS 13 Ventura Upgrade Failed
- 6 Solutions to Mac Recovery Mode Not Working [2022 Guide]
- How to Check RAM Health with Windows Memory Diagnostic Tool [Full Guide in 2022]
- What Happens If You Delete the System32 Folder? Here Are the Answers