Guide on macOS: Format USB Drive in 2023 [2 Ways]
Not every USB drive is compatible with a Mac computer, and some may need to be formatted before users can store files on them. Fortunately, formatting a USB drive on a Mac is a straightforward process, and this article will guide you through the steps to do so. If you're experiencing compatibility issues or need to format a USB drive, just continue reading to learn how to format it on your Mac.
Introduction
To format a USB drive for macOS, you can use the Disk Utility app that comes pre-installed on your Mac. Simply connect the USB drive, open Disk Utility, select the drive, click "Erase," and choose the "Mac OS Extended (Journaled)" format. This will erase all data on the drive and prepare it for use with your Mac. Alternatively, you can also use the "APFS" (Apple File System) format, which is the default format for newer Macs. Either way, your USB drive should now be formatted and ready to use with your macOS.

What Format Should the USB Be for Mac?
The most suitable file format for Mac depends on the user's needs. APFS is the default file format used on macOS, making it a good choice, but it's not compatible with older versions of the operating system. In that case, using Apple's Mac OS Extended is a better option.
Macs can format a USB drive to FAT32, but only up to a certain size. If the USB drive is larger than 32 GB, Macs will default to APFS, which is the file system used by Macs. However, if you want to use the USB drive on both Mac and Windows, formatting it to FAT32 is the way to go. You can do this by inserting the USB drive into your Mac, then going to Disk Utility, selecting the drive, and clicking on the "Erase" button.
Can Mac Format USB to FAT32?
To format a USB drive to FAT32 on a Mac, you can use the built-in "Disk Utility" tool or Terminal Command Line. You can also format the USB drive to any other format based on your needs. However, if you're unsure how to format your USB drive on a Mac, you can continue reading for further guidance.

Convert FAT32 to NTFS Without Losing Data
The choice of file system for a storage device depends on several factors, and four popular options are FAT32, FAT16, FAT12, and NTFS. FAT32, FAT16, and FAT12 are similar in that they are all variants of the File Allocation Table (FAT) file system, with the main difference being the maximum number of clusters they can support, ranging from 12 to 32,767.

How to Make macOS Format USB Drive - 2 Ways
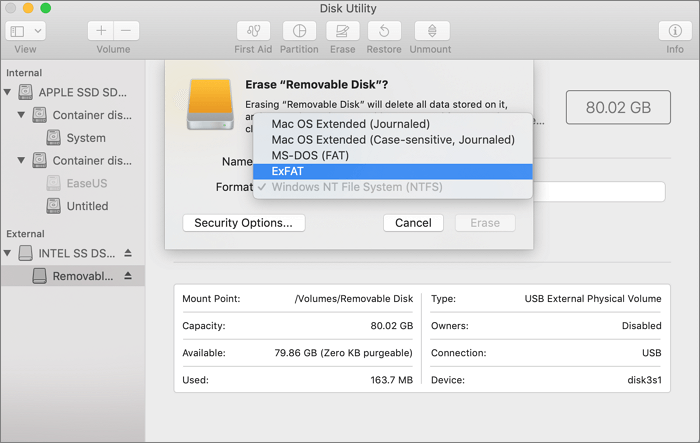
To format a USB drive on a Mac, you can use the Disk Utility tool, which is a built-in application that allows you to format the drive and make it ready for use. Alternatively, you can also use a third-party formatting tool like DiskMaker X, which offers more advanced formatting options and can also help you create a bootable USB drive. To format a USB drive using Disk Utility, simply connect the drive to your Mac, open Disk Utility, select the drive from the list on the left, click the "Erase" button, and then select the format you want to use (such as MS-DOS or ExFAT) and click "Erase" again. This will completely erase all data on the drive and format it for use on your Mac.
Way 1. macOS Format USB Drive Using Disk Utility
Mac computers come with a built-in tool called Disk Utility that can help format any storage device, including USB drives. To format a USB drive on a Mac using Disk Utility, you can follow these steps. (Note: the rest of the text is not provided, I just rewrote the first sentence)
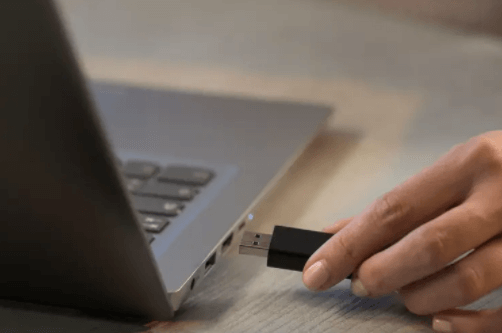
Step 1. To connect a USB drive to your Mac, simply insert the drive into a free USB port on your computer. The Mac should automatically recognize the drive and display it in the Finder window on the left side of the screen.
Step 2. Launch the "Disk Utility" and select your USB drive.
Step 3. Click the "Erase" button on the top menu.

Step 4. Go to the Disk Management tool, click on Action, then select "New Simple Volume" to create a new drive. In the "New Simple Volume" wizard, select the drive letter and file system (e.

Step 5. Click "Erase," and you can format your USB drive.
To format a USB drive on a Mac using Terminal, you can use the command "diskutil eraseVolume" followed by the disk identifier of the USB drive. For example, if the USB drive is identified as "disk2s1", you would type "diskutil eraseVolume" followed by the disk identifier, and then select the desired format (e.g.
Way 2. macOS Format USB Drive Using Terminal Command Line
The Terminal Command Line on a Mac is a powerful tool that can perform almost everything that can be done on the Graphical User Interface, offering a non-flashy way to navigate your device's environment. It can also be used to perform specific tasks, such as formatting a USB drive on macOS, which can be achieved by following a series of commands in the Terminal.
Step 1. To open Terminal on your Mac, click on the magnifying glass icon in the top right corner of the screen and type "Terminal" into the search bar. This will bring up the Terminal application, which you can then click on to open.
Step 2. The command to list the devices available in your system is `lspci -vvv` or `lspci -k`. This command will list all the PCI devices in your system.
diskutil list

Step 3. Choose the targeted device that you want to format.
Step 4. Type the following command and format your USB drive:
diskutil erasedisk FILE_SYSTEM DISK_NAME DISK_IDENTIFIER
File System: You need to determine your file system here.
Disk Name: Give a name for your USB drive.
Disk Identifier: It is the number of your device.
To format a drive to macOS Extended Journaled and name it "ImportantDisk", you can use the terminal command `diskutil eraseDisk -volumeName ImportantDisk HFS+ /dev/diskX` (replace X with the actual disk number). This command will erase the disk and format it with the macOS Extended Journaled file system.
diskutil erasedisk JHFS+ ImportantDisk disk2
Formatting a USB drive on macOS is a straightforward process that can be completed with the help of two guides. With these guides, you can easily format your USB drive, making it ready for use on your Mac.
A Professional Tool to Help Format USB Drive
If you need to format a USB drive, Qiling Partition Master Free is a great option. This free partition manager allows you to safely manage your hard drives and perform various tasks such as adjusting disk space, creating new partitions, merging partitions, and setting up a hard drive on your PC.
To format a USB drive using Qiling Partition Master Free, follow these steps: First, download and install Qiling Partition Master Free on your computer. Next, connect the USB drive to your computer and launch the Qiling Partition Master Free software.
Step 1. Select the USB drive to format.
Connect the USB drive to your computer, then download and launch Qiling partition software. Next, right-click the USB drive you intend to format and choose "Format" from the menu.
Step 2. Set the drive letter and file system on USB.
Assign a new partition label, file system (NTFS, FAT32, EXT2, EXT3, EXT4, exFAT), and cluster size to the selected partition, then click "Proceed".
Step 3. Check "Yes" to confirm formatting USB.
Click "Yes" to proceed with the update, but ensure you have backed up any important data on the device beforehand to avoid potential data loss.
In this way, users can format a USB drive easily.
What Else Can Qiling Partition Master Free Do?
However, Qiling Partition Master Free is more than just a Disk Management tool, offering various other features.
Its specific functions are as follows:
- Format USB to boot.
- Convert FAT32 to NTFS.
- Clone partitions or systems.
- Copy OS and data to another HDD/SSD.
- Convert MBR to GPT without losing data.
- Wipe and format the disk, USB, and SD cards.
- Create, delete, resize, extend, and merge partitions.
Qiling Partition Master Free is a helpful tool for formatting a disk or managing local disks, making it a useful download for those who need it.
Conclusion
You can format a USB drive on a Mac using either Disk Utility or Terminal, offering efficient ways to reformat the drive. Alternatively, you can use a utility tool like Qiling Partition Master Free, which not only formats the drive but also helps maintain the partitions in good order, allowing you to format the drive to any desired format.
FAQs About macOS Format USB Drive
If you're interested in learning more about formatting USB drives on a Mac, I'd be happy to help. Three questions and answers related to this topic are available below: What are the system requirements for formatting a USB drive on a Mac? How do I format a USB drive on a Mac? What are the benefits of formatting a USB drive on a Mac? Let me know if you have any other questions or if there's anything else I can help with.
What is the best format for a USB drive on Mac?
exFAT is a file system that allows for larger file sizes, up to the maximum capacity of the storage device, making it ideal for use on USB flash drives, and is compatible with most Mac operating systems.
How do I format a USB for my Mac and PC?
Formatting a USB drive to FAT32 format is a straightforward process. Simply insert the drive into your computer, open the file explorer, right-click on the drive, and select "Format". In the format window, select FAT32 as the file system and follow the prompts to complete the process.
Step 1. Plug the USB flash drive into the targeted Mac.
Step 2. Launch Disk Utility.
Step 3. Choose your USB drive.
Step 4. Erase your USB drive and then select the FAT32 format.
To format a USB drive for both Mac and PC, you can follow these steps. First, insert the USB drive into your computer and open the Disk Utility tool on your Mac.
What USB format works on Mac and Windows?
FAT32 can work on both Mac and Windows, and an alternative is exFAT.
Related Articles
- User Profile Service Failed the Logon (Causes & Solutions)
- Fix NTFS_FILE_SYSTEM BSOD Error in Windows
- Steam Quit Unexpectedly Mac? 6 Methods to Fix it [macOS Ventura/Monterey/Big Sur]
- How to Factory Reset PS4 [2023 Complete Guide]