How to Uninstall Dell Backup and Recovery on Windows 10 [Full Guide]
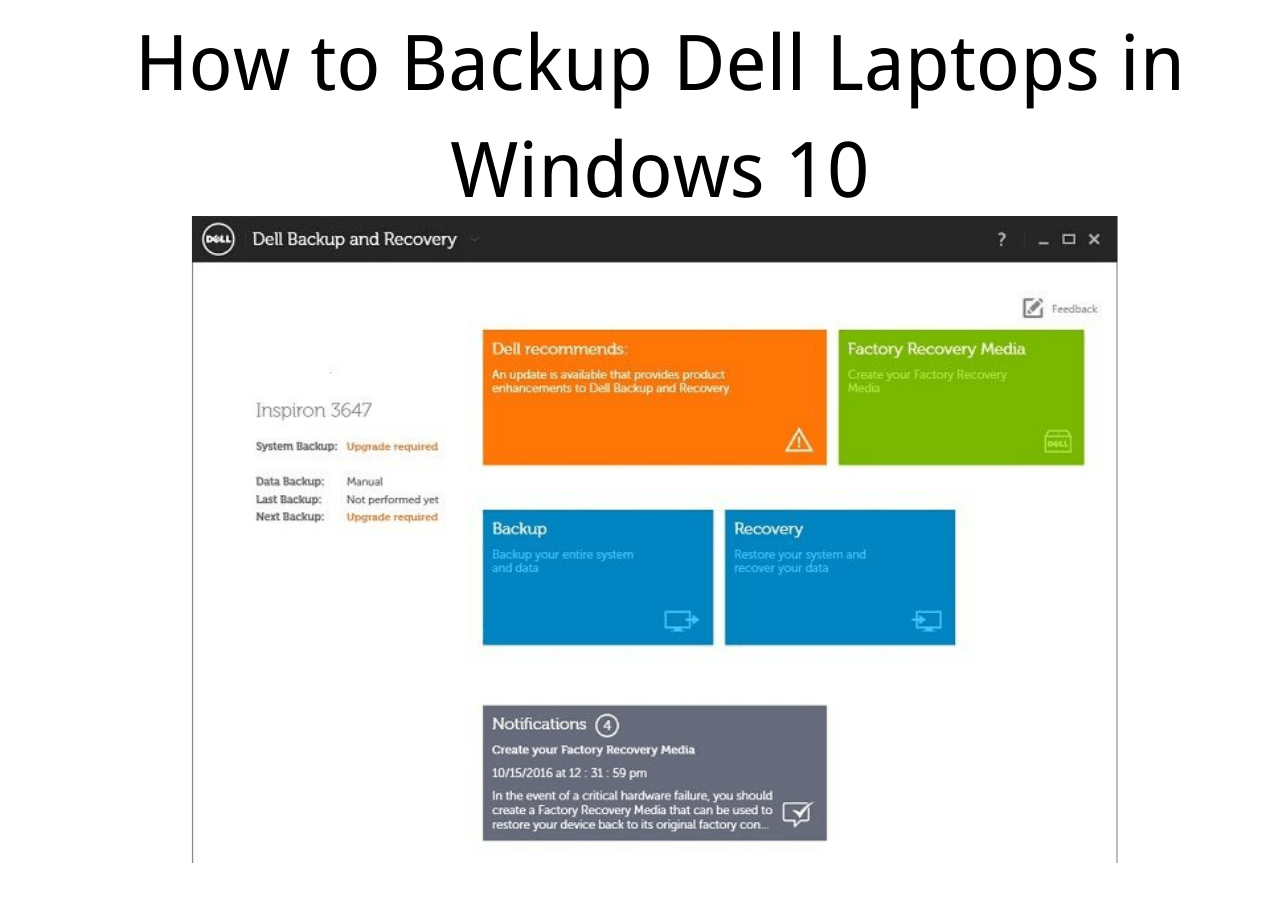
Dell Backup and Recovery is a software built by Dell for all its Dell users to create backups easily and also to restore them. The software was pre-installed on Dell PCs and laptops until Dell announced that it would no longer provide backup and recovery software support.
Dell computers manufactured and shipped with Windows 10 after April 2016 should not download this software on their computers.
You can download the software from Dell's official website if you recently upgraded to Windows 10 from a previous version.
You can also uninstall it from your Windows 10 PC since Dell has discontinued offering support. Here's how to uninstall Dell Backup and Recovery.
Dell Backup and Recovery on Windows 10
Dell Backup and Recovery is Dell's easy solution for its users to create a backup of their computer and recover the backup quickly. Dell shipped their Windows 7 and Windows 8 PCs and laptops with the basic version of this program (Version 1.8) pre-installed.
The Dell Backup and Recovery program discontinued support for this version and is no longer pre-installed on Dell computers manufactured after April 14, 2016.
When it was available, this program was available in both paid and free versions. The users could upgrade from the basic version of the software to the premium version.
Dell Backup and Recovery (DBaR) Version 1.9 is available for users who upgrade to Windows 10 from Windows 7 or 8. It is done to keep the DBaR application compatible. If your Dell computer came with Windows 10 pre-installed, you should not download DBaR version 1.9.
For computers that came pre-installed with the Windows 10 OS, users should back up and restore their computers using Windows Settings.
However, apart from Dell Backup and Recovery, many alternative methods exist. If you want to know more about that, read the article below:

How to Backup Dell Laptops in Windows 10 [Ultimate Guide]
How about losing all your data in a fraction of a second while facing issues with your Dell laptop? Well, that is a pretty ridiculous situation.

How to Uninstall Dell Backup and Recovery on Windows 10
Here's how to uninstall Dell Backup and Recovery on Windows 10:
- Method 1. Uninstall Dell Backup and Recovery Windows on 10 using Control Panel
- Method 2. Uninstall Dell Backup and Recovery using System Restore
Method 1. Uninstall Dell Backup and Recovery Windows on 10 using Control Panel
Step 1. Click the "Start" button and search for the "Control Panel."
Step 2. Now select "Uninstall a program" under "Programs."

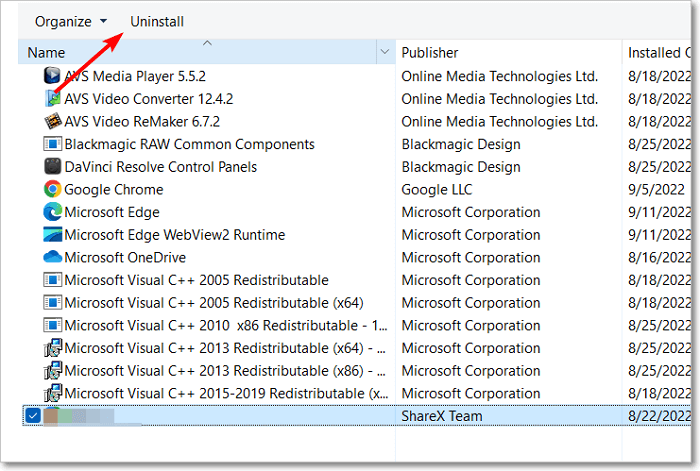
Step 3. Locate the "Dell Backup and Recovery program" and click the "Uninstall" button.

Step 4. The Dell Backup and Recovery uninstallation window will open. Complete the uninstallation process and click "OK."
Step 5. Now, click "OK" after the complete uninstallation and restart your computer.
Method 2. Uninstall Dell Backup and Recovery using System Restore
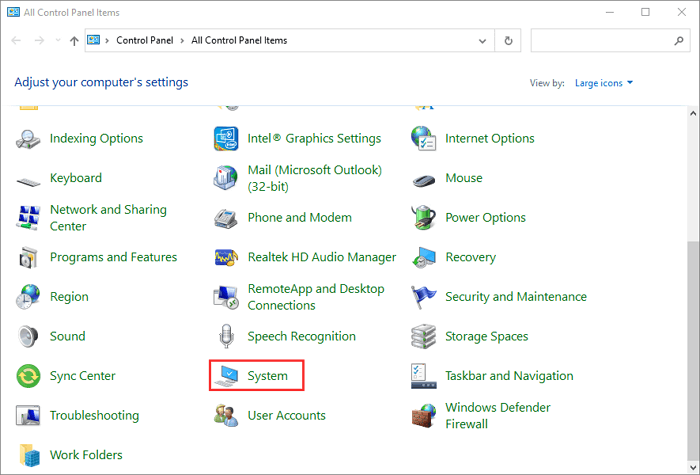
Step 1. Open the "Control Panel" and select "System and Security."

Step 2. Select "System," and then the "Settings" window will open.

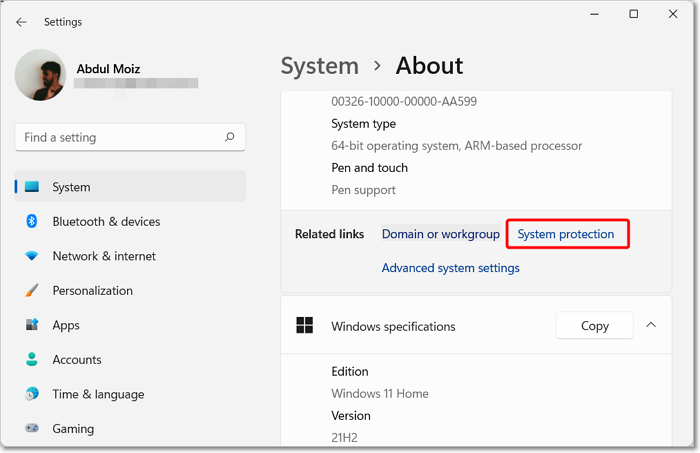
Step 3. Click "System protection," then click "System Restore" and then select "Choose a different restore point."

Step 4. Select the version of your backup that you want your computer to restore to.
Step 5. Click "Finish" in the "Confirm your restore point" window, and a pop-up window will open and select "Yes" again to confirm your decision.
The Epilogue
Since Dell discontinued providing updates or support to its Dell Backup and Recovery program, users can uninstall the software and use Windows' in-built backup and recovery solutions.
We hope this article has helped you uninstall Dell Backup and Recovery on your Windows 10 or earlier version of Windows PC.
Frequently Asked Questions
1. Where are Dell backups stored?
On your hard drive, Dell creates a secure location to store the backups securely. Users can specify how much storage space the Dell backup can use to store backups. It is set to 25% by default, but users can also configure and set it to 30%, which is the maximum limit.
2. What is a Dell recovery disk?
Users can quickly restore their computer to working condition in the case of a failure or use it to restore their lost data.
Dell offers an easy solution for users to create bootable recovery media on a flash drive.
Related Articles
- What Is the Best GoPro SD Card Format? [Best Choice and Tutorial Guide]
- Fix macOS Sierra 10.12.1 Update Stuck or Fail to Download Error
- [Solved] Windows 10 Fails to Shut Down
- [Fixed] The File Is Corrupted and Cannot Be Opened in Excel/Word