[SOLVED] How to Recover Audio Files on Windows/Mac/Android/iPhone
Audio files are a key component to many businesses, not just for the entertainment industry. Whether it's recording customer service conversations, holding meetings remotely, or making presentations with accompanying audio tracks, they need to be available at all times.
But what happens when these audio files suddenly become lost? While recovering lost data can seem intimidating and complicated, the process of retrieving missing audio files is actually simpler than you might think! In this blog post, we will dive into comprehensive solutions so that Windows, Mac, Android, and iPhone users can easily recover audio files - no matter how old or obscure they may be!
Why Do You Lose Audio Files on Windows/Mac/Android/iPhone
Losing audio files can be incredibly frustrating, especially if they are audio of important events or phone calls. There are several causes for audio file loss.
- Audio files can become corrupted or damaged over time
- While organizing files you accidentally delete an entire folder
- A factory reset of the device deletes all the device data
- An unexpected break happened when transferring audio files
How to Recover Deleted Audio Files on Windows 11/10/8/7
If you've accidentally deleted an audio file from your Windows 11/10/8/7 computer and want to recover it, the good news is there are multiple options available. The key to recovering the audio files is to act fast as soon as you realize they are gone. And follow the steps below to recover audio files on Windows 11/10/8/7.
Method 1. Recover Deleted Audio Files from Recycle Bin
Fortunately, there are some steps you can take to maximize your chances of recovering these files. The most effective way to restore audio files is using the Recycle Bin folder. Follow the steps below to restore lost audio files.
Step 1. Open the Recycle Bin by double-clicking on its icon on the Desktop.
Step 2. Locate and select the deleted audio files that you need to restore.
Step 3. Right-click the selected item and choose "Restore".

Method 2. Recover Deleted Audio Files with Audio Recovery Software
To have the best chance of success at recovering your audio file, quick action is necessary since as more time passes, your chances diminish significantly. If you fail to recover deleted audio files from Recycle Bin, turn to Deep Data Recovery. This data recovery software helps recover deleted files on Windows 11/10/8/7 with simple clicks. It has many highlights.
Qiling Audio Recovery Tool
- This SD card recovery software helps restore lost data from any device like HDD, SSD, USB, SD card, etc.
- You can always get back something you accidentally deleted, formatted, or moved from your device.
- Support lost audio file recovery on Windows 11/10/8/7/XP within three simple steps.
Download this audio recovery software and recover deleted audio files on a Windows PC/laptop.
Step 1. Select the location
Select the location where you lost music, voice recordings, and other audio files and click "Scan".
Step 2. Preview the audio files
The time required for the scanning process depends on the size of the disk. You can recover files during the scanning process. Click "Audio" in the left panel. Preview found audio files by clicking the "Preview" button.
Step 3. Restore lost audio files
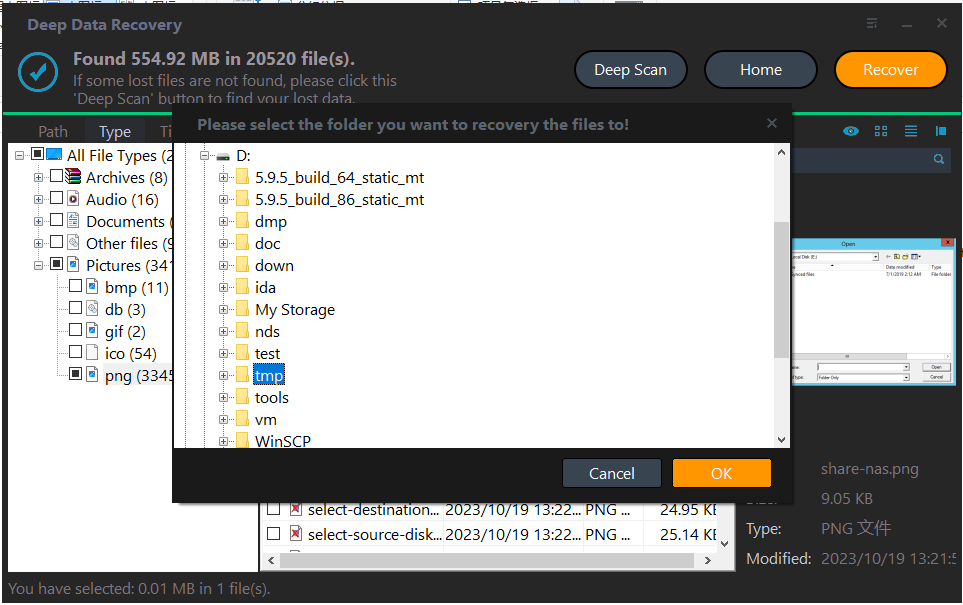
Select all found audio files and click "Recover". Choose a safe location on your PC or an external storage device to save these files and click "OK" to confirm.
Method 3. Recover Deleted Audio Files from Windows File History
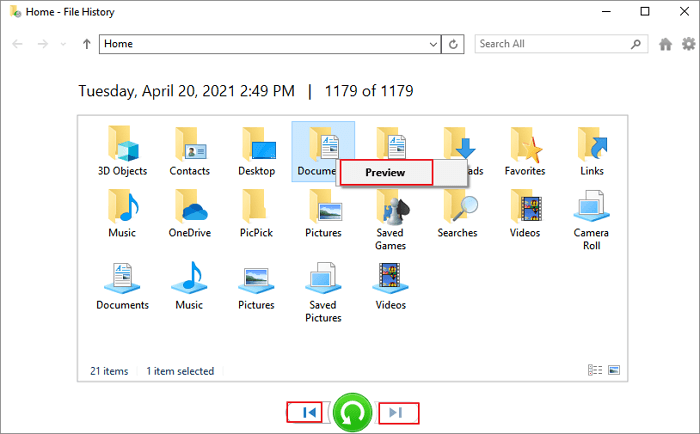
Another way to restore Windows audio files is using File History. It is a backup utility, which allows users to continuously back up their personal data files to an external storage device. If you have enabled File History in advance, you can recover deleted audio files with the following steps.
Step 1. Click the Search box and type file history.
Step 2. Click "Restore your files from File history" from the search results.
Step 3. Choose the audio files you need to restore and preview them.
Step 4. Click the green "Restore" button.
How to Recover Deleted Audio Files on Mac (3 Ways)
Recovering deleted audio files on Mac can be an easy and straightforward task. All you need to do is check the Trash, using Mac data recovery software or Time Machine. Keep reading to get the full guide.
Method 1. Check Mac Trash for Lost Audio Files
Where do deleted files go? Usually, they are in the Trash on Mac. Thus, you can recover lost audio files by checking Mac Trash.
Method 2. Recover Deleted Mac Audio Files with Software
Recovering deleted audio files on Mac can be a tricky affair, but thanks to the Deep Data Recovery for Mac, it is now very simple.
Deep Data Recovery for Mac is an effective and reliable data recovery tool designed to recover deleted files on Mac. It supports various common file formats and has powerful scanning capabilities that can locate hidden files in deep partitions quickly, making it easy to find exactly the files you need.
Download Qiling Mac data recovery software and restore lost audio files on Mac with the steps below:
Step 1. Search for lost files
Select the disk location to search for lost files (it can be an internal HDD/SSD or an external hard drive) where you lost data and files. Click the "Search for lost files" button.
Note: Before data recovery, you'd better click "Disk Backup" from the left sidebar to create a backup of your HDD/SSD to avoid further data loss. After backing up, the software can recover data from your disk backup, and you can use the HDD or SSD again.

Step 2. Go through the scanning results
This software will immediately scan your selected disk volume and display pictures, documents, audio, videos, and emails on the left pane.

Step 3. Select the file(s) and recover
Click the data to preview, and click the "Recover" button to have them back.
Method 3. Recover Deleted Mac Audio Files from Time Machine
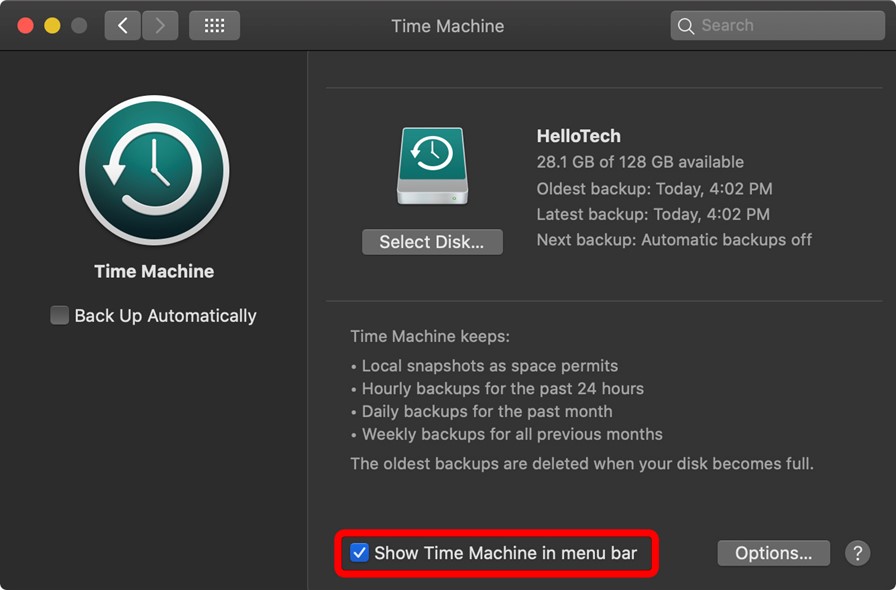
Just like File History for Windows, Time Machine is a built-in backup and recovery tool for Mac. If you have made a backup with Time Machine, you can follow the steps below to recover deleted audio files.
- Click the Apple logo. Then, choose System Preferences from the drop-down menu.
- Open the Time Machine options by clicking on this icon.
- Make sure the Show Time Machine in the menu bar option is checked.
- Click on the Enter Time Machine button. All of your previous Time Machine backups will be shown on this screen.
- Click the Restore button to recover lost audio files on Mac.
How to Recover Deleted Audio Files on Android
Recovering deleted audio files on Android can be a tricky task, however, there are multiple methods to recover these files.
Use Cloud Drive on Android
Using cloud storage can help recover lost audio files, as it typically stores all data that has been synced and uploaded from the device.
Turn to Android Data Recovery Software
In addition, downloading a reputable recovery application from the Google Play store can provide an easy option to recover lost audio files. Many of these applications provide deep scanning capabilities necessary for recovering deleted audio files on Android devices.

Ultimately, depending on the type of file system used by Android devices, multiple recovery options exist to recover deleted audio files from Samsung.
How to Recover Deleted Audio Files on iPhone
Recovering deleted files on iPhone doesn't have to be a stressful task. Depending on the version of iOS you are running, there are several options available that can help recover lost audio files, allowing you to recover memories or important meetings that were seemingly lost forever.
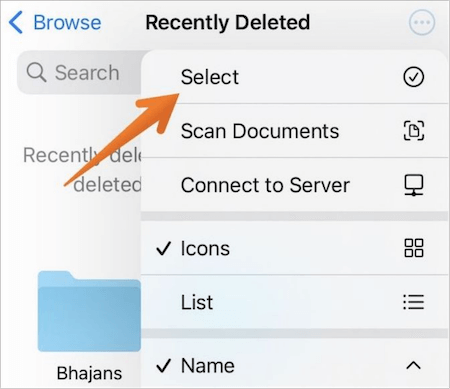
If you're using a newer version of iOS, it may be possible to recover your file directly from the "Recently Deleted" album in your Photos app.
If this does not work, Qiling MobiSaver is available for download and can recover your audio files for an easy and hassle-free experience.
- Connect your device to your PC
- Let the software scan for lost data on iPhone
- Select the format type and recover any data that was previously deleted
As long as the data has not been overwritten, there will always be the hope of salvaging any forgotten audio files on the iPhone.
Conclusion
To sum it up, recovering deleted audio files can be a challenge. Depending on the device it was lost from, you may have more success in finding and restoring it than others. Fortunately, there are plenty of options to handle data loss on each platform.
Without question, make sure you back up regularly so you don't find yourself in a situation like this where audio recovery is necessary. But regardless, knowing these tips and tricks will help reduce a lot of stress if an issue does arise.
Audio Recovery FAQs
If you still have problems, read the questions and answers to get additional help.
1. How do I recover permanently deleted Voice Memos?
The easiest way to recover deleted Voice Memos is using the Recently Deleted folder:
- Open the Voice Memos app on your iPhone
- Scroll down to find the Recently Deleted folder and tap it
- Find the voice memos you wish to recover
- Click Recover recording
2. Can I recover an audio recording?
Yes, there are many ways to retrieve deleted voice and call recordings from your Android phone or iPhone. And you can restore deleted audio files on Windows and Mac with Qiling data recovery software.
3. Why did my audio files disappear?
Here is the list of the reasons:
- The storage device is corrupted
- Accidentally deleted your files
- Interrupt file transfer
Related Articles
- Run Deep Data Recovery from WinPE Bootable Disk
- Detailed Guide | How to Recover Deleted Videos from DJI
- Recover Data from a Dead Hard Drive and Repair the Corrupted Disk
- How to Repair Corrupt RAW Photos on Windows PC🖼️