Download Clonezilla Alternative for Windows 11/10/8/7 for Easy Clone
How Does Clonezilla Clone HDD or SSD?
Clonezilla offers users two options: "Device to image" and "Device to device" cloning modes, both of which are command-line based. As a free and open-source disk imaging and cloning software, it is capable of handling most users' needs for copying a hard disk or partition at no cost.
Let's look at how to clone your hard drive with Clonezilla, with a very brief guide.
Step 1. Download Clonezilla Live and prepare boot media as required.

Step 2. To clone your hard drive, connect your second hard drive to your PC and boot from the Clonezilla Live USB or DVD. When Clonezilla loads, accept the default settings by hitting Enter.

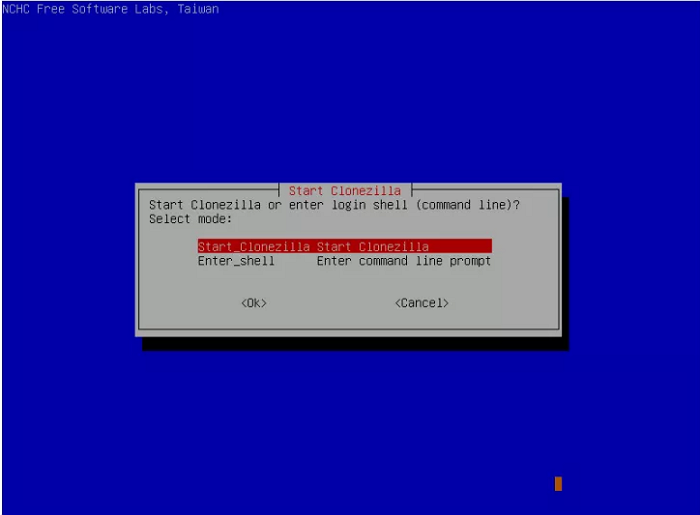
Step 3. To start the Clonezilla wizard, follow these steps: choose your language, select the default option "don't touch keymap" when prompted, and then choose "Start Clonezilla" when asked to proceed.

Step 4. Choose a cloning mode between "device-image" and "device-device".

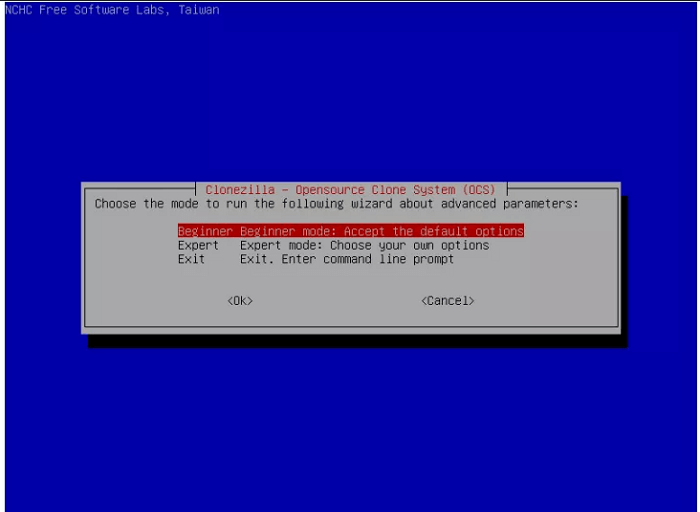
Step 5. Clonezilla will ask you to choose either a "Beginner" mode or an "Expert" mode to start. As it is a command-line program, advanced options are only available in the "Expert" mode. To make this guide simple to follow, we'll only display the Beginner's mode wizard in the next moves.

Step 6. You have two options when cloning your disk: you can create an exact copy of everything on your hard drive, or you can copy only one partition to an external hard drive.
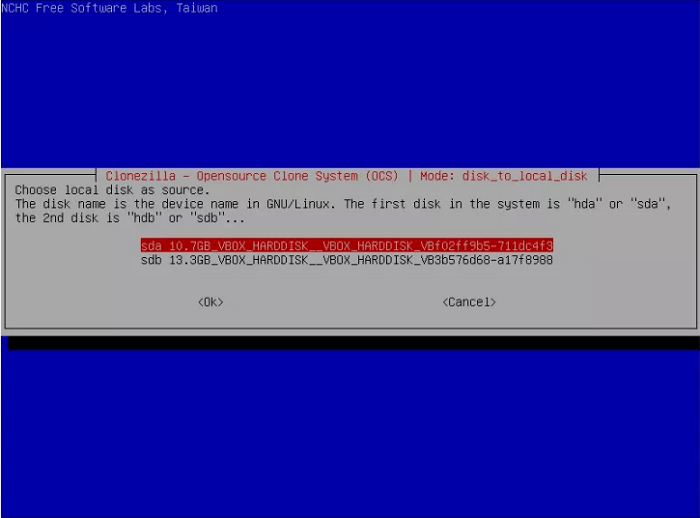
Step 7. Choose the source drive to clone, which is the device name in your system, such as "hda" or "sda" for the first disk, "hdb" or "sdb" for the second disk, and so on. It's crucial to select the correct drive to avoid any issues.

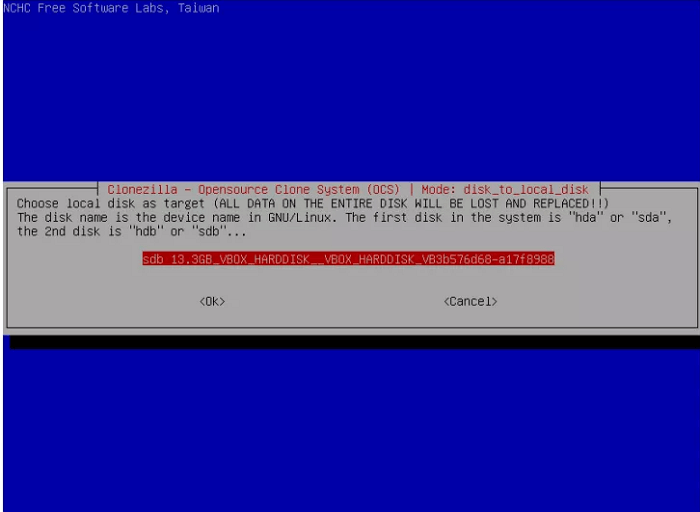
Step 8. Choose the target drive according to its device name, and the data will be fully copied from the source drive into this drive.

Step 9. To finalize the cloning process, set an option to reboot your computer or schedule it for later, and then start the Clone Wizard after all settings have been configured.
3 Reasons to Download Clonezilla Alternative Software
The current UI design is not user-friendly, especially for beginners. It lacks visual aids and intuitive navigation, making it difficult for new users to understand and use the system.
The Clonezilla disk cloning procedure has a steep learning curve, with complex text-based interfaces and command lines that can be overwhelming for beginners. Without solid IT knowledge, it's easy to make mistakes, such as cloning the wrong hard drive, which can lead to a catastrophic disaster for your system and data. This can be a daunting task for those who are not familiar with technical procedures.
- Different download versions for Legacy BIOS and UEFI-based machines.
Choosing the right version of Clonezilla to install can be tricky. All versions of Clonezilla support legacy BIOS, but if your machine has UEFI secure boot enabled, you'll need to use the AMD64 (X86-64) version, either Debian-based or Ubuntu-based. Unfortunately, this can be a challenge for average users who may not even be aware of their BIOS mode.
- Free and Open-source software, no customer support.
Due to the lack of customer support, users must search for answers and solutions on forums for any problem resulting from using Clonezilla, making it a potentially unreliable method for imaging or cloning hard drive data.
What's the Best Clonezilla Alternative Software for Easy Cloning?
Qiling Disk Copy is a reliable disk cloning software for Windows users, serving as a complete Clonezilla alternative solution that simplifies the cloning process in a few clicks, outperforming Clonezilla in many aspects.
- First of all, easy to download and install
You can install Qiling Disk Copy on any Windows computer by clicking the download button once. This software fully supports Windows 11 and is compatible with both BIOS and UEFI boot systems.
Cloning a hard drive or a single partition is surprisingly easy. With just a few steps, you can create an exact replica of your data, making it simple to back up or transfer your files to a new device.
Qiling Disk Copy automatically starts the cloning task without requiring any further action or settings from the user.
Prior Notice:
- The "Sector by sector copy" feature in the cloning process requires the destination disk to be at least as large as the source disk, preventing cloning to a smaller disk. If you want to clone a larger disk to a smaller one, this feature should be left unchecked.
- The process of completely erasing all data on a destination disk will result in the total removal of any existing information, effectively rendering the disk blank. This process is irreversible and should be approached with caution, as it will permanently delete all data, including files, folders, and any other stored information.
Step 1. To start copying/cloning an entire disk to another, choose the source disk under "Disk clone" and click "Next".

Step 2. Choose the other disk as the destination disk.

Step 3. Check the disk layout of the two disks, managing the destination disk's layout by selecting "Autofit the disk", "Copy as the source" or "Edit disk layout".

- "Autofit the disk" makes some changes to the destination disk layout by default to optimize its performance.
- The "Copy as the source" option does not modify the destination disk, and the layout remains identical to the source disk.
- Edit disk layout allows you to manually resize and move partition layout on the destination disk.
To optimize your SSD's performance, select the "Check the option if the target is SSD" option. This will allow your SSD to function at its best.
Step 4. Click "Proceed" to officially execute the task.
A message now appears, warning you that data will be lost. Please confirm this message by clicking "OK".
Related Articles
- How-to Guide | Clone NVMe SSD to NVMe SSD
- Can I Clone NVMe SSD to SATA SSD? How to Do it?
- Clone VS Image | What's the Difference? How to Clone or Image a Hard Drive [Get Full Guides Now]
- Clone vs Clean Install: Which Suites You Better