Tutorial: How to Resize External Hard Drive on Windows 10/11
External hard drives have become a necessity for tech enthusiasts and for those who need a concise space to store large volumes of data. However, there can be circumstances when resizing an external hard drive becomes necessary to meet your specific requirements. For those less familiar with technology, the resizing process may appear challenging. You don't need to sweat because Qiling Software has got you covered.
The main goal of this article is to give a quick overview of external hard drives, explain when and why resizing may be needed, to introduce you to the most efficient tools, like Qiling Disk Master and Disk Management, for resizing your external hard drive. Let's dive into the world of changing an external hard drive to make it easy for you!
Resizing an external hard drive becomes necessary in various scenarios:
- 🚩When you find your external hard drive running low on storage space, resizing allows you to accommodate more data and files, ensuring you have enough room for your storage needs.
- 🚩Additionally, resizing enables you to create additional partitions on the external hard drive, enhancing data organization and facilitating efficient data management.
- 🚩As your storage requirements change over time, resizing grants you the flexibility to adapt the allocation of space, repurpose the drive for different tasks, or meet evolving storage demands.
Now, here we are comparing Qiling Disk Master and Disk Management so that you can understand which one is better for disk resizing:
| Tool | 🥇Qiling Disk Master | 🥈Disk Management |
|---|---|---|
| 🚩Duration |
|
|
| 💻Complexity |
|
|
| 💡Pros |
|
|
| 🔨Cons |
|
|
As you can also see, Qiling Disk Master is a better choice for resizing external hard drives as it is easier to use, and fewer errors occur while using it.
Resize External Hard Drive on Windows via Qiling Disk Master
Qiling Disk Master is an effective and user-friendly software that makes resizing external hard disks on Windows much easier. This program is compatible with multiple Windows versions, which makes it your go-to tool for resizing your external hard drive. It also facilitates extending drives and shrinking their volume. With its help, you can adjust the external hard drive size safely, including extending volumes with allocated space or extending volume from an unadjusted partition. You won't lose any data during this process.
Guide 1. Extend Partitions on External Hard Drives
Step 1. Shrink partition to free up space to extend partition.
If the hard drive has enough unallocated space to extend the target partition, jump to Step 2, and continue. If not, free up space first:
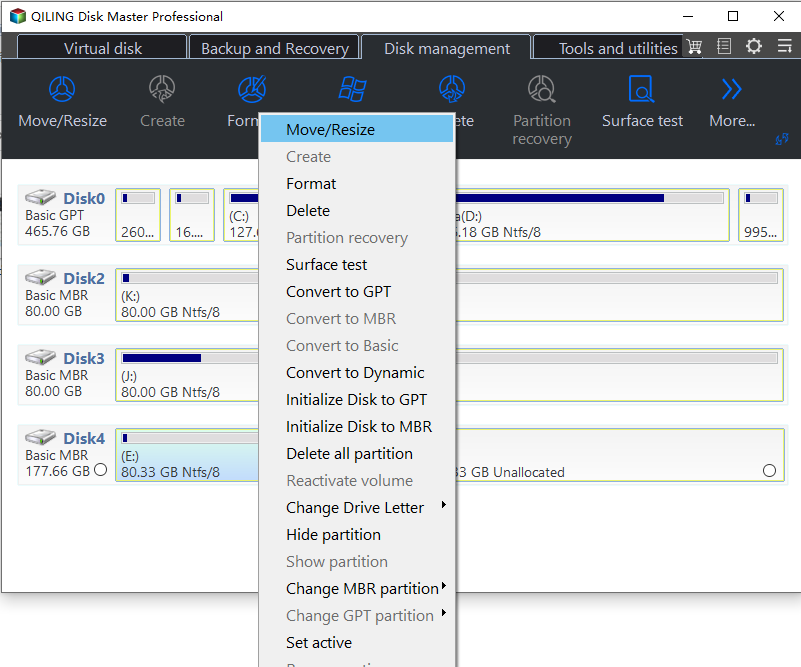
- At the Partition Manager section, right-click on a partition next to the target partition and select "Resize/Move".
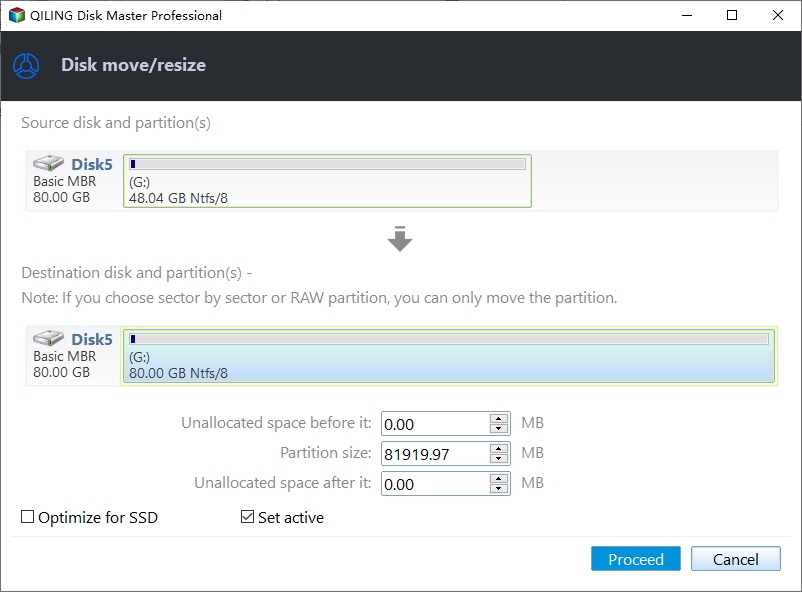
- Drag the partition ends to free up space, leaving enough unallocated space behind the target partition, click "Proceed".

Step 2. Extend the target partition.
Right-click on the target partition you want to extend and select "Resize/Move".
Drag the target partition handle into the unallocated space to extend partition.
Step 3. Keep all changes.
Click the "Proceed" button to keep all changes.

Guide 2. Shrink Volumes on External Hard Drives
Step 1: Locate and select target partition to shrink
Go to the Partition Manager section, right-click on the partition that you want to shrink and select "Resize/Move".
Step 2: Adjust to shrink partition
Use your mouse to drag the end of the target partition to shrink partition space.
You can also adjust the partition size box to shrink the target partition. Once done.
Step 3: Execute operation
Click the "Proceed" button to keep all changes.
Read the links below, and you can get more information on shrinking a volume:
Here are the reasons why Qiling Disk Master is your best choice to shrink or extend volumes on your external hard drive:
- Intuitive Interface: Qiling Disk Master provides a user-friendly interface that makes it easy to navigate and perform resizing tasks without confusion.
- Partitioning: This utility makes resizing the partitions on your external hard disk easy to meet your changing storage needs.
- Data Protection: During resizing, Qiling Disk Master uses advanced algorithms to safeguard your data from damage and loss.
- Fast and Efficient: With its optimized algorithms, Qiling Disk Master performs resizing tasks quickly and efficiently, saving you valuable time.
- Preview Functionality: Before applying any changes, you can preview the resizing operation to see the potential outcome, ensuring you are satisfied with the results.
Download this tool today and experience its user-friendly interface and powerful features. Say goodbye to complicated resizing procedures and enjoy a hassle-free experience!
Resize External Hard Drive On Windows Via Disk Management
Disk Management, a built-in utility in Windows, can be a valuable tool for resizing your external hard drive. This feature-rich utility offers several functions to assist in resizing your storage device effectively. With Disk Management, you can extend or shrink the volume of your external hard drive by allocating unallocated space or shrinking the available storage capacity. Disk management ensures the file system is resized appropriately without data loss. This makes storing files easy.
Step 1: Open Disk Management
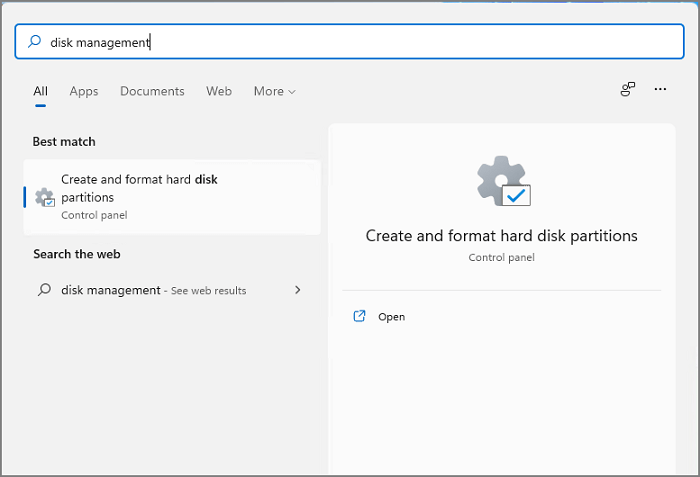
Connect the external hard drive to Windows and type Disk Management in the Windows search box. From there, select "Create and Format hard disk partitions". This will open the Disk Management utility.
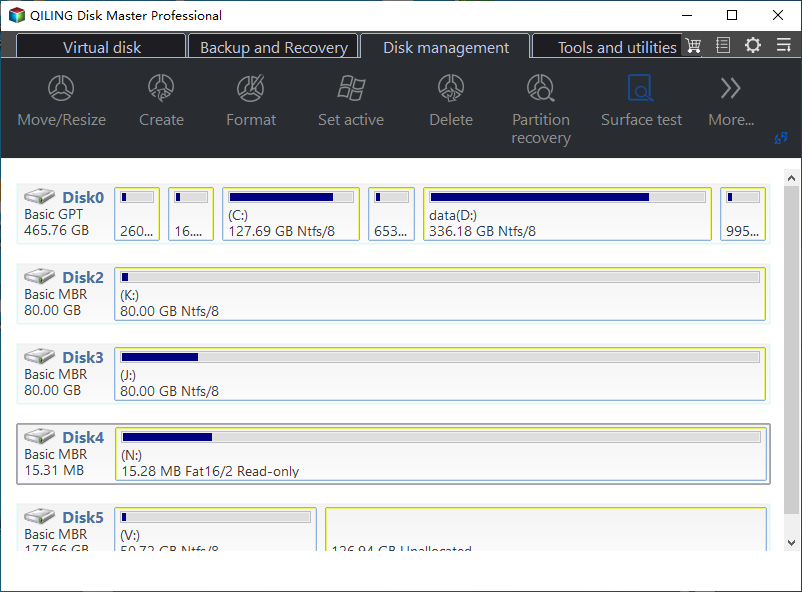
Step 2: Locate the External Hard Drive
Here you'll see the connected storage devices and find the external hard drive from the list. Note the available space in the drive. This will help you decide how much formatting it requires.
Step 3: Shrink or Extend the Volume
Select the "extended volume" or "shrink volume," depending on your need. Follow the prompt depending on whether you want to extend or shrink the volume. Extending volume will increase the space, and by shrinking the space, you can reduce space from your disk.
Sometimes, you may meet errors at this step; if so, click the links to fix them:
Step 4: Confirm the Resize Operation
Once the process is completed, disk management will change its graphical representation of the external hard drive's partitions. Now safely remove the hard drive from your computer. By checking its properties, verify that the external hard drive size has been adjusted successfully.
Choose Qiling Disk Master for a seamless resizing experience. Avoid the "Extend Volume Grayed Out" error encountered in Disk Management. With its intuitive interface and powerful features, Qiling Disk Master is the ideal tool for resizing your external hard drive efficiently.
If you don't want to install the tool on your PC, Qiling Disk Master also provides a portable edition. Check the following page to learn more.

Top 4 Best Partition Resizer Portable Review: Pros and Cons
This article will present pros and cons of 4 best partition resizer portable tool, continue reading and find the most suitable one for yourself.
Conclusion
In conclusion, whether you choose to resize your external hard drive using Disk Management or Qiling Disk Master, both methods provide user-friendly solutions for optimizing your storage capacity.
However, considering the intuitive interface, advanced features, and efficient performance, Qiling Disk Master is the top choice for resizing external hard drives on Windows. With its data protection mechanisms, fast operation, and preview functionality, Qiling Disk Master offers a hassle-free experience, making it the ideal tool for effortlessly managing and resizing your external hard drive. This tool can also help with the following tasks:
Also, share this article with your friends if you have found it useful.
How to Resize External Hard Drive FAQs
Here are some commonly asked questions regarding resizing external hard drives. You can consult them for further assistance.
1. Can we resize the external hard drive for free?
Yes, you can resize an external hard drive for free using Disk Management on Windows.
- Connect your external hard drive to your computer Windows. Follow the below-given steps to carry out the procedure.
- To access Disk Management, press the Windows key, type 'Disk Management,' and pick 'Create and format hard disk partitions.'
- Select the external hard drive you want to resize and select whether you want to enlarge or shrink its space.
Follow the instructions to resize the partition or volume and confirm the process. Remove the external hard drive once done.
2. Why can't I resize my external hard drive?
Several common reasons could hinder you from resizing your external hard drive, such as insufficient unallocated space, unsupported file system, disk errors or corruption, and hardware limitations.
If you encounter difficulties despite checking these factors, it may be beneficial to consult technical support or seek assistance from an expert to address the issue effectively.
3. How do I shrink my external hard drive?
Here is how you can shrink your external hard drive:
1. Connect your external hard drive to your Windows computer.
2. Open Disk Management and select 'Create and format hard disk partitions.'
3. Locate your external hard drive in Disk Management and select 'Shrink Volume.'
4. Enter the space you want to reduce from the total size and follow the prompts to complete the procedure.
Related Articles
- [Fixed] Hard Drive or C Drive Full for No Reason in Windows 10/8/7
- How to Install Windows 11 from USB Step by Step