How to Fix Windows 10 Boot Loop | 100% Working Solutions
In the vast realm of technology, encountering challenges is inevitable, and one prevalent issue that many Windows 10 users face is the frustrating phenomenon of the "Windows 10 Boot Loop." Picture this: you power up your computer, eagerly anticipating a productive day, only to find it stuck in a perpetual loop, unable to progress beyond the boot screen.
Windows 10 may stuck in boot loop after reset or update. But fret not because, in this article, Qiling Software delves deep into the intricacies of this problem, offering you not just a solution but a reliable one that guarantees a swift escape from this annoying loop.
How to Fix Windows 10 Boot Loop
Windows 10 getting stuck in a boot loop can prevent you from starting your computer. This section will lead you to solve the problem quickly. Besides, we also provide additional ways to help you solve the Windows 10 Infinite Boot Loop Problem due to different reasons.
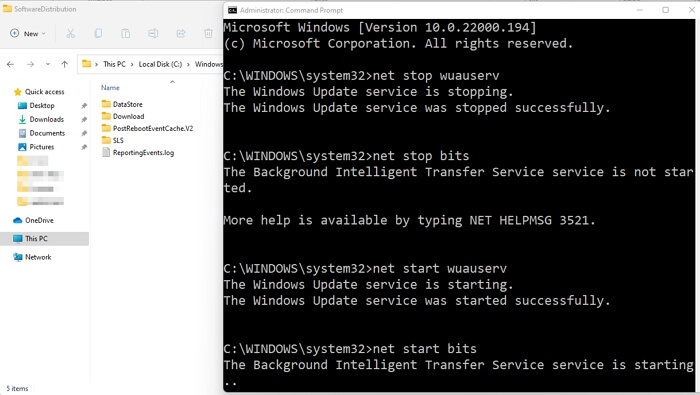
How to Fix Windows 11 Update Stuck at 100% | Full Guide
The Windows 11 update downloading process may get stuck at 100% when you upgrade to Windows 11. Luckily, in this guide, you will get efficient and quick solutions to fix the Windows 11 stuck at 100% error.
Quick Guide to Fix Windows 10 Boot Loop
1. Remove the Peripheral and Perform a Hard Reset
This procedure is foundational, addressing potential external interferences and clearing system glitches. By disconnecting peripherals and executing a hard reset, you can effectively troubleshoot the Windows 10 boot loop after the update issue.
Step 1. Unplug any external hard drives, printers, USB devices, or peripherals. Then, shut down your computer.
Step 2. Remove the battery and unplug the power cables using a laptop.
Step 3. Press and hold the power button on your computer for about 15-20 seconds.
Step 4. After the hard reset, reconnect the power source and plug in only essential peripherals.
Now, turn on your computer and check if the Windows 10 boot loop after the reset issue has been resolved.
2. Use the Windows 10 Boot Loop Automatic Repair Tool
Regarding resolving intricate boot issues, the Windows Boot Repair Tool in Qiling Disk Master Pro stands out as a reliable ally. This tool is engineered to tackle many hard disk and system boot errors, including system failures, blue screens, and the irritating Windows 10 infinite reboot loop. Its automatic repair feature effectively addresses issues arising after the system resets, making it an indispensable tool in your troubleshooting arsenal.
Step 1. Start Qiling Disk Master after connecting the external drive/USB to your computer, go to "Tools and utilities" tab page, and click "Create bootable media".

Step 2. Select an available USB Drive or CD/DVD and click "Proceed". You can also burn the Windows ISO file to the storage media.
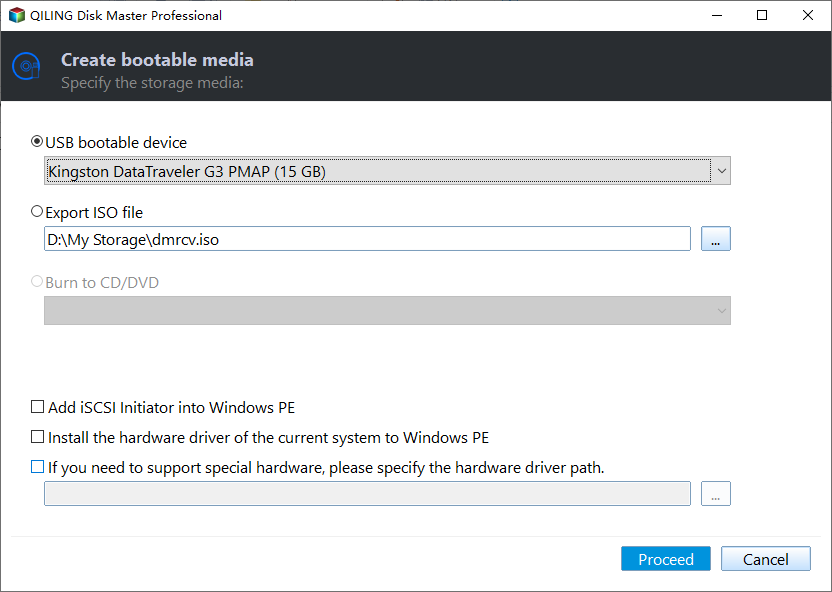
Step 3. Connect the created bootable drive to the new computer and reboot the computer by pressing and holding F2/Del to enter the BIOS. Then, set the WinPE bootable drive as the boot disk and press F10 to exit.
Step 4. Boot the computer again and enter the WinPE interface. Then, open Qiling Disk Master and click "Fix Boot" under the "Tools and utilities" tab page.
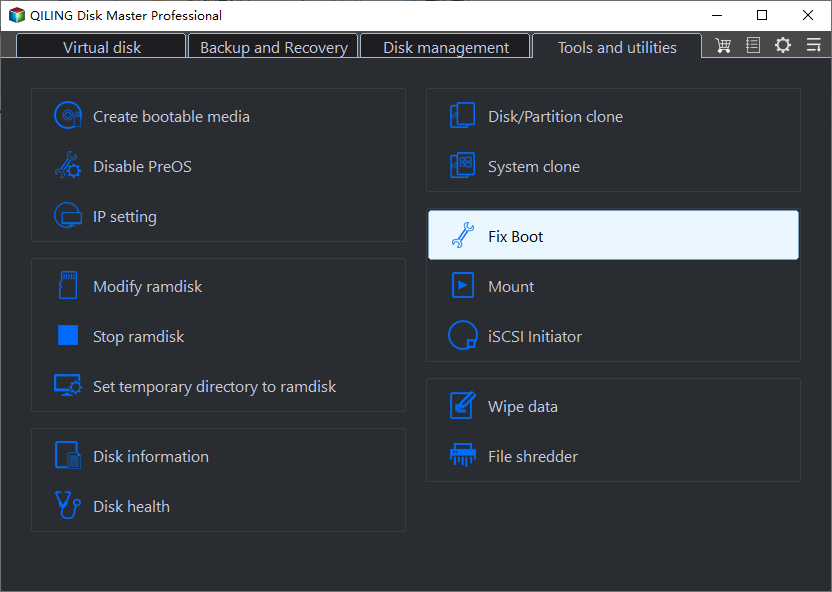
Step 5: Select the system you want to repair and click "Proceed".
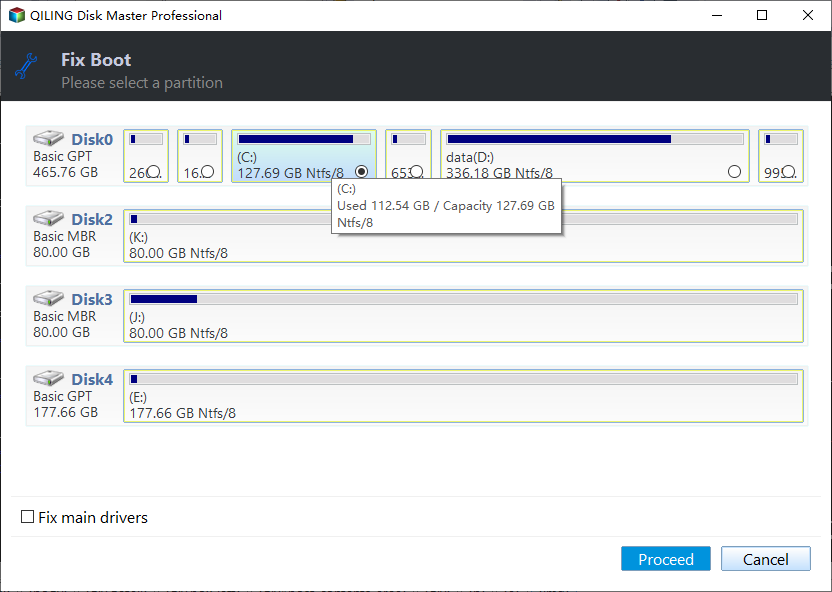
Step 6. Wait a moment, and you will receive an alert that the system has been successfully repaired. Click "OK" to complete the boot repair process.
As one of the best Windows 10 boot repair tool, Qiling Disk Master also provides the following functions to manage your PC better:
- Fix all kinds of color screen problems, including blue screen, black screen, yellow screen and other problems. such as Acer laptop screen black.
- Fix computer stuck screen or stuck in startup loop problems, such as ASUS stuck on logo.
- Provide functions to optimize the hard disk, such as hard disk upgrade, 4K alignment, etc.
- Repair other hard disk problems, such as bad sectors or file system errors.
Download this tool and you can enjoy the benefit it brings to you.
More Detailed Guides to Fix Windows Boot Loop
Now that we've covered the initial steps let's explore comprehensive methods to tackle the Windows 10 continuous reboot issue head-on. This section will guide you through detailed solutions, ensuring a smooth troubleshooting experience.
- Method 1: Disable Automatic Restart
- Method 2: Boot in Safe Mode
- Method 3. Check for File System Errors
- Method 4. Update Drivers
- Method 5. Delete the Wrong Registry
- Method 6. Repair Boot Loop via Command Prompt
- Method 7. Fresh Installation of Windows
If you find these methods helpful for you to solve the Windows 10 infinite reboot loop, you can share this post to others who need it!
Method 1: Disable Automatic Restart
When your system encounters a critical error, it restarts automatically, causing the boot loop. Disabling automatic restart can provide insights into the underlying issue.
Step 1. When your computer restarts, hit the F8 key repeatedly before the Windows logo appears.
Step 2. Select Advanced Boot Options from the menu.
Step 3. Navigate to the Disable Automatic Restart on System Failure option with the arrow keys.
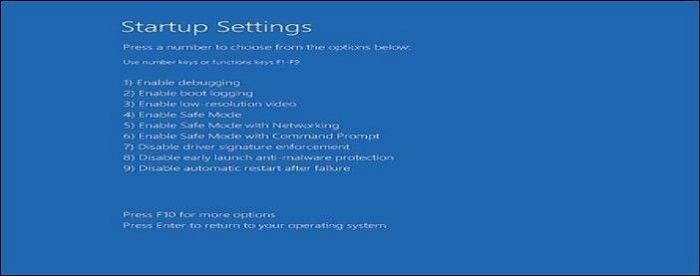
Step 4. Press Enter to apply the change.
Method 2: Boot in Safe Mode
With the fewest drivers installed, your computer can boot in safe mode, which can help you figure out whether third-party applications or drivers are causing the boot loop.
Step 1. Press the F8 key continuously until the Windows logo appears after you restart your computer.
Step 2. From the Advanced Boot Options menu, choose Safe Mode.
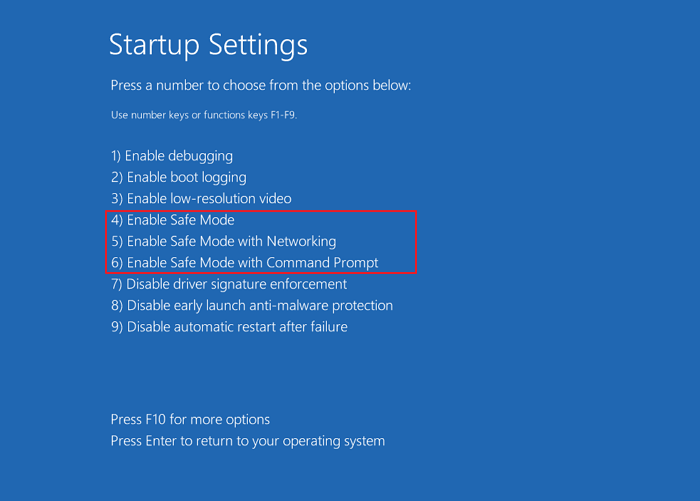
Step 3. Press Enter to start Windows in Safe Mode.
Method 3. Check for File System Errors
In our quest to resolve the Windows 10 boot loop, Qiling Disk Master unveils a powerful feature: the Check File System. This feature operates effectively through a bootable USB drive, providing an independent environment to diagnose and repair file system errors.
Creating a bootable USB with Qiling Disk Master empowers you to check for errors in your system's file structure. By booting from this customized USB drive, you gain access to a specialized environment where you can execute the Check File System feature. This enables you to meticulously inspect your system, ensuring the integrity of your files and resolving any underlying errors that might be causing the Windows 10 boot loop.
Guide 1. Create Qiling Bootable USB
Guide 2. Check File System Error
Step 1. Right-click the target partition that has a problem.
Step 2. Choose "Advanced" > "Check File System".
Step 3. Confirm if you want to hide the partition or not.
Step 4. In the Check File System window, check the "Fix the error on the disk" option.
Step 5. Click "Proceed" to check errors on your partition.
With Qiling Disk Master's intuitive interface and robust functionality, diagnosing and rectifying file system errors becomes a seamless process, guiding you toward a stable and error-free Windows operating system.
If you meet other errors, such as the hard drive not showing up, Qiling Disk Master provides format/create partitions features to solve your error.
Detailed Reading: USB Flash Drive Not Showing Up in Windows 11
Method 4. Update Drivers
Outdated or incompatible drivers can wreak havoc on your system's stability. Keeping your drivers up-to-date ensures smooth operation and can resolve the Windows 10 boot loop. But your should do the operation in Safe Mode.
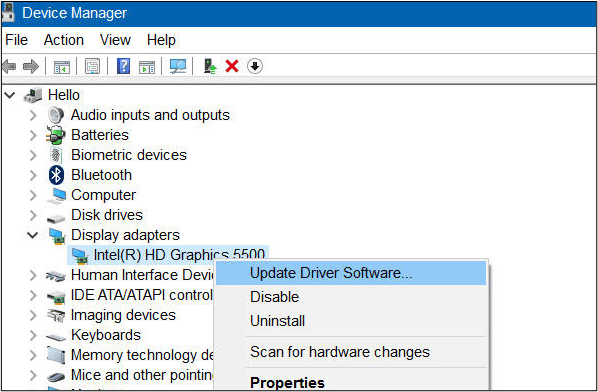
Step 1. Right-click on "This PC/My Computer," select "Manage," and then click on "Device Manager" in the left pane.
Step 2. Find the device, right-click, and select Update Driver. Choose Search automatically for updated driver software.
Method 5. Delete the Wrong Registry
Incorrect registry entries can lead to boot issues. Deleting problematic entries can rectify the problem.
Step 1. Type "regedit" in the Windows search bar and press "Enter."
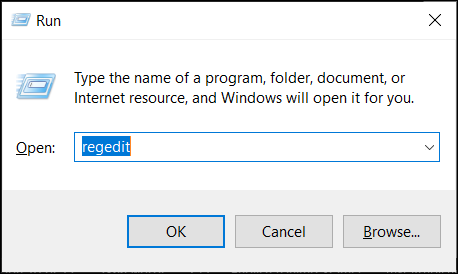
Step 2. Identify the problematic registry key, right-click, and select "Delete."
Method 6. Repair Boot Loop via Command Prompt
The Command Prompt offers powerful tools for troubleshooting. Repairing the boot loop through Command Prompt can restore normal system booting.
Step 1. Boot from a Windows installation media and select Repair your computer>Troubleshoot>Advanced options>Command Prompt.
Step 2. Type sfc/scannow and press "Enter" to check for system file corruption.

You May Also Like:
Method 7. Fresh Installation of Windows
A fresh Windows installation can provide a clean slate when all else fails, eliminating persistent boot issues.
Step 1. Use the Media Creation Tool for a bootable USB drive or DVD.
Step 2. After inserting the installation disc, restart your machine. Boot from the media and follow the on-screen prompts for installation.
Following these steps, you can navigate through advanced solutions, resolving the Windows 10 boot loop issue effectively and restoring your system to optimal performance. For more detailed information about install Windows, click the link below:
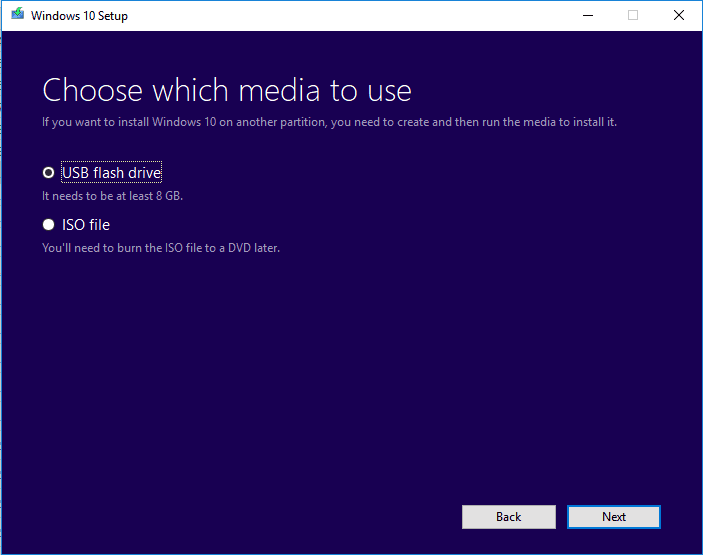
How to Install Windows 10 from USB Drive [2023 Newest Guide]
This tutorial will concentrate on installing Windows 10 from USB. When your computer does not use the OS installation CD, you can install Windows 10 via Qiling Disk Master or Windows Media Creation Tool.
Why Windows 10 Gets Stuck in Boot Loop
Understanding the reasons behind the perplexing Windows 10 boot loop is crucial for effective troubleshooting. Let's unravel the common culprits that cause this frustrating issue, shedding light on each potential trigger.
- Windows Updates: Sometimes, updates can inadvertently disrupt the boot process, leading to loops that seem endless.
- Incompatible Device Drivers: Outdated or incompatible drivers can clash with your system, causing it to get stuck in a loop during bootup.
- Faulty Applications: Certain applications, especially those that start during boot, might malfunction and create a loop when launching.
- Malware Attack: Malicious software can infiltrate your system, causing disruptions that result in the boot loop phenomenon.
- Hard Disk Errors: Physical or logical errors on your hard disk can prevent Windows from loading correctly, initiating a cycle of restarts.
- Windows System Registry Problems: Corrupted or incorrect registry entries can interfere with the boot process, triggering a loop.
By identifying these potential triggers, you gain valuable insights into the origins of the Windows 10 boot loop issue and fix the error successfully. You can click the social buttons and share this guide with others who also meet the Windows reboot loop after update or other situations!
Conclusion
The Windows 10 boot loop is a formidable challenge, disrupting our daily digital endeavors. However, armed with the knowledge acquired in this comprehensive guide, you can now navigate this frustrating challenge.
There are various solutions, from basic troubleshooting like removing peripherals and performing a hard reset to advanced methods such as disabling automatic restart and repairing the boot loop via Command Prompt. We've identified the underlying issues: Windows updates, incompatible drivers, faulty applications, malware attacks, hard disk errors, and Windows system registry problems.
To resolve your Windows 10 boot loop, consider Qiling Disk Master, a powerful tool with advanced features to make your troubleshooting experience seamless. Embrace these solutions, and let your system breathe freely again. Your journey to an uninterrupted computing experience starts here.
FAQs About Windows 10 Boot Loop
You might still have lingering questions about the Windows 10 boot loop. Below, we've answered some common queries to provide further clarity.
1. How do I fix the BIOS loop?
Here are the steps you can follow to fix the BIOS loop:
- Completely shut down your computer.
- Power it back on and start pressing the BIOS access key immediately. Keep pressing it until the BIOS setup utility screen appears.
- Once in the BIOS settings, navigate to the "Boot" or "Boot Order" section.
- Save your changes and exit the BIOS.
Let your computer restart normally. Check if it boots into the operating system without getting stuck in the BIOS loop.
2. Why is my computer stuck on restarting Windows 11?
Your computer might get stuck on restarting Windows 11 due to several reasons. Here are some common causes:
- Windows Update
- Incompatible device drivers
- Faulty applications
- Malware attack
- Hard disk errors
- Windows system registry problems
3. How do you fix a PC stuck in a boot loop with no display?
Fixing a PC stuck in a boot loop with no display involves a systematic approach. Here is how you can resolve the issue:
- Ensure all hardware components are connected.
- Disconnect unnecessary peripherals.
- If you have a laptop, connect it to an external monitor to check if the issue is with the laptop screen.
- Try reseating or replacing the graphics card, as it might be causing the no-display problem.
- Inspect the motherboard and CPU for potential issues.
Related Articles
- Basic Disk VS Dynamic Disk (The Features, Differences, and Conversion)
- Top 7 Best Partition Recovery Software for Windows 11/10/8/7 in 2023
- 5 Ways to Hide Drives in Windows 10 | Check Your In-depth Tutorial
- The Disk Is Write Protected in Windows 11/10/8/7 (6 Fixes)