How to Fix Windows 11 Black Screen with Cursor| 100% Works
When you turn on your Windows 11 computer, you see the Windows 11 black screen with a cursor, and you don't know what's this and what you should do. It could be a stunningly tense situation for you. But don't worry if you ever find a Windows 11 black screen with a cursor because Qiling provides quick solutions step-by-step, and you'll also know the actual reasons behind this issue. So follow this guide entirely and learn a few effective fixes to quickly fix this Windows 11 black screen problem.

Quick Guide to Fix Windows 11 Black Screen with Cursor
First, try some quick fixes such as checking physical hardware to fix the Windows 11 black screen with cursor, and if quick solutions don't work, then try other solutions.
Guide 1. Check the Physical Hardware and Connections
Before diving into software solutions, it's crucial to rule out any hardware-related issues. Inspect your hardware, such as cables and connections, for damage or loose connections.
If you identify a particular hardware component as a potential problem, consider substituting it with a functioning replacement to test whether this resolves the issue. Additionally, be vigilant about the monitor, as certain problems could be a source of the error.
Guide 2. Use Professional Windows Boot Repair Tool
If you want to fix this issue quickly without hassle and time-consuming efforts, use a professional Windows boot repair tool such as Qiling Disk Master Pro. Qiling Disk Master's "boot repair" feature allows you to diagnose and resolve various boot-related problems, making it a valuable asset when troubleshooting issues that prevent your operating system from starting correctly. Whether it's due to corrupted boot records, missing system files, or other related errors, this tool provides an accessible solution.
Download Qiling Disk Master and quickly fix any hard disk and system boot errors, including system failure, blue screen, and black screen.
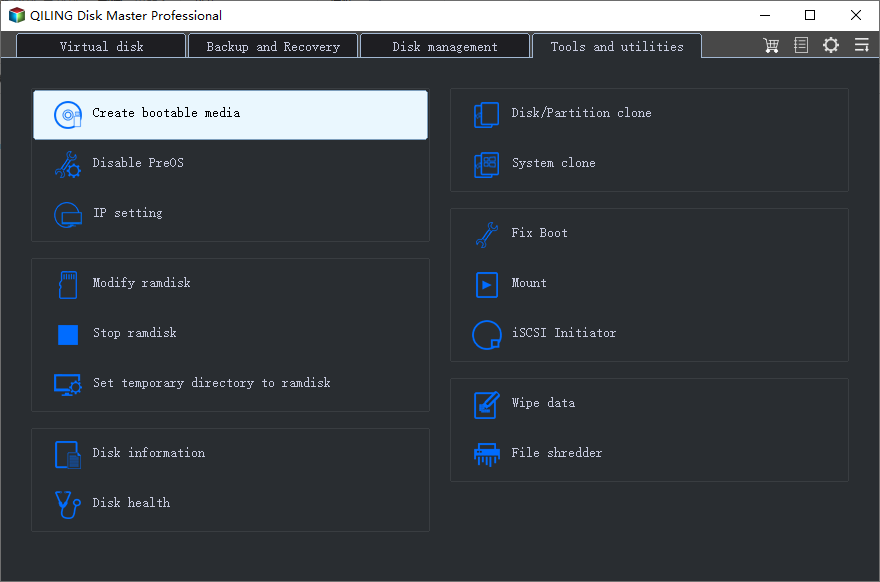
Step 1. Start Qiling Disk Master after connecting the external drive/USB to your computer, go to "Tools and utilities" tab page, and click "Create bootable media."
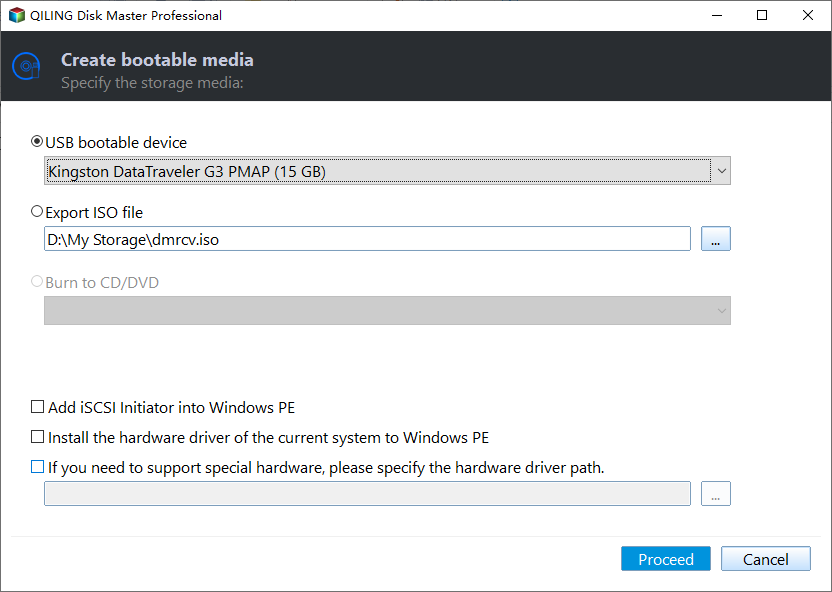
Step 2. Select an available USB Drive or CD/DVD and click "Proceed". You can also burn the Windows ISO file to the storage media.
Step 3. Connect the created bootable drive to the new computer and reboot the computer by pressing and holding F2/Del to enter the BIOS. Then, set the WinPE bootable drive as the boot disk and press F10 to exit.
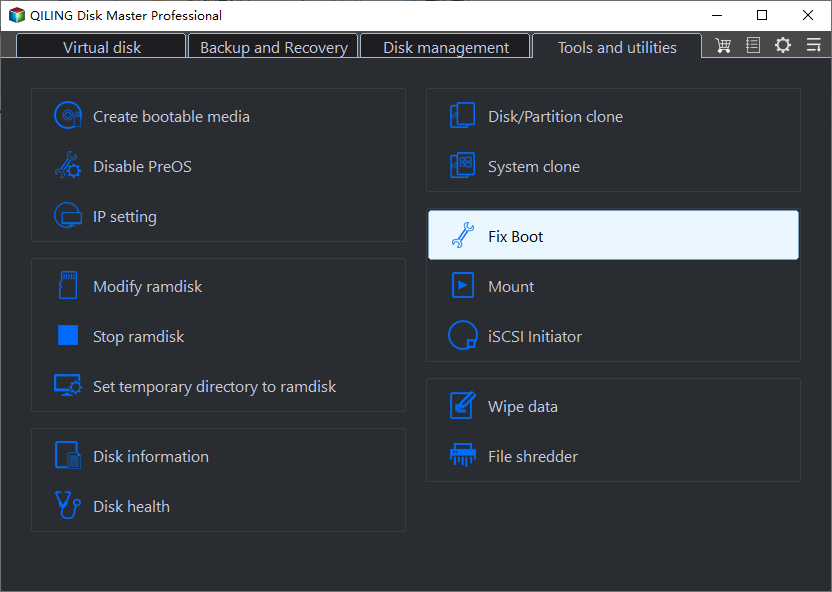
Step 4. Boot the computer again and enter the WinPE interface. Then, open Qiling Disk Master and click "Fix Boot" under the "Tools and utilities" tab page.
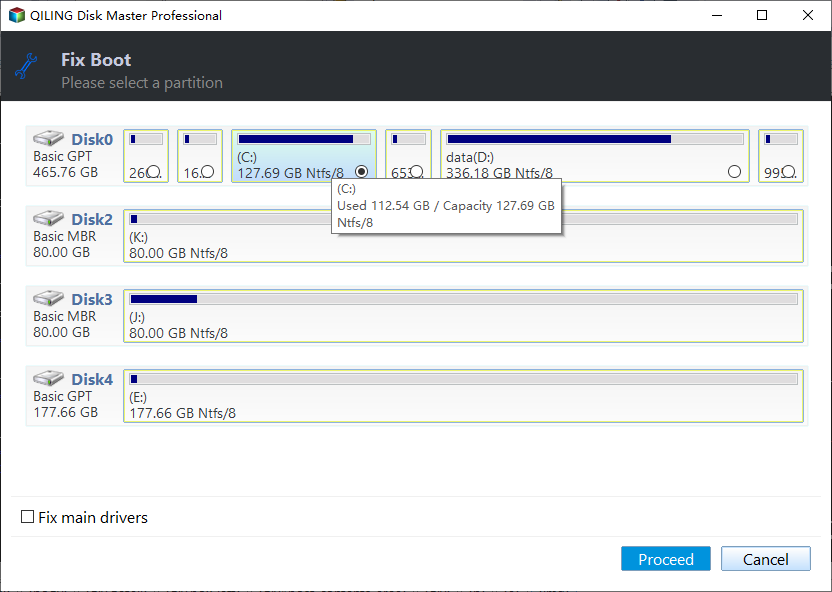
Step 5: Select the system you want to repair and click "Proceed".
Step 6. Wait a moment, and you will receive an alert that the system has been successfully repaired. Click "OK" to complete the boot repair process.
Qiling Disk Master is one of the best Windows boot repair tool. It can fix most of the boot errors efficiently. The following are some typical examples:
Other Solutions to Fix Windows 11 Black Screen With Cursor Manually
This section will give you six more detailed ways to help you solve the Windows 11 black screen problem. If you know what is causing the problem, you can jump to the corresponding program:
- Option 1. Boot into Safe Mode
- Option 2. Update/Rollback the Graphics Card Driver
- Option 3. Uninstall Windows Update
- Option 4. Check for File System Errors
- Option 5: Run SFC and DISM
- Option 6. Reinstall Windows 11
Next, we will give detailed steps for each option. If you find the solutions in this article helpful for fixing Windows 11 black screen with cursor, you can also click on the social buttons below to share this article with others in need.
Option 1. Boot into Safe Mode
If your Windows 11 computer fails to boot completely, you can troubleshoot by booting into Safe Mode. This option lets your computer start with only the necessary processes, drivers, and services, ensuring stability.
Follow the steps:
Step 1. Press the Power button. Hold down the Power button while Windows loads until the computer shuts off. Repeat this process three times to enable Windows to enter Startup Repair mode. From there, select Advanced options.
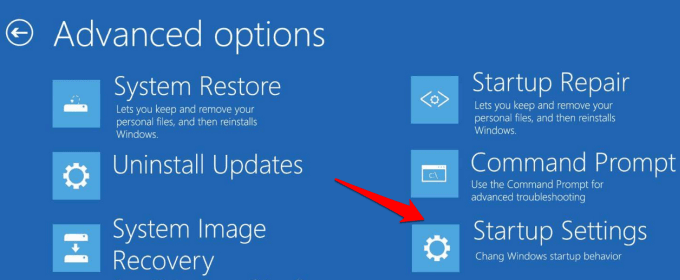
Step 2. Select "Troubleshoot" and click "Advanced options".
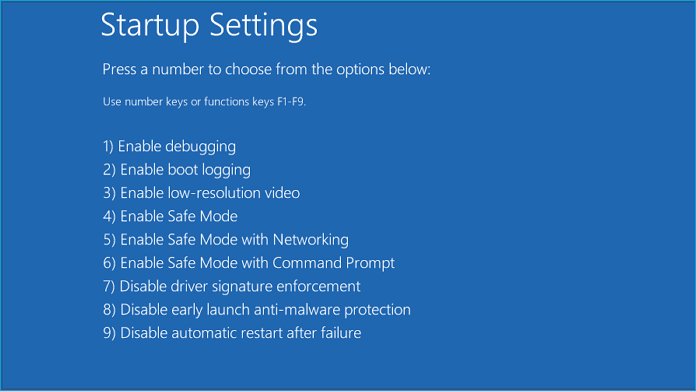
Step 3. Select Startup Settings.
Step 4. Restart the PC.
Step 5. Press F5 or F4 from your keyboard to boot your Windows 11 into Safe Mode or Safe Mode with networking.
You can also try using that method when your computer keeps restarting. In order to learn more about it, click on the link below.
How to Fix Computer Stuck on Restarting
Is your computer stuck on restarting? Here's a quick and easy guide on how to fix your computer stuck on restarting. Just follow the methods and start using your PC again.
Option 2. Update/Rollback the Graphics Card Driver
While updates are essential for optimal computer performance, they can sometimes cause errors or bugs. Sometimes, outdated drivers also cause this issue; both cases are possible. Here, we'll try to fix this issue by updating or rollbacking graphics card drivers.
Follow the steps:
Step 1. Right-click the Windows start symbol in the lower left corner and choose Device Manager from the menu that appears.
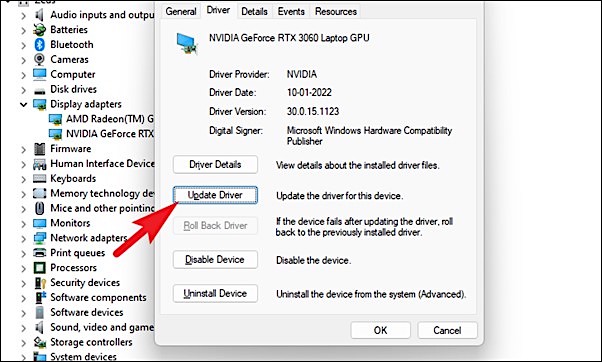
Step 2. Expand "Display adapters" and double-click on the graphics driver.
Step 3. Click the "Driver" tab, and from here, you'll see both options, "Update Driver" and "Roll Back Driver." Perform any action accordingly to fix the issue.
Option 3. Uninstall Windows Update
If you've recently updated your Windows 11 and are now encountering a black screen issue, consider uninstalling the problematic update to resolve the problem.
Follow the steps:
Step 1. Open the Windows setting, click Windows Update, and select Update History.
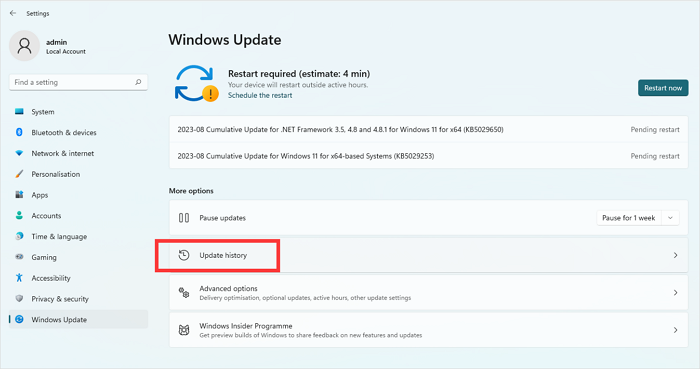
Step 2. Scroll down and go to Uninstall updates.
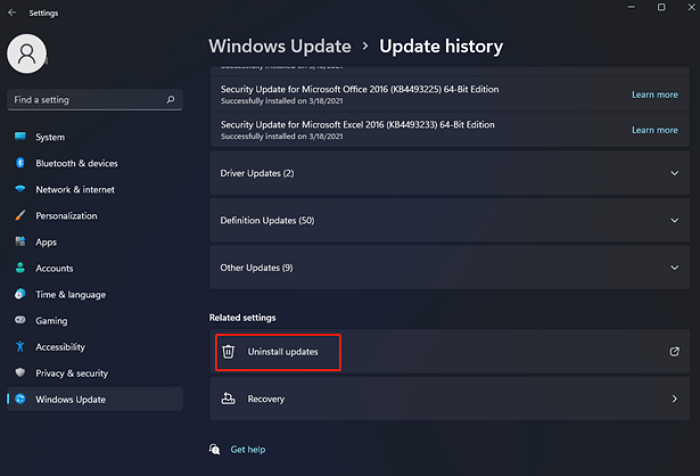
Step 3. Click Uninstall to uninstall each update.
Option 4. Check for File System Errors
File system errors can lead to various system problems, including the Windows 11 black screen issue. Here, we'll delve into using Qiling Disk Master to create a bootable USB drive, which will help you thoroughly inspect and repair any file system errors on your computer.
Stage 1. Create Qiling Bootable USB
Stage 2. Check Hard Drive Errors
Step 1. Start Qiling Disk Master after connecting the external drive/USB to your computer, go to "Tools and utilities" tab page, and click "Create bootable media".
Step 2. Select an available USB Drive or CD/DVD and click "Proceed". You can also burn the Windows ISO file to the storage media.
Step 3. Connect the created bootable drive to the new computer and reboot the computer by pressing and holding F2/Del to enter the BIOS. Then, set the WinPE bootable drive as the boot disk and press F10 to exit.
Step 4. Boot the computer again and enter the WinPE interface. Then, open Qiling Disk Master and click "Fix Boot" under the "Tools and utilities" tab page.
Step 5: Select the system you want to repair and click "Proceed".
Step 6. Wait a moment, and you will receive an alert that the system has been successfully repaired. Click "OK" to complete the boot repair process.
Option 5: Run SFC and DISM
By running SFC and DISM can repair Windows images. These commands are essential for repairing damaged files, including system and DLL files.
Follow the steps:
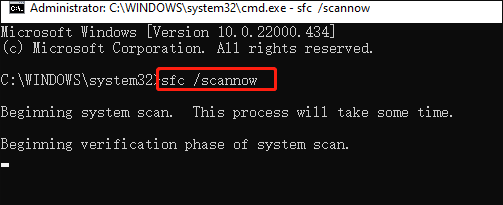
Step 1. Run Command Prompt as administrator.
Step 2. Write sfc /scannow and press Enter.
Step 3. If the issue persists, input "DISM.exe /Online /Cleanup-image /Restorehealth" and press Enter.
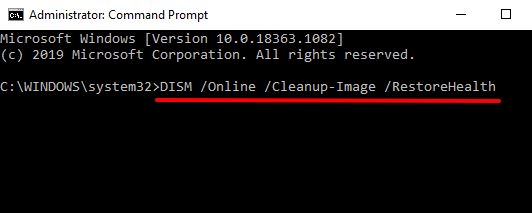
Step 4. Finally, Restart your computer.
Read Also: SFC SCANNOW Stuck
Option 6. Reinstall Windows 11
If all the above methods/options fail to fix the Windows 11 black screen with a cursor issue, the last option is reinstalling Windows 11.
To reinstall Windows 11, arrange a USB drive with a minimum of 8-16 GB and then create a Windows 11 bootable drive.
Refer to this article: Create Bootable USB from ISO
After creating a Windows 11 bootable USB, follow the steps to reinstall Windows 11:
Step 1. Connect the bootable USB to your computer, restart it, and press the Del or F2 button to enter BIOS.
Step 2. Configure your flash drive as the primary boot device and save your settings.
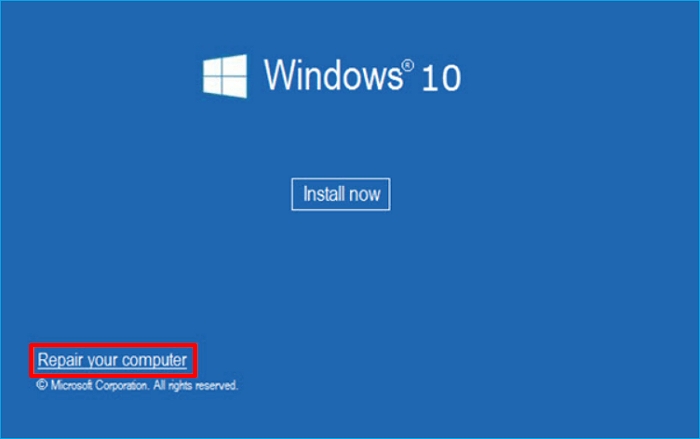
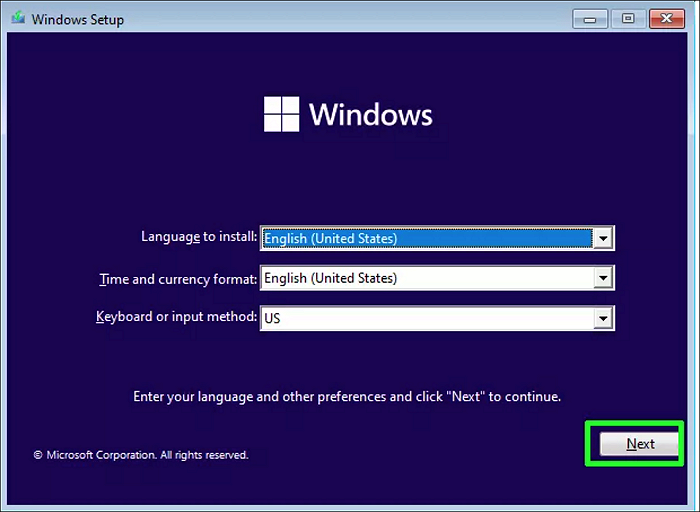
Step 3. Press any key when prompted to access setup and click "Next."
Step 4. Click "Install now".
Step 5. Input your product key or select "I don't have a product key."
Step 6. Choose your preferred Windows 11 version and click "Next".
Step 7. Then click Next after clicking "Accept" to agree to the terms of service.
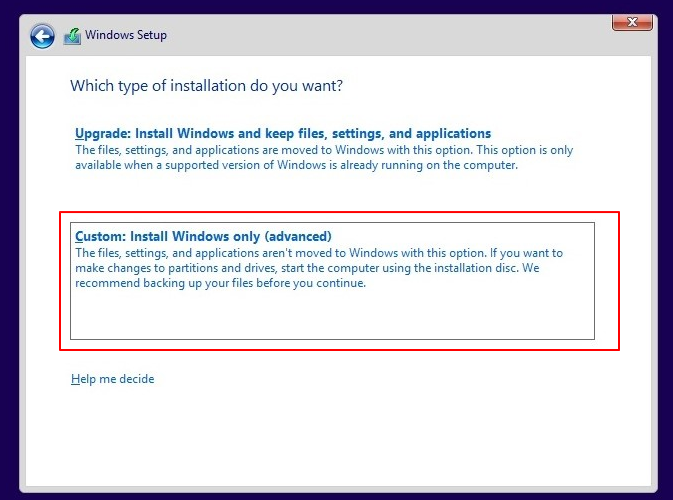
Step 8. Choose Custom Install.
Step 9. Choose your Primary drive and click Next.
Step 10. To finish the procedure, adhere to the on-screen instructions.
Note: This method will relocate your files to a Windows.old directory, allowing you to restore your data from the Windows.old folder. Acting promptly is essential, as these files will be automatically removed after 10 days.
Other topics related to install Windows:
Why Windows 11 Black Screen with Cursor?
Understanding the causes behind the Windows 11 black screen with a cursor is crucial for finding the right solutions. There are numerous causes for this problem, including:
- Graphics Driver Corruption: Problems with your graphics drivers can lead to a black screen with a cursor. Outdated, incompatible, or corrupt graphics drivers may disrupt the display.
- System File Corruption: Corruption in critical system files can result in startup issues, including the black screen problem. These files are essential for the functioning of Windows 11.
- Windows Update Error: Sometimes, Windows updates can go wrong, causing conflicts or issues that lead to a black screen. An error during an update process can leave your system in this state.
- Multi-Monitor Connections: Configuring multiple monitors can occasionally result in a black screen issue. Misconfigurations or driver problems in multi-monitor setups can cause this problem.
- Abnormal Screen Display: Irregular screen resolutions, refresh rates, or other display settings can trigger a black screen. These settings may become incompatible with your hardware.
- Application Compatibility: Certain applications may not be compatible with Windows 11, and using them can lead to the black screen problem. This can happen when running older or poorly optimized software.
- Hardware Issues: Problems with your hardware components, such as malfunctioning RAM, a faulty hard drive, or damaged cables, can cause your system to display a black screen with a cursor.
With a clear understanding of these potential causes, it's essential to explore the solutions and take action to resolve the Windows 11 black screen issue.
You May Also Like:
Conclusion
In this tutorial, we've examined the reasons behind the Windows 11 black screen issue with a cursor and provided insights into how to address it effectively. We aim to help you regain computer control and eliminate this frustrating problem. We strongly encourage you to explore the most efficient solutions outlined in this article. Additionally, consider leveraging the advanced features of Qiling Disk Master to simplify the troubleshooting process and restore your system to full functionality. Don't let the black screen issue disrupt your computing experience—take action today to resolve it and enjoy a seamless Windows 11 experience.
FAQs About Windows 11 Black Screen with Cursor
If you're still seeking answers or have more questions about dealing with the Windows 11 black screen issue, the below FAQs may be helpful for you.
1. How do I fix my black screen on Windows 11 after sleep?
When your Windows 11 screen goes black after waking from sleep mode, try adjusting your power settings to prevent this issue. Navigate to "Settings," then "System," and choose "Power & sleep" to configure your sleep settings and to avoid screen blackouts.
2. Why is my Windows 10 black screen with cursor blinking?
A blinking black screen on Windows 10 can result from various issues, such as graphics driver problems or system file corruption. You can tackle this by updating or reinstalling your graphics drivers or using tools like System File Checker (SFC) and Deployment Imaging Service and Management Tool (DISM) to address potential system file issues.
3. How do I fix the black screen on Windows 11 without a cursor?
If you're encountering a black screen on Windows 11 without a cursor, the problem might be related to different causes than cursor-related black screen issues. To resolve this, follow some of the solutions mentioned in this guide, like checking for system file corruption, updating graphics drivers, or reinstalling Windows.
Related Articles
- Fixes for (External) Hard Drive Shows Wrong Capacity
- How to Install Windows 10 on Second Hard Drive | 2 Ways🔥
- How to Convert MBR to GPT without Losing Data Windows Server
- How to Find Large Files on Windows 10 | Quick Guide💡