7 Easy Ways to Fix Windows 11 Stuck on Boot Screen
Seeing a Windows 11 PC stuck on a boot screen and continuously restarting is frustrating. Several users like me have faced the issue. Moreover, you may notice minor problems and general sluggishness before the boot loop starts.
However, Qiling will walk you through several DIY fixes and ways to solve this issue. You will also get to know about the potential factors that were causing it!
This problem arises from a faulty OS update, a malware attack, or as simple as incompatible driver upgrades. Now that you understand the potential reasons, we will help you fix the issue. It can be resolved in two ways - first, by using Window's in-built utility features, and second, by using a third-party tool Qiling Disk Master.
| 🆚Comparison | 🥇Qiling Disk Master | 🥈Window's in-Built Utility |
|---|---|---|
| 🔨Operation Difficulty | Easy | Medium |
| 🚩Target Users | Beginners and Pros | Better for Pros |
| 💻Efficiency | High, professional tool to help with PC boot issues. | Medium, manual processes and commands may lead to other errors and data loss. |
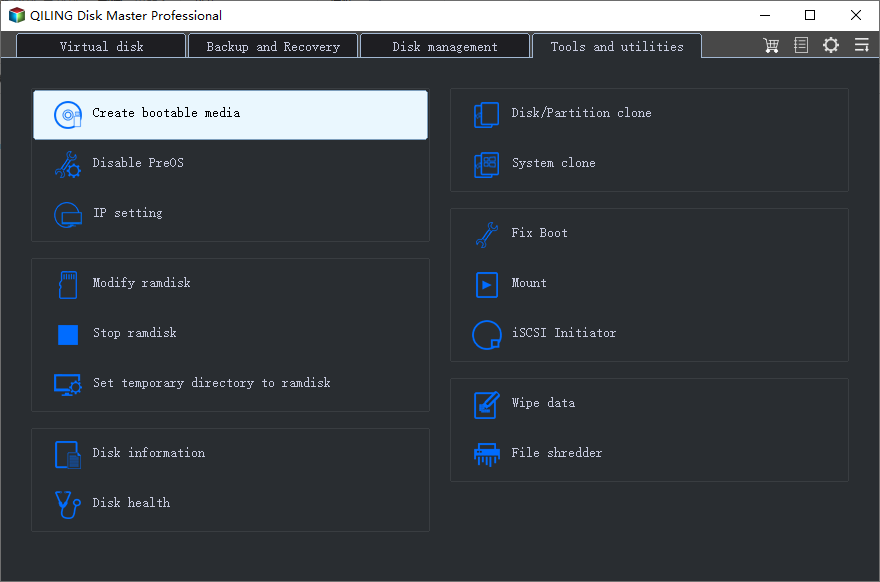
Use Third-Party Software to Fix Windows 11 Stuck on the Boot Screen
These methods are challenging to implement, which often causes device failure. In such a scenario, third-party tools emerge, which eases up. One of the most effective ones is the Qiling Disk Master. It is a Windows disk and partition manager to solve the Windows 11 stuck-in Boot Screen issue. Download this tool and try the following fixes.
Option 1. Apply Boot Repair
To save your time and energy, we recommend you use the "Boot Repair" feature of Qiling Disk Master, which can fix various Windows startup problems.
All you need to do is as follows:
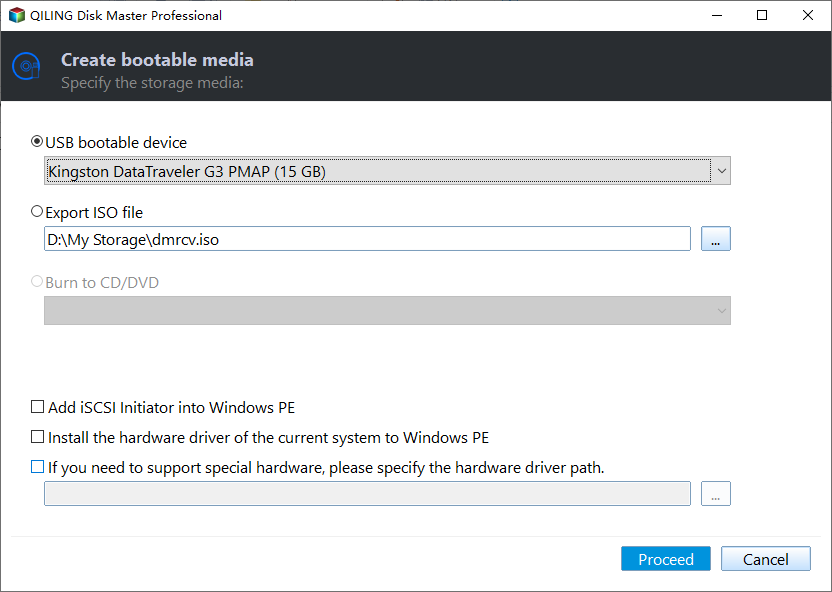
Step 1. Start Qiling Disk Master after connecting the external drive/USB to your computer, go to "Bootable Media," and click "Create bootable media."
Step 2. Select an available USB Drive or CD/DVD and click "Create." You can also burn the Windows ISO file to the storage media.
Step 3. Connect the created bootable drive to the new computer and reboot the computer by pressing and holding F2/Del to enter the BIOS. Then, set the WinPE bootable drive as the boot disk and press F10 to exit.
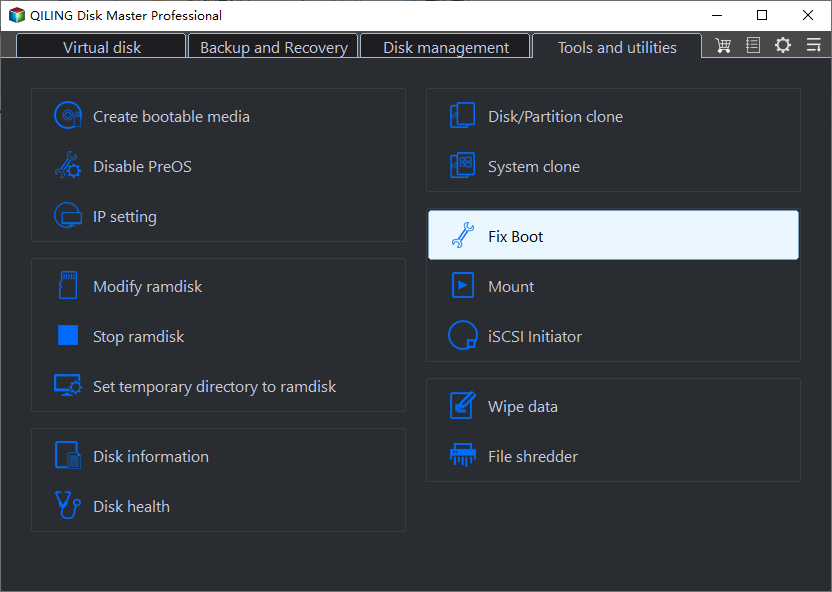
Step 4. Boot the computer again and enter the WinPE interface. Then, open Qiling Disk Master and click "Boot Repair" under the "Toolkit" option.
Step 5: Select the system you want to repair and click "Repair."
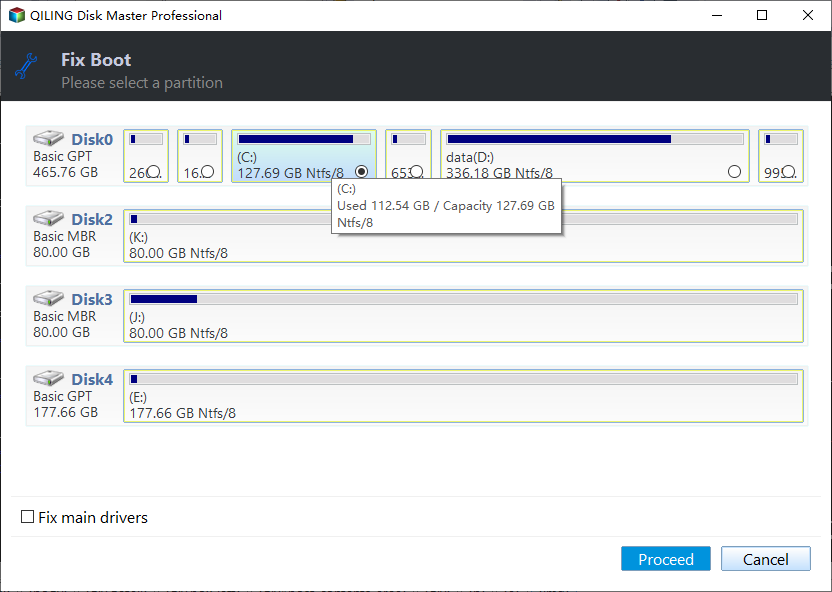
Step 6. Wait a moment, and you will receive an alert that the system has been successfully repaired. Click "OK" to complete the boot repair process.
In addition, Qiling Disk Master also helps resolve the issue by checking for disk errors and rebuilding the MBR, which stands for Master Reboot Record. It's beneficial if you do not wish to get into too much technical stuff.
Option 2. Check Partition Errors
Step 1. Open Qiling Disk Master on your computer. Then, locate the disk, right-click the partition you want to check, and choose "Advanced" > "Check File System".
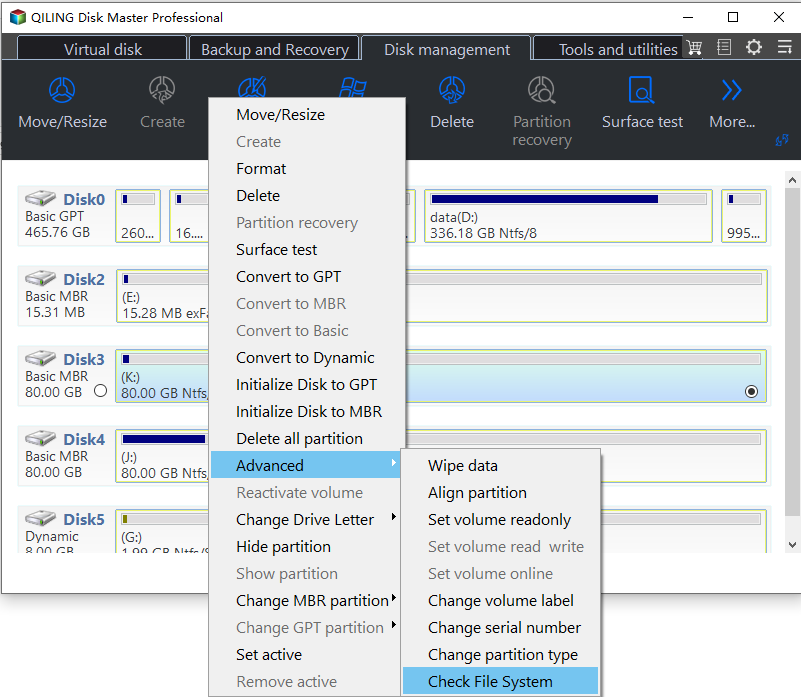
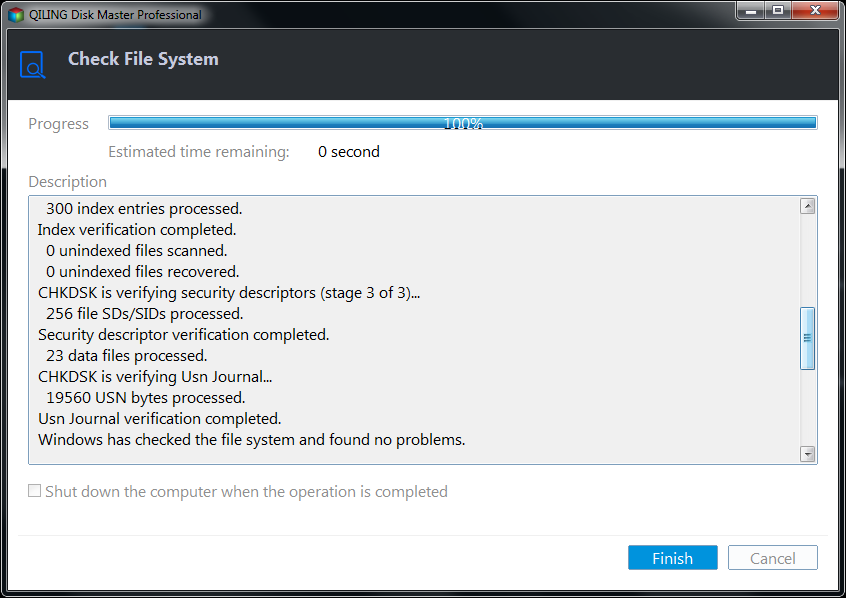
Step 2. In the Check File System window, keep the "Fix the error on the disk" option selected and click "Proceed".

Step 3. The software will begin checking your partition file system on your disk. When it completes, click "Finish".
Besides checking partition errors, Qiling Disk Master can also do the following:
Option 3. Rebuild MBR
Step 1. Create a WinPE bootable disk
- Launch Qiling Disk Master, and click "Bootable Media" on the toolbar. Select "Create bootable media".
- Click "Next" to finish the process.
Step 2. Boot Qiling Disk Master Bootable USB
- Connect the bootable USB or CD/DVD to your PC.
- Press F2 or Del when you restart the computer to enter the BIOS screen. Set and boot your computer from "Removable Devices" or "CD-ROM Drive". And then Qiling Disk Master will run automatically.
Step 3. Rebuild MBR
- Click "Toolkit" and choose "Rebuild MBR".
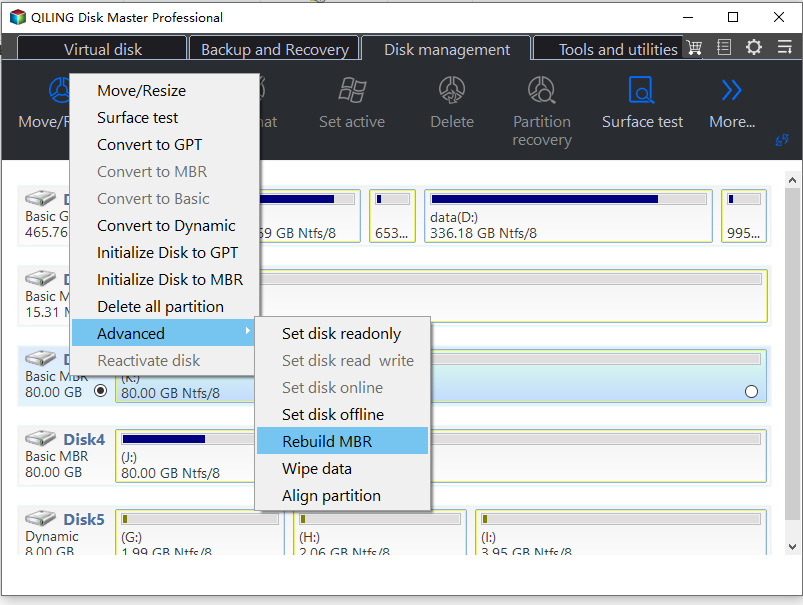
- Select the disk and the type of MBR. Then, click "Rebuild".
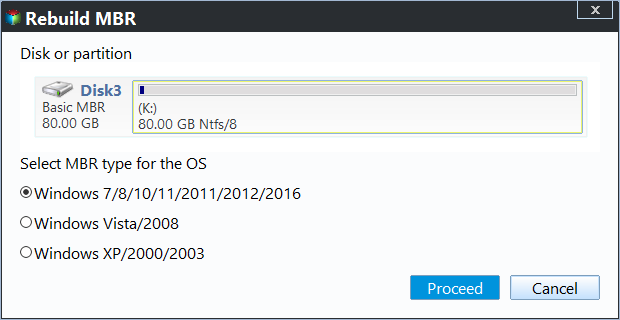
- After that, you can see "MBR has been successfully rebuilt on Disk X".
Rebuilding MBR can help you fix boot issues on Windows 11 efficiently. If you are stuck in the boot screen, try to use it and create a bootable USB to fix this error.
7 Fixes for Windows 11 Stuck on Boot Screen
Here, we have handpicked our most effective ways to help you resolve the issue of Windows 11 being stuck on a boot screen. Before you use any of these, ensure you have a constant power connection.
- Fix 1. Remove All External Devices Connected
- Fix 2. Run an Automatic Repair
- Fix 3. Enter Safe Mode
- Fix 4. Perform Startup Repair
- Fix 5. Perform System Repair with Command Prompt
- Fix 6. Check Disks via Command Prompt
- Fix 7. Go Back to the Previous Build
Next, your hardware should be working correctly!
Read Also:
How to Fix Windows 11 Update Stuck at 100% | Full Guide
The Windows 11 update downloading process may get stuck at 100% when you upgrade to Windows 11. Luckily, in this guide, you will get efficient and quick solutions to fix the Windows 11 stuck at 100% error.
Fix 1. Remove All External Devices Connected
When you have recently connected, any faulty external device could be the reason for a boot loop. Besides, even the existing peripheral devices might also conflict suddenly. These include keyboards, mice, speakers, and disk tapes. It resolves the issue if any external peripherals are causing it.
🚩See Also: Windows 10 Stuck on Welcome Screen
Fix 2. Run an Automatic Repair
Automatic Repair is a Windows utility that diagnoses your PC for problems like Windows 11 being stuck on Boot Screen and what causes it. It will notify you of its cause and prompt you to fix it.
Step 1. Turn on the and simultaneously Shut down when you see the Windows Logo.
Step 2. Repeat the above process a couple of times until it launches the Automatic Repair Screen utility.
Step 3. A dialog box saying "Your PC did not start correctly" appears.
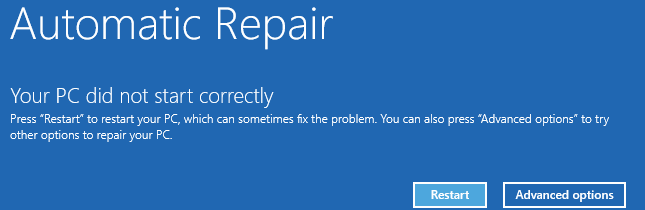
Step 4. To launch the Windows 11 Automatic Repair, click "Restart."
It restarts your device and fixes the problem if it's simple that the tool can identify; else, use the Safe Mode!
Fix 3. Enter Safe Mode
Safe Mode lets users continue using Windows with the help of fundamental drivers, using a limited set of files. If there is no issue in Safe Mode, the core settings and fundamental drivers are working correctly.
Step 1. Reboot your PC multiple times to access the Windows Recovery Environment, i.e., WinRE.
Step 2. Press the Power Button for some seconds until the device switches off, and then use the button again to turn it on.
Step 3. Keep repeating the same until you can access WinRE.
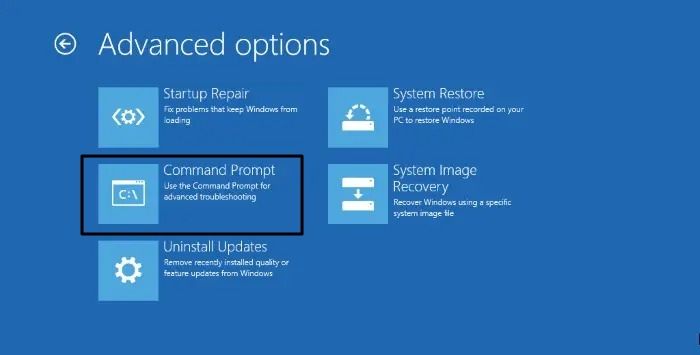
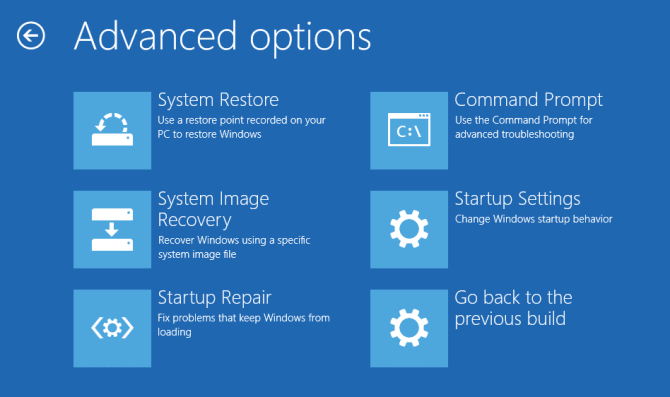
Step 4. Select Troubleshoot, click Advanced Options, and go to Command Prompt.
Step 5. Type in the following command in the prompt:
bcdedit /set {default} safeboot network
This command lets you launch the safe mode.
Step 6. Wait a few minutes for the OS to boot into Safe Mode fully, then go to Settings and click Windows Update. Then click Check for Updates.
If Windows releases new updates, Safe Mode will automatically download them to your system. But if you aren't familiar with Safe Mode or using commands, don't attempt it.
Fix 4. Perform Startup Repair
This feature tool of Windows detects and rectifies any faults that interfere with the overall working of your PC.
Step 1. Load the WinRE as mentioned above.
Step 2. Click Troubleshoot, go to Advanced options, and select Startup Repair.
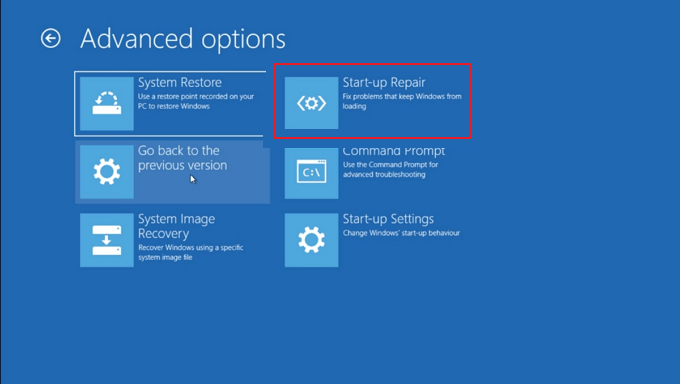
Step 3. Select the account with administrative privileges and enter the password.
This now runs the Startup Repair Tool and will execute a thorough scan of the system to fix the root causes of the Windows 11 loading issue.
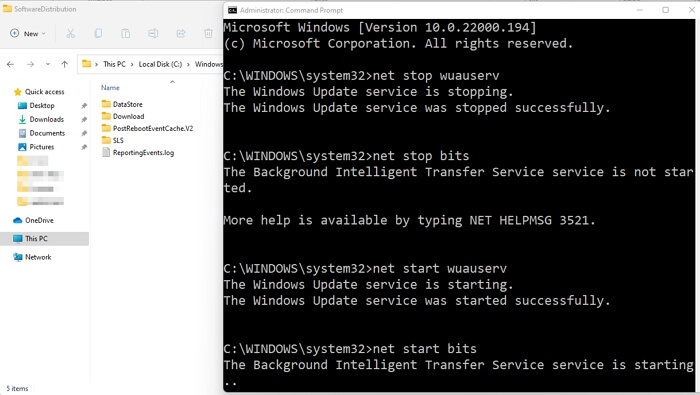
Fix 5. Perform System Repair with Command Prompt
You can now launch System Repair via the Command Prompt to help resolve the boot loop issue.
Step 1. In Advanced Options, select Command Prompt.
Step 2. Type the following command and press Enter.
bootrec.exe/fixboot
Wait for some time for the Command Prompt to repair your PC.
Read Also: Windows 11 Not Booting
Fix 6. Check Disks via Command Prompt
More often than not, a corrupted disk is the reason for Windows 11's boot screen. In such situations, you must inspect or check the disk using cmd.
Step 1. Load into the WinRE, as shown earlier.
Step 2. Click Troubleshoot and go for Advanced Options. Choose Command Prompt.
Step 3. Type the following command and hit Enter: chkdsk C: /f /r /x
This should help you to check for malfunctioning disks on your PC and solve the "Windows 11 stuck on boot screen" issue.
Fix 7. Go Back to the Previous Build
The Previous Build restores Windows 11 to the version of the last update, thereby uninstalling the most recent update.
Step 1. Once you have the sign-in screen, press the Shift+Power button simultaneously.
Step 2. Select Restart.
Step 3. Click Troubleshoot, and select Advanced Options. Then, finally, click Go back to the Previous Build.
Conclusion
We hope our detailed guide on how to fix Windows 11 Stuck on Boot Screen helped you fix your PC's issue. As a small suggestion, we suggest you do the steps in the same order mentioned above.
On the other hand, using Qiling Disk Master helps resolve the issue if you don't want to deal with it yourself.
If you want more help fixing such glitches and getting the hang of technical stuff, check out our other articles and spread the knowledge by sharing this one!
Windows 11 Stuck on Boot Screen FAQs
If you still have some questions, this section is for you. We have compiled a list of common yet important questions which might be boggling your mind.
1. Why is Windows 11 stuck on the boot screen?
There can be several reasons for the same. This could result from a glitchy OS update or a malware attack. A boot screen loop can also happen when you have outdated drivers and incompatible external devices.
2. How do I fix Windows 11 stuck on my boot screen?
Broadly, there can be two ways of fixing this issue. One can do this by using the in-built feature of Windows like System Repair, going back to the Previous Build, etc., which require you to know a bit of the technical stuff.
Or, you can opt for a third-party tool like Qiling Partition Maker and let the software do the heavy lifting.
3. Why is Windows 11 bootable USB stuck on the logo screen?
Outdated BIOS and problematic hard drives usually cause the problem of Windows 11 bootable USB stuck on the logo screen. Hence, fix it by updating BIOS and checking for external peripherals.
Related Articles
- How to Optimize Windows 11 for Gaming [6 Effective Ways🧰]
- Solved 2024: Unable to Recover Your PC. The System is Too Small
- How to Fix SD Card Saying Full When Empty in Windows 11/10/8/7
- Can't Merge USB Partitions? 2 Proven Fixes Here