How to Burn ISO to USB on Windows 10, Here Is Full Guide
If you are not clear about the process of burning ISO to USB in Windows 10, don't worry. Burning an ISO image is a complex process that requires you to resort to a professional ISO to USB burning tool or software. Follow this page, and you'll learn how to successfully burn an ISO image to a USB flash drive in a few simple clicks.
Can I burn ISO to USB? Of course, yes. We are going to learn two ways to help you burn ISO to USB on Windows 10. There is a table for you to choose a suitable way. Read the table to get more information.
| 🆚Comparison | 🥈Windows To Go | |
|---|---|---|
| 💻System |
|
|
| 🧩USB Limitation |
|
|
| ⚙️Operation Difficulty |
|
|
| ✏️Steps |
|
|
Well, it's clear that Qiling Disk Master is easy to use, while Windows Togo has lots of requirements to burn ISO to USB on Windows, such as Windows versions and USB capacity. Hence, let's learn to use Qiling Disk Master to burn the ISO file to USB. Before that, you need to prepare for this process:
- #1. Prepare a USB
- #2. Format USB to FAT32
- #3. Download Windows 10 ISO files from Microsoft(This is an official link for you to download)
- #4. Download Qiling Disk Master to burn ISO
🔥You May Like: Burn ISO to External Hard Drive Windows 10
Way 1. Burn ISO to USB on Windows 10 via Qiling Disk Master
Qiling Disk Master allows you to burn ISO files to a USB drive no matter which version of Windows 11/10/8/7 you are using. Also, it does not require a certified USB stick. A 13 GB drive capacity is sufficient. Now, you can download the free software and check out the guide below.
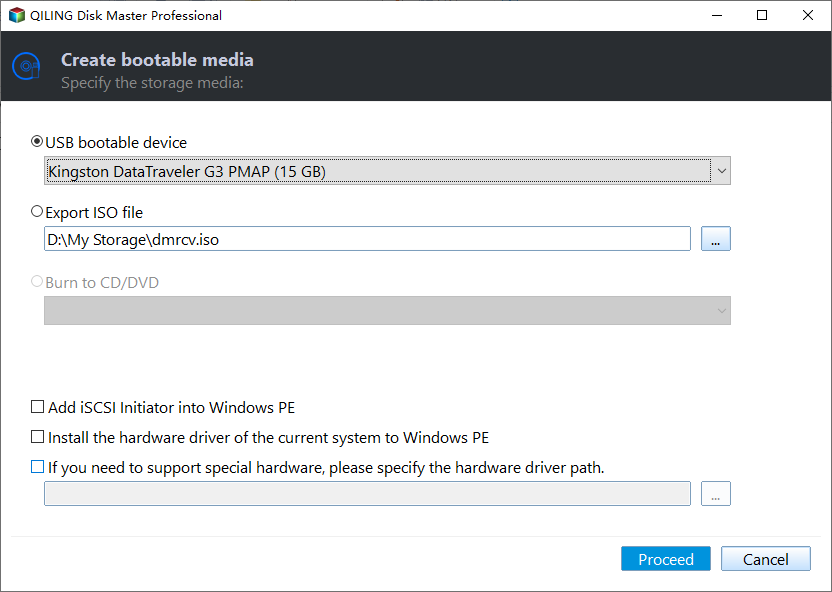
Step 1. Launch Qiling Disk Master and go to the Tools section. Click "Create Bootable Media"

Step 2. Select the target USB as destination and click "Proceed" to execute the operation.

Alongside burning ISO to USB on Windows 10, users can also use Qiling Disk Master to set up USB for multiple different purposes, such as:
- Burn ISO to DVD
- Format USB for PS4/5
- Format 128GB USB to FAT32
- Windows 10 format USB to FAT32
- Create/merge partitions on USB drive
Download Qiling Partition to help burn ISO to USB and manage your USB.
Way 2. Burn ISO to USB on Windows 10 via Windows To Go
As mentioned above, you can use a built-in tool - Windows To Go, as long as you're using Windows 8/8.1 Enterprise or Windows10 Education/Enterprise/Pro. This process may be difficult if you are not an experienced user. Hence, turn to Qiling Disk Master or follow the guide below carefully. If you want to know other tools to burn ISO, click the link to get the top 5 ISO burners for Windows 10.
I divide the whole process into four steps:
- #1. Prepare a USB larger than 32 GB
- #2. Format it to FAT32 (back up your data, if any)
- #3. Download ISO files from Microsoft's official website
- #4. Connect the certified USB drive to the PC and follow the steps to burn ISO to USB
Step 1. Navigate to the Control Panel and search for "Windows To go" in the window. Then click on the "Windows To Go" option.
🚩Also Read: Top 3 Windows 1123H2 ISO Downloader
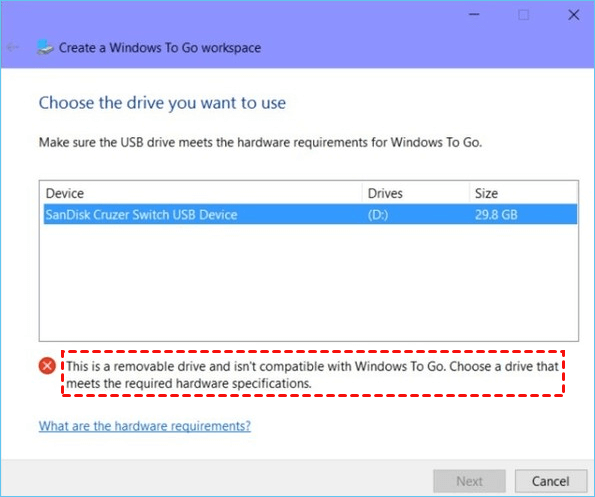
Step 2. In the next window, it will automatically detect the inserted USB drive. After that, click on the USB drive you plan to burn the ISO to and click Next to continue.

Only when the U disk meets the hardware specifications required by Microsoft the "Next" button can be clicked. Or you will encounter the error message above.
Step 3. Click "Add Search Location," search for the Windows 10 installation ISO file, and select the mounted ISO file.
Step 4. In the subsequent window, you can enable BitLocker Drive encryption on the Windows To Go workspace, which can protect important data on the USB drive.
Step 5. Windows will move Windows 10 ISO to the target USB drive.
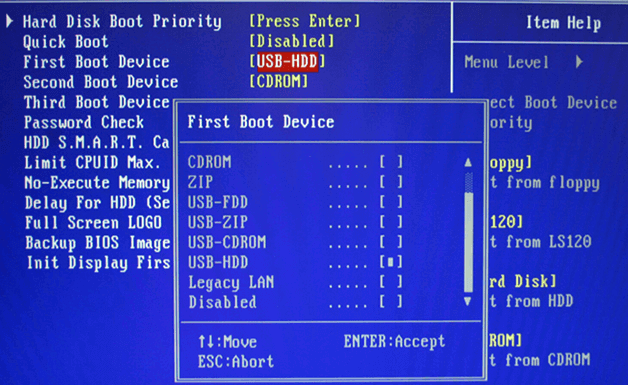
If the Windows doesn't boot from USB, click the link below to check:

Fix Windows (11/10/8/7) Won't Boot From USB Error
Can't you boot from Windows 10 bootable USB drive? Are you trying to boot your computer from a bootable USB drive in Windows 10, 8, or 7 but the system doesn't allow you to do so?

Final Verdict
Now you can choose the right tool to burn ISO to USB Windows 10. In contrast, Qiling Disk Master is easier to use and accomplish this task. It helps a lot, especially when you are a newbie.
This tool can create bootable USB using the present system and can help with a lot, such as: transferring OS to SSD/HDD, allocating space from one partition to another, merging partitions into one, splitting a large partition into two smaller partitions, and convert MBR to GPT for Windows 11.
Burn ISO to USB on Windows 10 FAQs
In this part, we also collected some bonus questions related to burning ISO to USB flash drives. If you are interested, you can follow here to find answers:
1. How do I burn an ISO to a USB drive?
It can be easy with the help of Qiling Disk Master, which supports Windows 10/11/8/7/Vista/XP. Follow the steps here:
Step 1. Prepare a USB and format it to FAT32.
Step 2. Download the Windows ISO file from the official website.
Step 3. Launch Qiling Disk Master and navigate to the "Bootable Media."
Step 4. Select the ISO image that you have downloaded on your PC, and click "Open." Then, choose the target USB and click "Burn."
2. Can I burn Windows ISO to USB?
Of course, you can. Follow the guide below to try Burn Windows ISO to USB now:
- Make a USB drive ready for ISO image burning: Prepare a USB and format the USB to FAT32.
- Download ISO burning software for help: Third-party software is recommended since Windows To Go and other built-in tools can make the process difficult if you are not experienced.
- Burn ISO to USB: Then, launch Qiling Disk Master and follow the guide to proceed.
3. How do you put an ISO on a USB and make it bootable?
Follow the steps below to put an ISO on a USB and make it bootable:
- Prepare a USB and format it to FAT32. Then, connect it to the PC.
- Download Qiling Disk Master and launch it. Navigate to the "Bootable Media."
- Select the ISO file to be burned and click Next.
- Choose the target USB drive and click "Burn" to start the process.
Related Articles
- Don't Miss Best FAT32 Formatter: Free FAT32 Format Tools Recommend
- Diskpart Has Encountered an Error Access Is Denied | How to Fix
- How Do I Securely Erase Hard Drive/SSD, Wipe Confidential Data? Your Reliable Guide Is Here
- How to Install Windows 10 to eMMC [Step-by-Step Guide]