[Solved] Secure Boot Violation Invalid Signature Detected
Many computer manufacturers like ASUS have implemented the Secure Boot feature on their computers by default to protect systems from viruses or malware attacks. However, this feature could also result in unexpected issues.
If you are experiencing the Secure Boot Violation error with a message saying, "Invalid signature detected. Check Secure Boot Policy in Setup," don't panic! Qiling will provide you with quick troubleshooting in this guide to assist you in fixing the computer by yourself.
How to Fix Secure Boot Violation
To resolve the Secure Boot Violation error, here are 4 methods you can try.
- Fix 1. Disable the Secure Boot
- Fix 2. Disable the Digital Driver Signature Enforcement
- Fix 3. Perform Boot Repair via Qiling Disk Master
- Fix 4. Install/Uninstall Windows Update
Fix 1. Disable the Secure Boot
Since this problem usually occurs because of the incompatibility between motherboards and some Windows versions, which happens commonly on ASUS desktops and laptops, the first easy way you can try is to disable the Secure Boot option in BIOS configuration.
Some users may wonder if it's OK to disable Secure Boot. The action will do no harm to your system. However, you may encounter a PC won't boot issue if there are viruses or malware in the system because they can attack the system bootloader.
Step 1. Press the BIOS hotkey (Usually "F1", "F2", "F10", "Delete," or "Esc") while booting the PC to enter BIOS.
Step 2. Use arrow keys to navigate to the following location and modify the settings. (The location varies on different computers.)
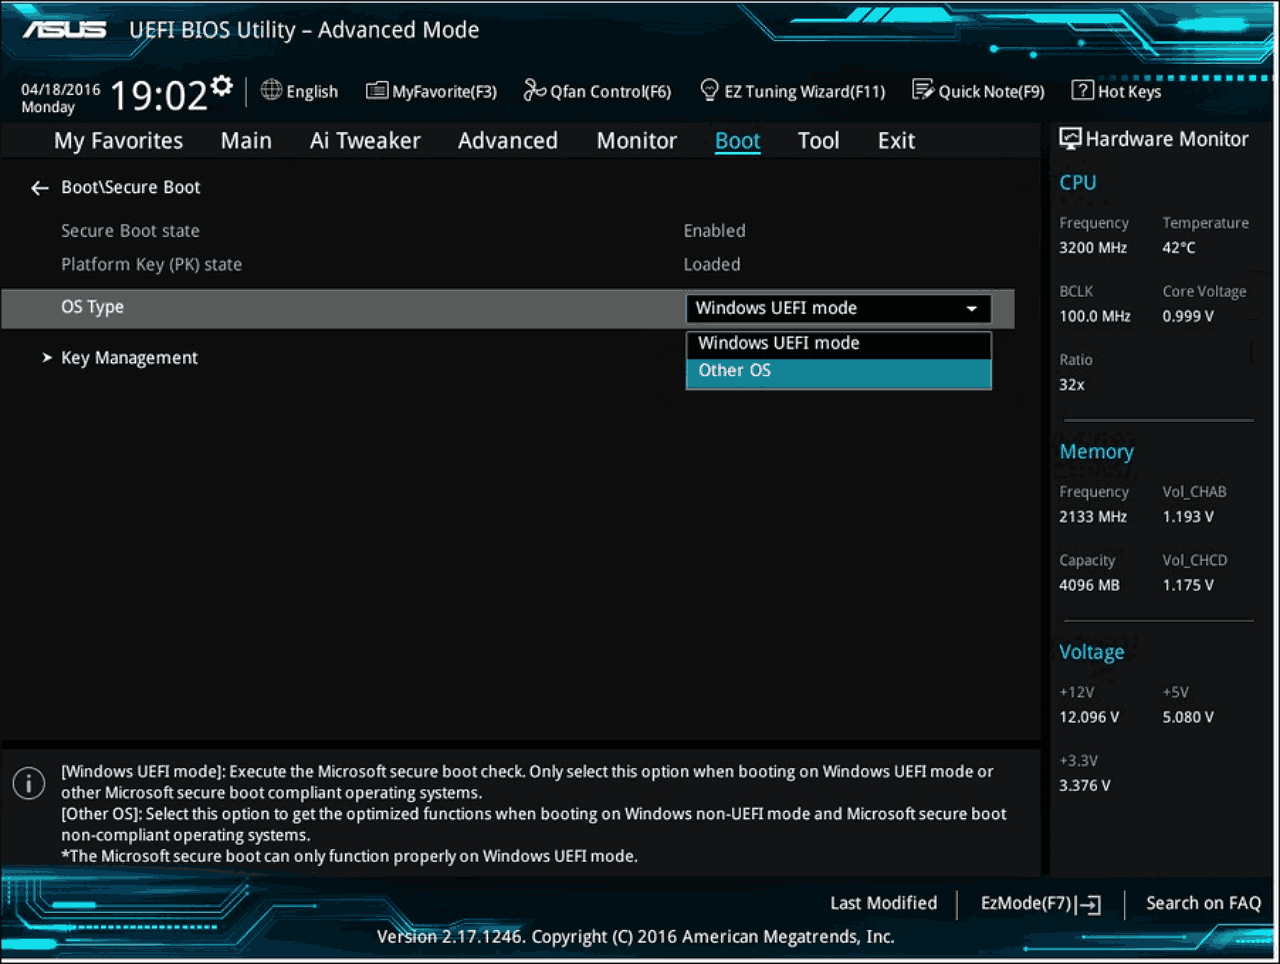
#1. Move to "Boot" > "Secure Boot."
Then, select "OS Type" and set the option as "Other OS" to disable Secure Boot. (Windows UEFI mode stands for enabled Secure Boot.)
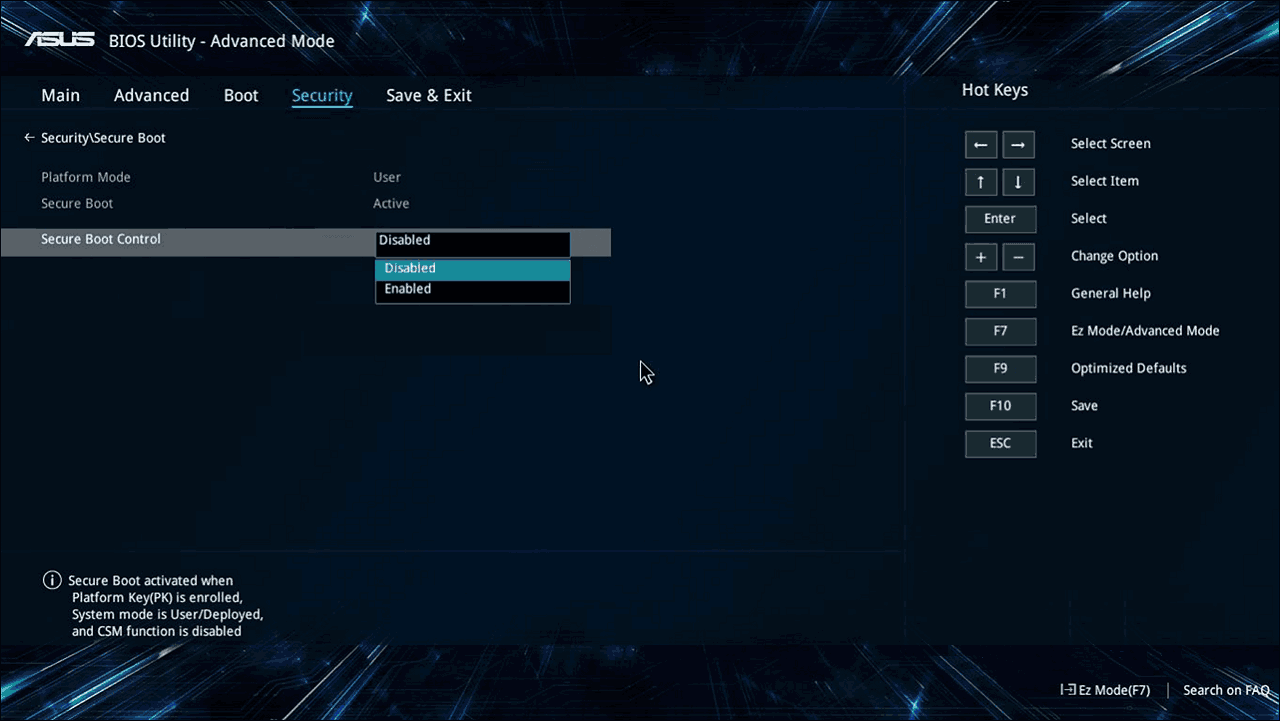
#2. Move to "Security" > "Secure Boot."
Then, select "Secure Boot Control" and set the option as "Disabled" to disable Secure Boot.
Step 3. Hit "F10" to Save & Exit, and your computer will restart.
Related article:
Fix 2. Disable the Digital Driver Signature Enforcement
The Secure Boot Violation issue could also be caused by the conflict between unsigned device drivers and the system protection module. Thus, you can try disabling the digital driver signature enforcement to resolve the problem.
Step 1. Go to the Start menu and open Settings.
Step 2. In the Settings window, navigate to "Update & Security"/"System" > "Recovery."
Step 3. Find the "Advanced Startup" section and hit "Restart now" to enter the Advanced Startup Options.
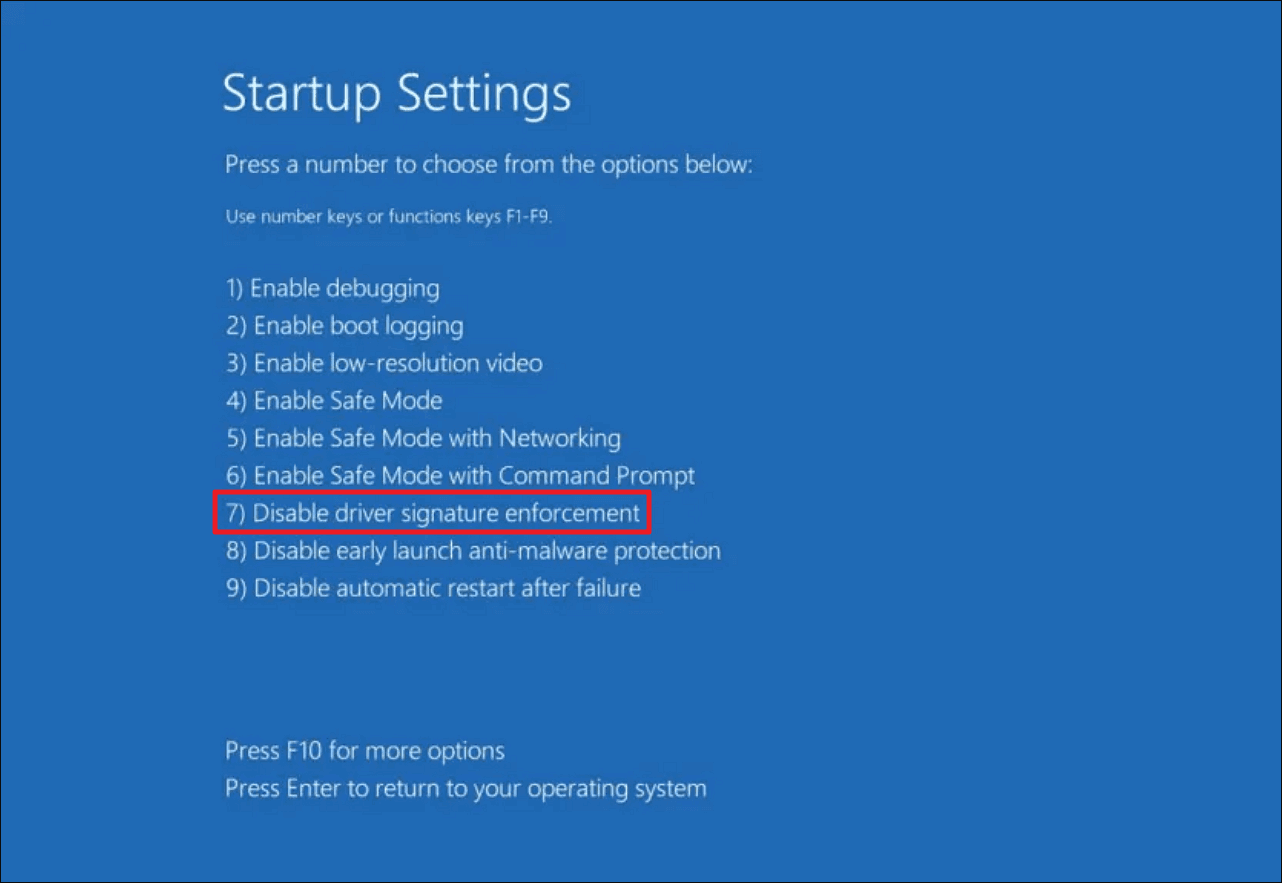
Step 4. In the Choose an option window, go to "Troubleshoot" > "Advanced Options" > "Startup Settings."
Step 5. Locate the "Disable driver signature enforcement" option. Press "7" or "F7" to disable the function.
Step 6. Press "Enter" to return to your Windows OS and check if it works.
Fix 3. Perform Boot Repair via Qiling Disk Master
If the above two methods can not fix the issue, you can resort to professional help from third-party software. One of the best boot repair tools is Qiling Disk Master Professional, which provides a Boot Repair feature specifically designed for various bootup issues in Windows computers.
With advanced algorithms in this tool, it'll be able to automatically examine and repair any errors it finds quickly.
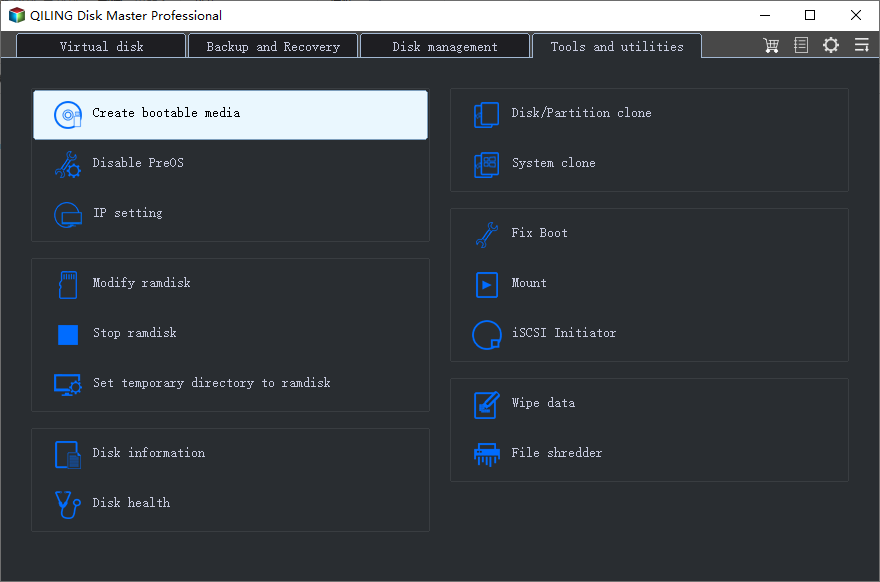
Step 1. Start Qiling Disk Master after connecting the external drive/USB to your computer, go to "Bootable Media," and click "Create bootable media."
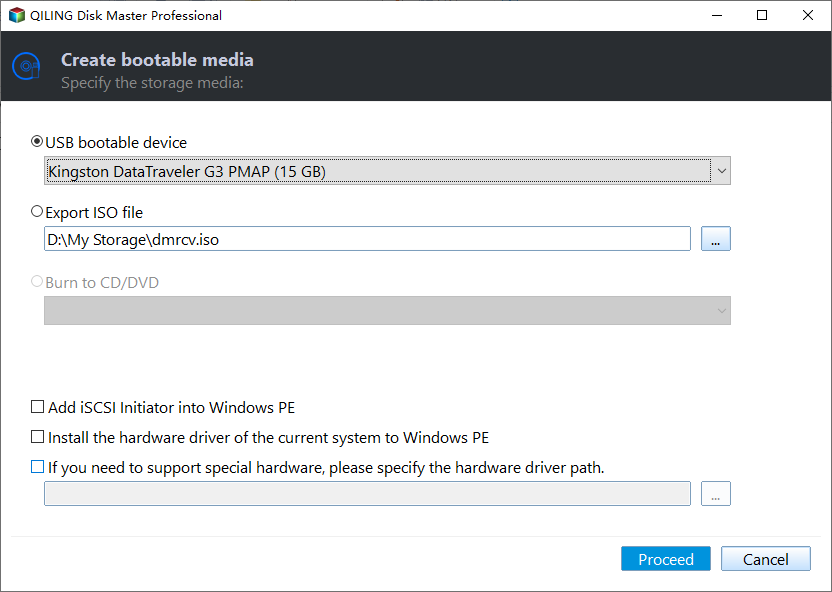
Step 2. Select an available USB Drive or CD/DVD and click "Create." You can also burn the Windows ISO file to the storage media.
Step 3. Connect the created bootable drive to the new computer and reboot the computer by pressing and holding F2/Del to enter the BIOS. Then, set the WinPE bootable drive as the boot disk and press F10 to exit.
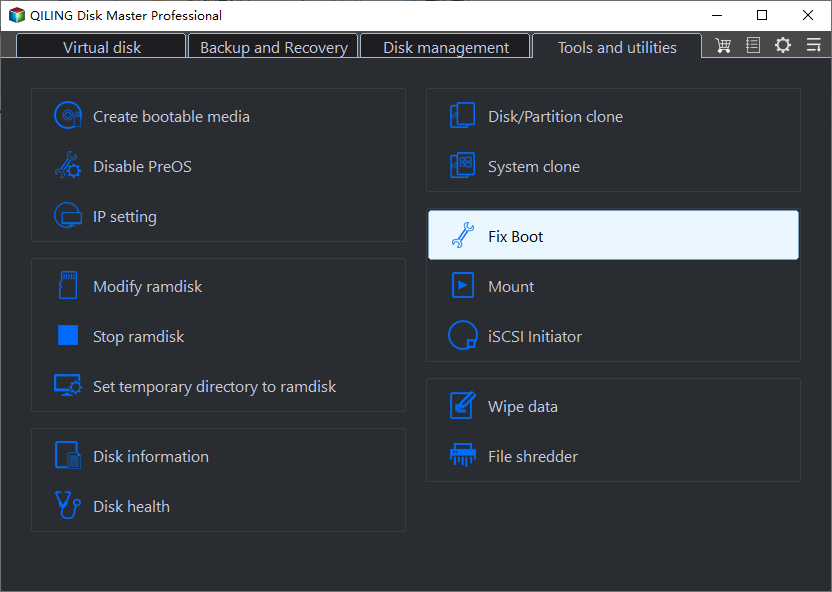
Step 4. Boot the computer again and enter the WinPE interface. Then, open Qiling Disk Master and click "Fix Boot" under the "Tools" page.
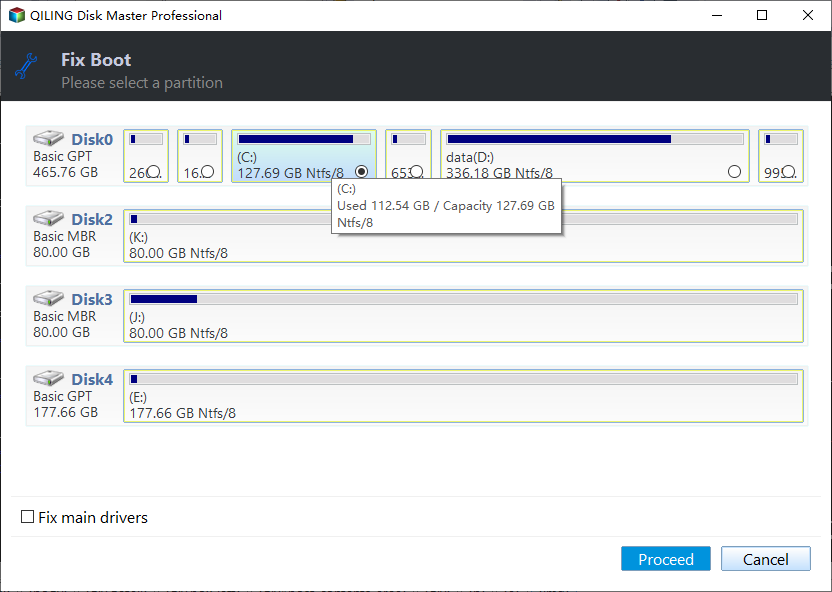
Step 5: Select the system you want to repair and click "Proceed".
Step 6. Wait a moment, and you will receive an alert that the system has been successfully repaired. Click "OK" to complete the boot repair process.
⭐Professional Help
This is a consultation entrance for your additional queries. Click and chat with the support engineers:
Qiling experts are available to provide you with 1-on-1 manual services (24*7) and help fix Windows boot error, BSOD or computer boot loop issues. Our experts will offer you FREE evaluation services and efficiently diagnose and resolve system boot failure, Windows stop codes and OS lagging issues using their decades of experiences.
- 1. Fix BSOD - blue/black screen of death error due to Windows update or other reasons.
- 2. Get rid of Windows boot error such as no bootable device found, or BCD file corruption.
- 3. Serve to fix 0X000_error codes on Windows system or OS boot loop issues.
You can share this powerful and time-saving tool with your friends who also encountered startup issues.
Fix 4. Install/Uninstall Windows Update
Windows users have been reporting the Secure Boot Violation errors since Windows 7. Although Microsoft has released certain update patches to fix the problem, it still exists in Windows 10 and 11. Therefore, you might be able to resolve this by updating or downgrading your Windows version.
#1. Install Windows Update
Step 1. Go to the Start menu and open Settings.
Step 2. Navigate to ("Update & Security" >) "Windows Update" and click on "Check for updates."
Step 3. Install the update if there is a new version.
#2. Uninstall Windows Update
Step 1. Search for and open the Control Panel in the search box on the taskbar.
Step 2. Go to "Programs" > "Programs and Features" in the Control Panel window.
Step 3. Hit "View installed updates" on the left side of the window.
Step 4. A list of installed Windows updates will show up on your screen. Select the problematic update and hit "Uninstall" at the top. Then, follow the on-screen guide to complete the uninstall procedure.
Related article:
Why Secure Boot Violation Error Occurs on Bootup
There are several reasons why you encounter Secure Boot Violation and the message "Invalid signature detected. Check Secure Boot Policy in Setup" while booting up your PC. The most possible 2 causes are listed below:
- Certain Windows versions are incompatible with the Secure Boot Technology in ASUS motherboards.
- The Digital Driver Signature Enforcement that performs checks may cause your computer to be unbootable.
Don't forget to share this article and help more users who are also experiencing the Secure Boot Violation error.
Conclusion
This article contains 4 solutions to Secure Boot Violation Invalid signature detected issue. In most cases, this error occurs on ASUS computers, whose Secure Boot Technology has a bigger chance of being incompatible with some versions of Windows.
However, if you can't fix the problem because the computer belongs to another brand or the general methods just don't work, Qiling Disk Master can help. With its powerful Boot Repair function, you can fix various startup errors without any effort.
FAQs on Secure Boot Violation
If you still have other questions about Secure Boot Violation, you can take a look at the FAQs below. There may be your answers.
1. What is a Secure Boot on a PC?
Secure Boot is a security mechanism designed to help users run their PC with only manufacturer-trusted software. It is supported on many systems, such as multiple versions of Windows, distributions of Linux, and variants of BSD.
2. Is Secure Boot good or bad?
Secure Boot is good in most cases since it verifies the digital signature of executable files and protects your system from viruses and malware. However, some users have also reported the downsides of enabling Secure Boot.
3. Does Secure Boot decrease performance?
No, enabling Secure Boot hardly has any impact on computer performance. If you want to disable Secure Boot, just simply access the UEFI/BIOS and set Secure Boot to be disabled.
Related Articles
- Fix No Option to Format SSD in Windows 10/11 [Quick & Easy Methods]
- How to Merge Partitions by Disk Management and Free Partition Software
- M.2 vs. SSD, What's the Difference [New Details]