Solved: Xbox 360 Hard Drive Not Detected [5 Ways] 💡
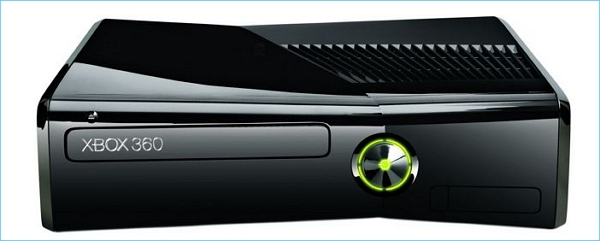
Xbox, like any other gaming system, has limited storage. As a result, you must use storage if you wish to preserve all of your games intact. However, you may have troubles such as Xbox not recognizing storage.
A wrong hard drive format, incorrect installation, console errors, and corrupted hard drives can lead to this error. It can be a big problem, especially if your computer has games and other media files. So, this article from Qiling explains how to fix the Xbox 360 hard drive not detected error. Read on to find out more.
| 💡Aspects | 🧩Details |
|---|---|
| 🔎Complex Level | Low, step-by-step guide |
| 🚩Fixes | |
| 💻Causes |
|
5 Fixes for Xbox 360 Hard Drive Not Detected Error
In this part, we will discuss the five fixes that will help you resolve the Xbox 360 hard drive not detected error. Check them one by one to fix your Xbox 360 not detecting a hard drive error.
Fix 1. Restart Xbox 360 Console
Restarting the Xbox 360 Console is the first and the easiest fix you can try before moving on to the other fixes. It mostly solves simple errors. Here is how to go about it:
Step 1. Turn off your Xbox 360 with a long press of the power button.

Step 2. Unplug the console power cable, and then remove the hard disk.
Step 3. Turn your console on and then off.
Step 4. Reattach the hard drive and restart your console.
📖Extend Reading: Xbox One Not Reading Disc
Fix 2. Format the Xbox 360 Hard Drive
The majority of drives are now formatted with NTFS, while Xbox 360 supports FAT32. You must first format the Xbox 360 hard disk to the proper hard drive format to resolve this issue.
Please keep in mind that formatting will erase all data. If you have essential game data, you can clone the disk or move game apps.
Qiling Disk Master is an excellent program for the job, and it is a quick and easy solution to format your Xbox 360 hard drive. This program simplifies the formatting process with its user-friendly design and powerful functionality. It can format a hard drive greater than 32GB to FAT32, which many Windows utilities cannot. Download Qiling Disk Master today to experience the ease of formatting your Xbox 360 hard drive.
Follow these steps to begin formatting your Xbox 360 hard drive with Qiling Disk Master:
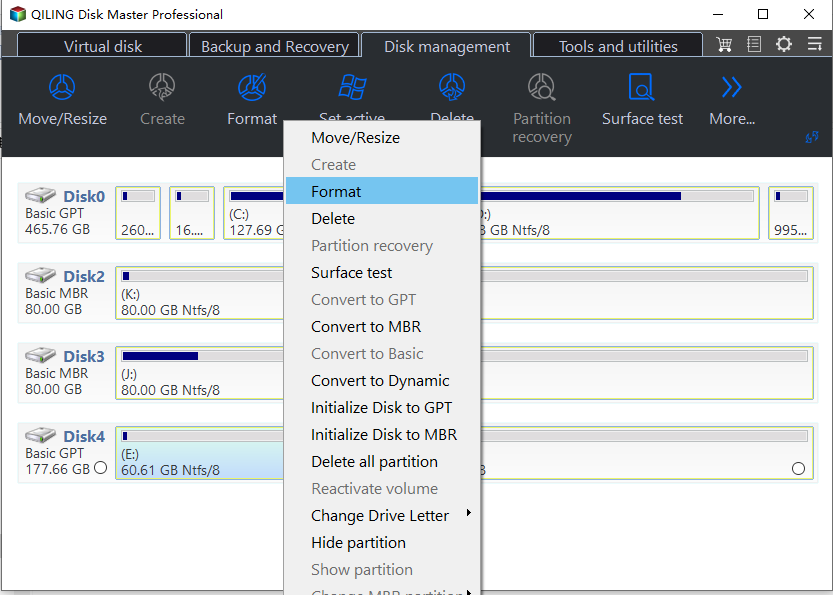
Step 1. Run Qiling Disk Master, right-click the hard drive partition you intend to format and choose "Format".

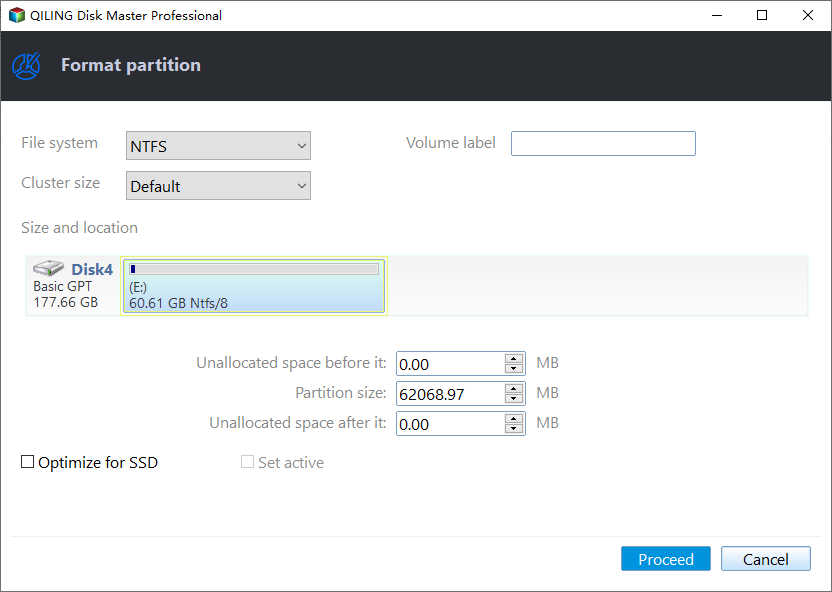
Step 2. In the new window, set the Partition label, File system (NTFS/FAT32/EXT2/EXT3/EXT4/exFAT), and Cluster size for the partition to be formatted.

Step 3. Click the "Proceed" button to start formatting the partition on your hard drive.
Step 4. Then you will see a warning window, click "Yes" in it to continue.

You have finished Xbox 360 hard drive format now. Place it into the Xbox 360 and see if it can be recognized and detected. Let's see more features of this tool.
Key Feature list:
- Options for flexible customization
- Format a USB drive for the Xbox 360
- Format the external hard drive to FAT32
- Effective Xbox 360 hard drive formatting
- Format 64 GB SD card to FAT32
- Supports formatting hard drives bigger than 32GB to FAT32
If you want to make the formatting process faster and easier, download this tool to help. Especially when you are not a pro, Qiling Disk Master helps a lot.
Fix 3. Remove and Reinstall Hard Drive on Xbox 360
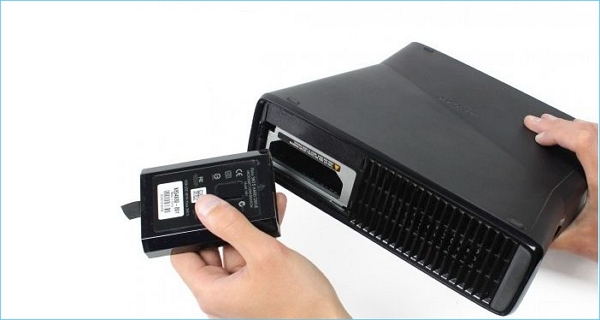
In this method, you will have to correctly install your hard drive on Xbox 360 to eliminate the error. For that, you need to remove and then reinstall the hard drive on Xbox 360. Here is how to go about it.
- Notice:
- Avoid contacting the hard disk drive bay contacts or the hard disk drive connector with your fingers or a metal item when handling your Xbox 360 Hard Drive.
- Connect a hard drive to the original Xbox 360 system:
Step 1. Switch off the console.
Step 2. Place the hard drive's back against the back of the hard drive bay.

Step 3. Push the hard drive's front end down until it clicks into place.
💡Note: If your console did not previously contain a hard drive, remove the bay cover before installing a hard drive.
- Remove the original Xbox 360 console's hard disk:
Step 1. Switch off the console.
Step 2. Locate the hard drive on the console's top (or left side, depending on how the console is configured).
Step 3. Press the hard drive's release button.
Step 4. Remove the hard drive from the console.
It should be noted that not all Xbox 360 consoles feature a hard drive.
- Ensure that your console identifies the hard drive:
After connecting the hard drive, ensure that your console detects it. Here is how to do it:
Step 1. Navigate to System > System Settings by pressing the Guide button on your controller.
Step 2. Choose either Storage or Memory.
Step 3. Determine that the Hard Drive appears in the list of Storage Devices. If it still does not work, try removing and reconnecting the hard drive to the console.
Share this article and these fixes to help more Xbox 360 users who are facing the same error.
Fix 4. Try Another Hard Drive
In this method, you can try using another hard drive and check whether the issue was with the previous one. Here is how you connect a hard drive to Xbox 360:
Step 1. Locate the hard drive cover release on the right side of the console, near the back end.
Step 2. Pull the hard drive door open while sliding the release towards the front of the console.
Step 3. Insert the hard drive into the slot and firmly press down until you hear a click. Replace the hard drive's cover.
If the other hard drive works, the first hard drive you were using could be damaged.
Fix 5. Replace the Hard Drive
If your hard drive is damaged, Xbox 360 will not detect your hard drive. So, you can replace your damaged hard drive with another one. You can buy a new hard drive or get it repaired.
Device service and repair can help you order a replacement Xbox 360 hard drive. To repair a hard drive under warranty, you must first register your console. All these fixes above are from Xbox 360 Troubleshoot page, so feels easy to try them.
Why Does Xbox 360 Not Detect Hard Drive
What are the reasons why Xbox 360 does not detect a hard drive? Listed below are a few of them:
- Incompatible hard drive format: This hard disk problem can be caused if the hard drive's disk format or file system is incompatible with your system. To resolve this, format the drive.
- Corrupted hard drive: When a system cannot finish writing data to a file or when regions of the file become inaccessible, hard drive data corruption occurs. So, you can replace or upgrade Xbox hard drive.
- Console errors: If there are any prevailing console errors, it will not detect the hard drive. You can try restarting your Xbox 360 console.
- Incorrect installation: Make your the hard drive is correctly connected to the console; if not, the Xbox 360 will not detect the hard drive.
So, these are why your Xbox 360 is not detecting the hard drive. Check the following links to get more related details.
Conclusion
Do not be alarmed if your Xbox 360 cannot detect your hard drive. A flawed connection, an incompatible or corrupted hard drive, your Xbox firmware, power supply, or other difficulties may be stopping you from accessing the (external) hard drive.
You can use the solutions in this article to troubleshoot. You can guarantee compatibility and best performance for your game console by following the step-by-step instructions provided by Qiling Disk Master. You can smoothly copy, move, and install games with the formatted hard drive. It can also help upgrade Xbox 360 hard drive to an SSD.
FAQs About Xbox 360 Hard Drive Not Detected
Do you have more questions about your Xbox 360 not able to detect your hard drive? Check out the frequently asked questions and their answers given below:
1. How do I fix my hard drive not detected on Xbox 360?
If your hard drive is undetected on Xbox 360, try restarting Xbox 360. Here is how to do it:
Step 1. To access the instructions, press the Xbox button on your controller.
Step 2. Choose Profile > System > Settings > General > Power settings.
Step 3. Select Restart now.
2. How do I know if my Xbox 360 hard drive is bad?
You will know if your Xbox 360 hard drive is bad if your Xbox 360 is not saving in-game data. In this case, your hard drive is probably full or damaged. Ensure that the hard drive is correctly attached and that there is enough free space for the save before attempting to save again. If this fails, you may need to replace the hard drive.
3. Do all hard drives work on Xbox 360?
Unlike the Xbox One, not all hard drives are compatible with the Xbox 360 system. The Xbox 360 official edition console must use a specialized internal hard drive (specifically, Microsoft official hard drives).
Related Articles
- 3 Easiest Ways to Run USB Speed Test in Windows 10 in 2024
- How Do I Use DiskPart to Delete All Partitions in Windows? Your 2024 Guide Is Here
- Sleep vs Hibernate on Windows 10/8/8.1/7 (Complete Guide)
- Get Qiling Disk Master Key (v18.2) in 2024 | No Cracking