How Do I Open/Access Disk Management In Windows 11? All Methods You Can Get
What Is Windows Disk Management
Disk Management is a built-in Microsoft Windows program that manages hard drives for better performance, allowing users to extend volume, shrink volume, initialize a new disk, and change a drive letter.
How Do I Access Disk Management Disk Management
For Windows 11 users, accessing Disk Management remains the same as before. You can easily access it by searching for "Disk Management" in the Start menu, or by pressing the Windows key + R to open the Run dialog box and typing "diskmgmt.msc".
- Open Disk Management CMD
- Launch Quick Access Menu
- Using Start Menu Search
- Run Dialog
- Run Control Panel
- Using Task Manager
- Launch Computer Management
Method 1. Run Disk Management from Command Prompt
The Command Prompt is a command-line interpreter that allows Windows users to execute fixed commands to set up their computer quickly. It also provides a shortcut to access disk management, making it a convenient option for those who prefer to bypass complicated steps.
You can enter "chkdsk" in the command prompt and press Enter. Then, you can check disk management.
Step 1. To open the Command Prompt, click the Start button and type "Command Prompt" in the search box, then click on it to open it.
Step 2. Enter the "diskmgmt" command and hit the Enter key.
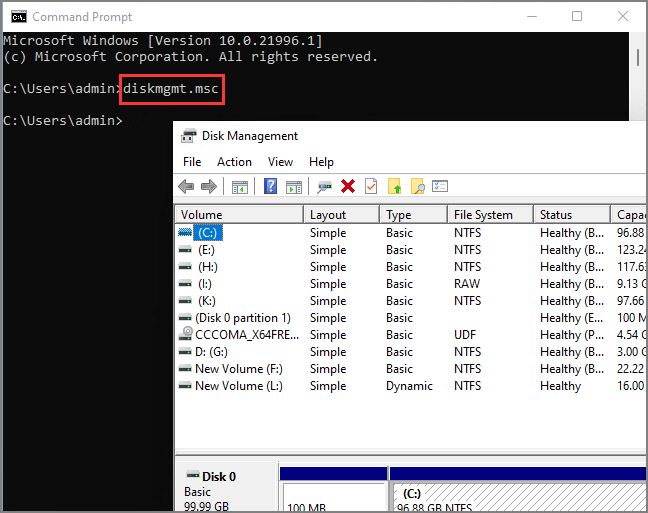
The Disk Management window will be opened and you can close the command prompt window.
Given command-You can use a utility to access the Windows built-in disk manager from either the Command Prompt (CMD) or Windows Powershell. The same command line can be used in both environments to reach the disk manager.
Step 1. To open Windows PowerShell, click the Search icon on your taskbar, type "Windows PowerShell" in the search box, and then click on the result to launch it.
Step 2. Input "diskmgmt" and press Enter key.
Method 2. Launch Quick Access Menu to Open Disk Management
The basic quick access in Windows 11 remains unchanged from Windows 10, allowing you to access various features by pressing "Windows + X", including disk management.
Step 1. To access the user menu, right-click on the Windows icon, which will display a list of available options.

Step 2. Click the Disk Management.
Method 3. Using Start Menu Search to Open Disk Management
To open the Disk Management tool on a Windows computer, you can simply search for it in the Start search bar. However, instead of being listed as "Disk Management," it may appear under a different name in the search results. Once you find the correct app, you can click on it to open it.
Step 1. To access the Disk Management tool, click on the search icon located in the taskbar, typically at the bottom right corner of the screen. Type "disk management" in the search box, and a list of search results will appear.
Step 2. To confirm the changes, click the "Create and format hard disk partitions" button. This will finalize the partitioning and formatting of the hard drive, making it ready for use.
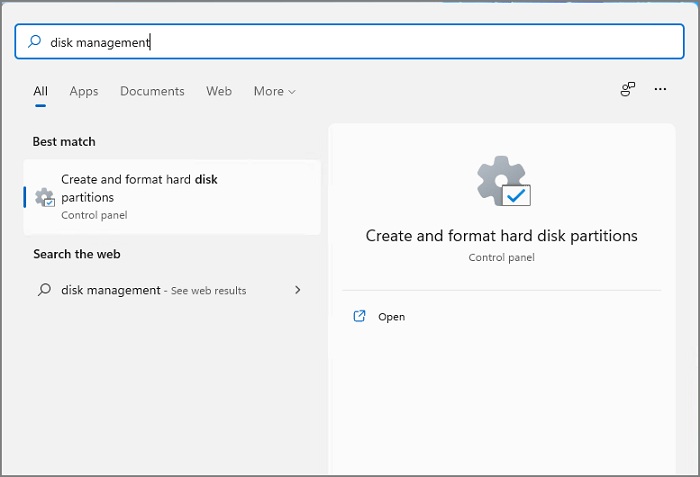
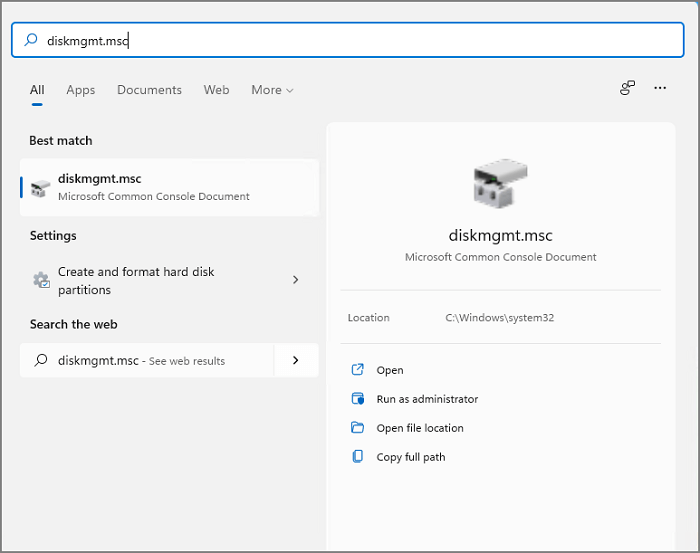
You can open the Disk Management tool by typing "diskmgmt.msc" in the search box and clicking the appearing icon on the best match.
Method 4. Run Dialog to Open Disk Management
The Run Dialog in Windows is accessed through the Run box, which can be opened to directly launch any application or file.
Step 1. Press the Windows key + R to open the Run dialog.
Step 2. Type "diskmgmt.msc" in the open field and click the OK button.
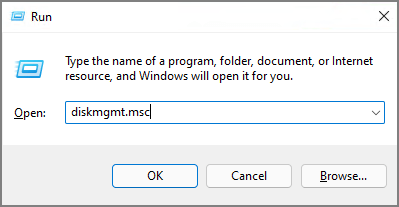
The Disk Management will run instantly.
Method 5. Run Control Panel to Access Disk Management
The Control Panel in Windows allows users to check and change hardware and software settings, including the disk manager tool. This is where you can also manage software.
Step 1. To open the Control Panel, click the search icon, search for "Control Panel" in the search menu, and then click the "Open" option to launch it.
Step 2. If the Control Panel directly goes to the All Control Panel Items page, you can click on "Control Panel" in the path and then quit to the main menu.
Step 3. Click the System and Security.
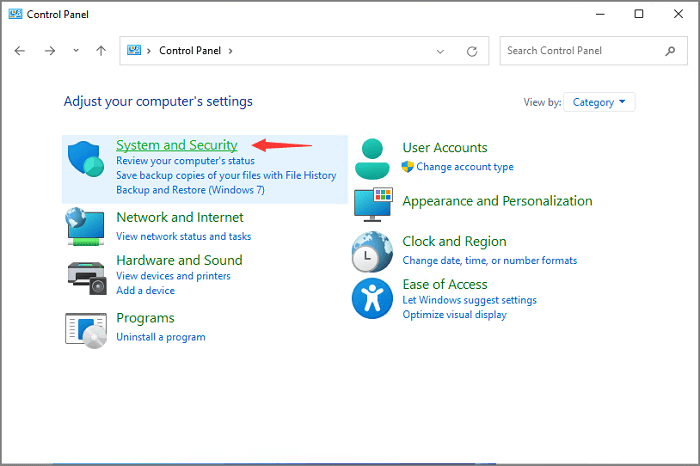
Step 4. To create and format hard disk partitions on Windows, go to the Windows Tools section and click on "Create and format hard disk partitions".

Method 6. Launch Computer Management to Access Disk Management
Computer Management is another useful collection to control PC settings.
Step 1. To access Computer Management, click the Search icon located in the bottom left corner of the screen, and then input "Computer Management" in the search bar that appears.
Step 2. To access the disk manager tool, open Computer Management, navigate to the Storage section, and click on Disk Management. This will display the disk manager interface, where you can directly manage your disk.

Method 7. Wake Disk Management Using Task Manager
Step 1. Right-click the Windows icon and select the Task Manager from the menu.
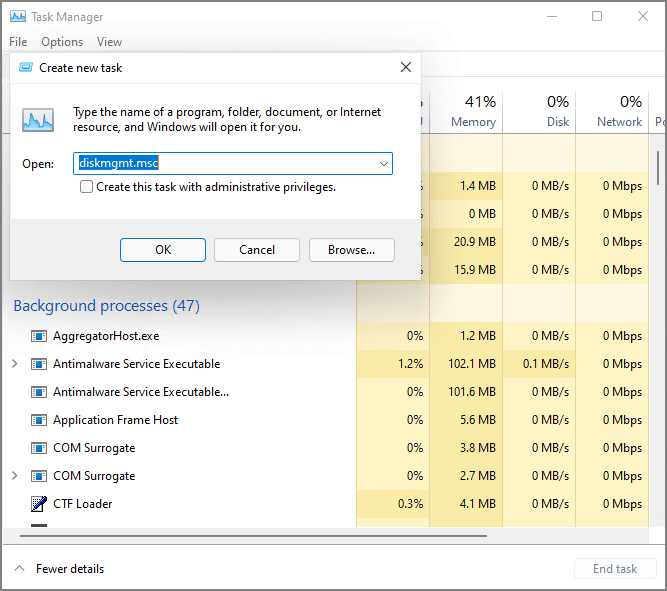
Step 2. Click the File tab and choose "Run new task".
Step 3. To create a new task in Windows, open the Run dialog box by pressing the Windows key + R, then type "diskmgmt.msc" and click OK. This will open the Disk Management utility, where you can perform various disk-related tasks.
Is There Any Disk Management Alternative? Yes!
While Disk Management meets some basic needs for optimizing devices, it falls short when it comes to advanced functions like cloning a hard disk to a new drive, migrating an OS to an SSD, recovering damaged partitions, or merging non-adjacent partitions. For these more complex tasks, users need to turn to third-party software, such as Qiling Partition Master.
Read an article about the top 8 disk management tools:
Related Articles
- How to Create Qiling WinPE Bootable Disk in Windows 10/8/7
- Does formatting a Hard Drive Remove OS? Check Your Full Guide
- Lenovo Laptop Running Slow Windows 11/10 | Speed It Up
- How to Fix Service Host Superfetch High Disk Usage