How to Fix "Get Windows ready don't turn off your Computer" 2021
Quick Navigation:
- Method #1: Wait for the Windows Update to Finish
- Method #2: Force Power-Off Computer and Power Reset Computer
- Method #3: Restart Computer and Troubleshoot Problems
- Method #4: Perform System Restore or Reset Computer to Factory Settings
- What is Deep Data Recovery Software?
- How to Recover Lost Files in Windows 10/8/7/XP
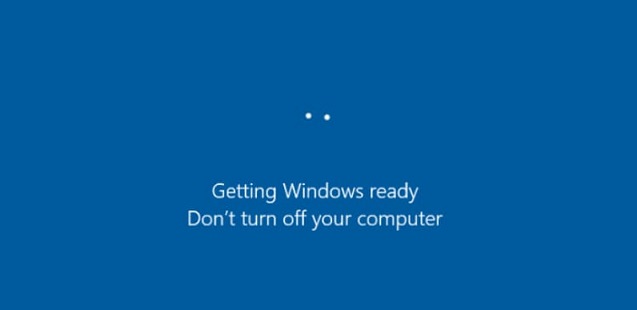
If you're using Windows 8 or 10, you'll be familiar with the notification – "Getting Windows ready don't turn off your computer." This often occurs when you're trying to restart, turn OFF, or turn ON your PC.
Sometimes, you have to wait for the notification to clear off without success. If you regularly experience this, you don't have to worry about it anymore. This post shares four solutions to help you fix the issue.
Method #1: Wait for the Windows Update to Finish
This is the most recommended method to fix the problem. It is also the easiest way to fix it as you don't have to do anything but to wait. When you see the notification, "Windows 10 getting Windows ready don't turn off your computer", it may mean that your operating system is processing some data in the background. Your operating system may be modifying some modules and application's settings, starting a Windows update process, or downloading and installing some files, among others.

It may take some time for the system to complete the tasks to enable your PC to boot properly. Microsoft support technicians usually recommend this method to resolve the problem. You should wait for about two to three hours for the system to complete its tasks. However, if you are still seeing the "get Windows ready don't turn off your computer" notification on your screen, it's time to try other methods to fix the issue.
Method #2: Force Power-Off Computer and Power Reset Computer
If you're tired of dealing with the 'Windows is getting ready' notification and want to try a more drastic method, you can try forcing your PC to shut down. This method is usually recommended by Microsoft support technicians to resolve certain issues. Here's how to do it:
- Step 1: Turn off the computer by pressing down the power button.
- Step 2: Remove all external devices such as earphones, external hard drives, and USB drives. You should also unplug the adapter or power cable from your computer.
- Step 3: If your computer is a laptop and you can detach the battery, open the battery compartment to remove it.
- Step 4: Hold down the power button on your PC for 20-30 seconds to drain the residue from the capacitors.
- Step 5: Now reinsert the laptop battery or reconnect the power cable to the computer if it's a desktop PC. You shouldn't reconnect any external device to the computer at this point.
- Step 6: Press down the power button to complete the PC booting. This should resolve the issue and you shouldn't see the "getting Windows ready don't turn off your computer 2020" after this.
Method #3: Restart Computer and Troubleshoot Problems
If Windows 10 is stuck on the "getting Windows ready" screen, it's likely due to a software issue. Restarting the computer can often resolve the problem. However, if the issue persists, you may need to troubleshoot further.
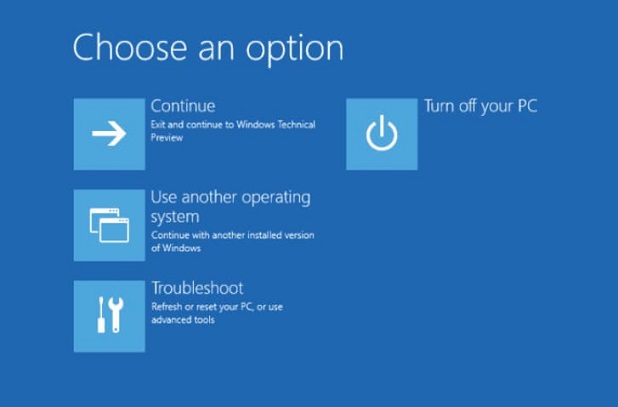
- Step 1: Click the Windows tab and click on "Restart". This will bring up the Windows Boot Options window.
- Step 2: Click the Windows Boot Options menu and select "Troubleshoot". Next, click on "Advanced Options" and then "Command Prompt".
- Step 3: Type "C: cd Windows\System32\LogFiles\Srt.SetTrail.txt" in the opened command line and click the "Enter" button.
- Step 4: If there's a corrupt file, you may see something in this line – "Boot critical file c:\windows\system32\drivers\vsock.sys - is corrupt". If something like this comes up, try to locate the specific corrupt file's location with the Command Prompt. When you've found the file, enter the "Del" command to remove it.

This should fix the issues of "Windows 8 getting Windows ready don't turn off your computer" if the problem is with corrupt files.
Method #4: Perform System Restore or Reset Computer to Factory Settings
When all other troubleshooting methods have been exhausted, and your Windows 8 computer is still stuck in a loop, it may be necessary to perform a system restore or reset to factory settings. Before proceeding, it's essential to back up your important data to avoid losing any files. We recommend using QILING Disk Master Professional to backup your data.
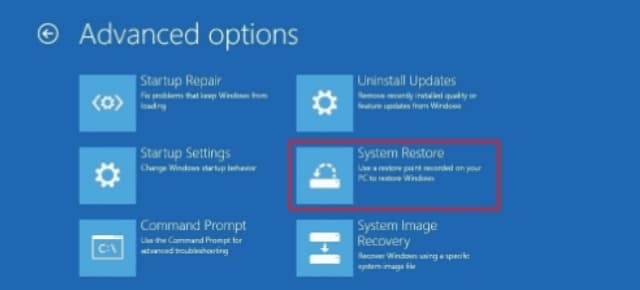
- Step 1: Open the Windows Boot Options menu and select "Troubleshoot". Next, select "Advanced Options" and then "System Restore"
- Step 2: Follow the onscreen Wizard instruction and select the relevant restore point.
- Step 3: Click the "Finish" button when the last step is completed to restore the system.

After performing a system restore or reset, you may find that some of your important files or data are missing. Don't panic! You can still recover lost data using Deep Data Recovery software.
What is Deep Data Recovery Software?
Deep Data Recovery is a powerful software designed to help users recover deleted or lost files from their PC or other external devices. With this tool, you can easily restore your lost data without any technical knowledge.
Your Effective File Recovery Software
- It supports the recovery of deleted documents, emails, photos, videos, audios, archives, and other files and folders from Windows 8 and 10.
- It offers two recovery options – quick scan and deep scan, to successfully recover lost files.
- It supports a wide range of storage devices, including hard drive, memory card, SSD, USB drive, pen drive, digital camera, and other external storage devices.
File Recovery Software is a powerful tool designed to help users recover deleted or lost files from their PC or other external devices. This software supports the recovery of various types of files, including documents, emails, photos, videos, audios, archives, and more.
How to Recover Lost Files in Windows 10/8/7/XP
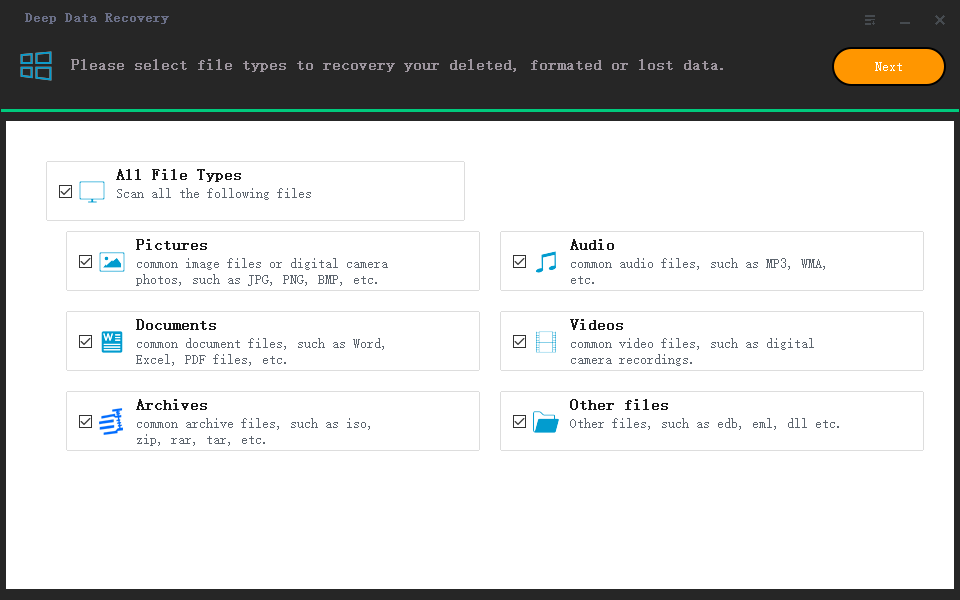
Step 1: Download and install Deep data recovery software. You can download the free trial version of the software to get started. After the download, install and launch it. You'll see the supported files in the main window. All file types will be selected by default and you have to uncheck file types that you don't need. When you are done with this, click the "Next" button.

Step 2: Select the specific location to scan the lost files on your PC. Here, you have to select the drive or partition where you want to scan for the deleted files. Next, click the "Scan" button to commence the scanning. It's important to select all system folders where your lost data may have been saved.

Step 3: Restore the deleted files on your PC. You can select the deleted files that you want to restore and click the "Recover" button to recover and save them to your PC. If some of the files are not found, you should use the "Deep Scan" button for further search.

The "Getting Windows ready, don't turn off your computer" issue can be frustrating, especially when it's accompanied by data loss. Here are some solutions to help you troubleshoot the problem and recover your lost files.
Related Articles
- 5 Ways for How to Fix Files on Desktop Disappeared in Windows 10/8/7
- How to Fix 0x80240fff Windows 10 Update Error
- Where Do Photos/Pictures Go After Recently Deleted on Mac/Windows/Android Phone/iPhone
- [SOLVED] How to Recover Audio Files on Windows/Mac/Android/iPhone
There are times that you lose audio files like voice recordings, music and songs. Read this post and recover audio files on Windows/Mac/Android/iPhone with simple clicks. Download and run Qiling audio recovery software to get back your recordings, music and songs on any device.