7 Ways to Fix Windows 10 Keeps Freezing Up Randomly [2021]
Quick Navigation:
- How to Fix Windows 10 Computer Keeps Freezing and Restarting
- Method 1: Free Disk Space on your System Disk
- Method 2: Check for any Damaged Hardware
- Method 3: Disconnect all attached Devices
- Method 4: Repair Corrupt System Files
- Method 5: Uninstall Possible Incompatible Programs
- Method 6: Update Device Drivers
- Method 7: Perform a System Restore or a Clean Install of Windows 10
- How to Backup Important Files/Folders/Drives
- How to Recover Lost Data in Windows 10 Reinstallation
- Guide to Recover Lost Data in Windows 10 Reinstallation
Freezing up of Windows 10 can happen anytime. When this happens, the whole system can stop functioning or it may affect specific elements like the Taskbar. No doubt, many users experience the issue of "Windows 10 keeps freezing up randomly" and this can be frustrating. In this article, we will look at seven different ways in which you can resolve the issue immediately.
How to Fix Windows 10 Computer Keeps Freezing and Restarting
This section looks at the seven ways you can quickly fix Windows 10 computer keeps freezing and restarting issue. Let's check the solutions out!
Method 1: Free Disk Space on your System Disk
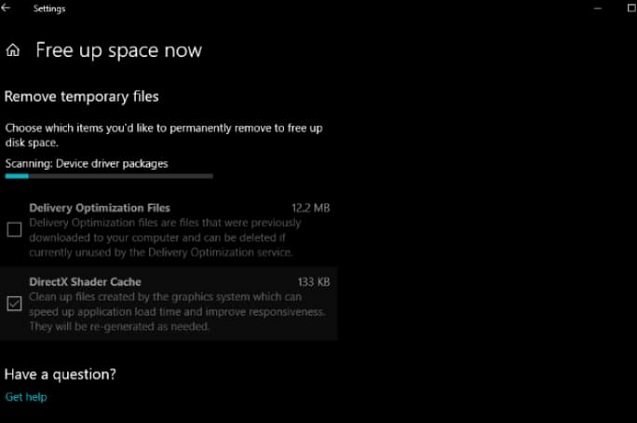
When the system disk has low disk space, it can cause the system to slow down and even lead to random freezing issues. Here are some steps to resolve this issue:
- Ensure you have adequate free disk space on the C drive. If you don't, clean up the junk files to free up disk space. You can use Windows 10 disk cleanup to complete the process. This will free up space and optimize the performance of your PC.

Method 2: Check for any Damaged Hardware
If you're experiencing freezing issues on your Windows 10 system, there could be several reasons behind it. Before diving into software-related solutions, let's first rule out any potential hardware issues.
Method 3: Disconnect all attached Devices
If your Windows 10 laptop is freezing frequently, there could be several reasons behind it. Let's explore some potential causes and solutions.
Method 4: Repair Corrupt System Files
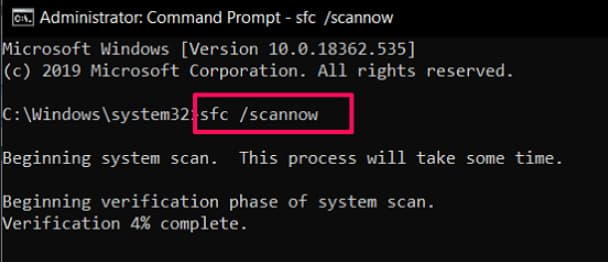
Sometimes, when Windows 10 randomly freezes and hangs, it is because the system files have been corrupted. To check and correct this issue and stop the freezing, you need to run a Command Prompt as the administrator. Check the black Command Prompt window and type in: SFC /scannow and click "Enter" on your keyboard. This will scan and repair the corrupt files.

Method 5: Uninstall Possible Incompatible Programs
Newly installed programs on a PC can lead to the freezing of the computer. Therefore, if you have recently installed a new program on your computer and you are experiencing the freezing issue, the best thing is to uninstall the app to see if this will stop the problem.
Method 6: Update Device Drivers
The reason why Windows 10 keeps freezing can be because of the incompatibility of drivers and hardware. If this is the issue, you need to update all the device drivers on your PC. To do this, follow the steps below:
- 1. Click the "Start" menu and then the "Settings" tab
- 2. Click on "Update and Security" and select "Windows Update" in the left plane
- 3. Click "Check for Updates". Updates all the drives from this point. You should have a reliable internet connection when updating the device drivers
Method 7: Perform a System Restore or a Clean Install of Windows 10
If none of the previous methods have worked, it may be time to consider a more drastic approach. If your Windows 10 computer continues to freeze randomly, you may need to perform a system restore or a clean install of Windows 10.
How to Backup Important Files/Folders/Drives
To ensure that your data is safe and recoverable, it's essential to back up your files regularly. This is especially true if you're planning to perform a system restore or clean install of Windows 10, as these processes will erase all data on your PC.
How to Recover Lost Data in Windows 10 Reinstallation
If you've forgotten to back up your data before performing a system restore or clean install of Windows 10, don't worry. You can recover the lost data with the help of a professional data recovery tool.
Guide to Recover Lost Data in Windows 10 Reinstallation
You can click this download link to get Deep Data Recovery firstly and install it.
Step #1: Select the file types that you need to recover. When you launch the Deep Data Recovery tool, all file types will be selected by default. You can unselect the files that you don't want. When this is done, click the "Next" button to begin the process.

Step #2: Select the location to find or scan the data. Depending on where the files you want to recover are saved, such as a specified location or partition, you should select the location. The software will scan the partition and search for the lost data. When it completes the process, the result window will pop up.

Step #3: Preview and recover deleted files in Windows 10. When the search window pops up, preview the files and restore all the files. If you need to conduct a further search, use the "Deep Scan" menu to search for more data.

In this article, we have looked at how to fix Windows 10 keeps freezing issues. You should try the methods one after the other to fix the issue. If your final option is to perform a system restore, make sure you backup the data before you start with data backup software. You can also use Deep data recovery software to recover any lost data that may happen after the process.
Related Articles
- Solved Windows 10 Do not Show Hidden Files and Folders 2021
- How to Fix 0x80240fff Windows 10 Update Error
- How to Fix the Sony PlayStation 4 (PS4) Error Code
- How to Convert Dynamic Disk to Basic without Data Loss in Windows
How to convert dynamic disk to basic? Here comes an easy way to convert dynamic disk to basic without losing data. - Using Command Line Prompt to Clone System and Disk
Learn how to clone system to a HDD/SSD or clone a disk to another disk from command prompt.