Solutions to Fix EAC3 Audio Not Supported
If you're unable to watch your favorite movie after downloading it, you can try using the MX player, but it may not support certain audio formats like EAC3 unless you install a specific codec designed for that format.
| Workable Solutions | Step-by-step Troubleshooting |
|---|---|
| 1. Add to MX Player | Launch the MX player on your computer and access the settings to make any necessary adjustments.Full steps |
| 2. Convert to Other Format | To convert an EAC3 file, select the file you want to convert from the list, and then choose the desired output format and settings.Full steps |
| 3. Use a Different Media Player | Click on the "Open Media" option from the VLC menu, then select the desired file to play.Full steps |
Help! EAC3 Audio Not Supported, What to Do?
The issue of 'audio format EAC3 not supported' is common among users of MX Player, resulting in a video that plays fine but lacks sound, likely due to the EAC3 audio format not being supported by the player.
- MX Players, a popular media player app, has stopped supporting DTS and Dolby audio codecs due to licensing issues.
- Videos encoded using certain audio codecs can no longer play audio and instead display an error notice such as "MX Player EAC3 not supported", causing the video to play without audio.
The 'EAC3 Audio Not Supported' issue can be frustrating, but don't worry, there are suitable methods to solve it. To get started, let's explore the possible solutions together. Whether you're using a media player, a streaming service, or a device, we can find a way to fix this problem and enjoy your EAC3 audio content without any issues.
Method 1. Add the Custom Codec to MX Player
To download and install the correct custom codecs for your MX player, start by checking the current version of MX player operating in your media player. Once you know the version, follow the on-screen instructions to select and download the custom codec that matches your MX player version.
Step 1.Launch the MX Player on your computer, then go to the main menu and select settings.
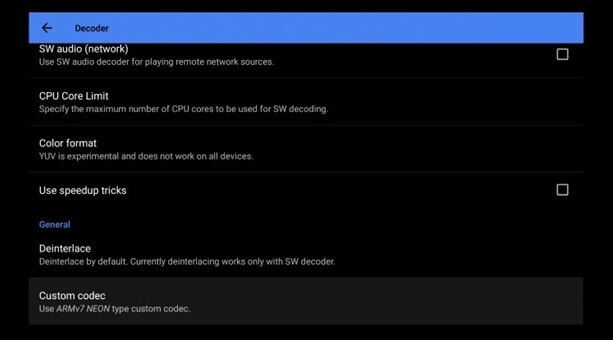
Step 2.1. Select the "Decoder" from the drop-down menu.
Step 3. Once you're on this page, you'll see the codec you need to download to resolve the EAC3 audio not supported by MX Player issue.
Step 4.After downloading the codec, you can reopen the MX player, and it will automatically recognize the new codec. If it's compatible, click "OK" to confirm. If not, try downloading it again.
Method 2. Convert EAC3 Audio to Other Format
To resolve the MX Player EAC3 audio not supported issue, you can convert the EAC3 audio to a compatible format like MP3, MP4, or AAC using a professional video or audio converter. This allows you to play the audio without any issues.
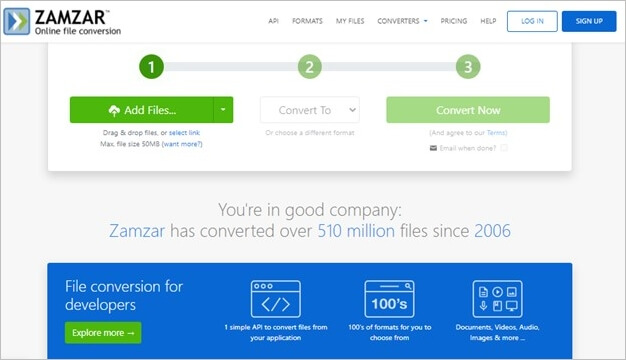
To resolve the audio format EAC3 not supported, we recommend using the Zamzar website that can help you convert your audio. You can access free video and audio converters, but choose the most appropriate one from the list. Zamzar can assist you in converting your audio, and here's how you can do it.
Step 1. To convert an EAC3 file, select the file you want to convert from the list provided. This will initiate the conversion process, allowing you to choose the desired output format and settings.
Step 2.If you want to convert your EAC3 file to an MP3 format, choose MP3 as the output format.
Step 3.To convert your EAC3 file, select the "Convert" option from the drop-down menu.
Pro Tip.AC3 files can be played back using the Quicktime player, which is pre-installed on Macs and available for download on Windows.
Method 3. Use a Different Media Player
The VLC media player can also convert between various video and audio formats. If you are experiencing compatibility issues, such as the audio format EAC3 not being supported, you can convert it to MP3 or any other supported format using VLC. Here are the steps.
Step 1. To open a media file in VLC, go to the menu and select "Open Media", then click "Add" and select the file.
Step 2.To access the settings, click the "Convert/Save" button to a page where you can change the Profile.
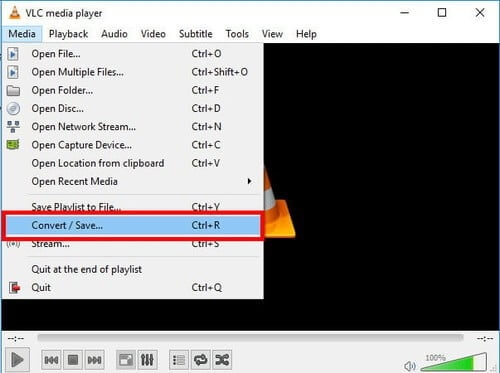
Step 3. Select the desired audio format from the dropdown menu, optionally give the converted file a name, and then click the "Start" button to initiate the conversion process.
Step 4.The converted audio file, with the unsupported EAC3 format, has been saved after conversion.
How to Recover Lost or Deleted EAC3 Audio Files
The error EAC3 not supported on MX player is caused by a license issue or corrupted audio file, resulting in missing audio. This can be resolved by using Deep Data Recovery to recover the lost EAC3 audio file.
This program has various file recovery functions, including simple undelete, recovering data from hard disk drives, SSDs, SD cards, flash drives, and other storage devices, and can even retrieve lost data due to formatting a hard drive.
RAW file systems that can't be recognized by your computer's operating system may still be recovered if the MBR is faulty or the partition table is destroyed. The program offers a pre-recovery preview with configurable scanning to quickly find lost items or examine storage, allowing you to see lost data before recovering it and only recover the files you need.
Main Features of the Deep Data Recovery
- It can help you recover more than 1,000 lost files.
- The scanner has multiple scanning modes, including a quick scan for fast results and a deep scan for more detailed analysis.
- It also offers the preview-before-recovery option.
- The software can recover files after Windows 11/10 crashes.
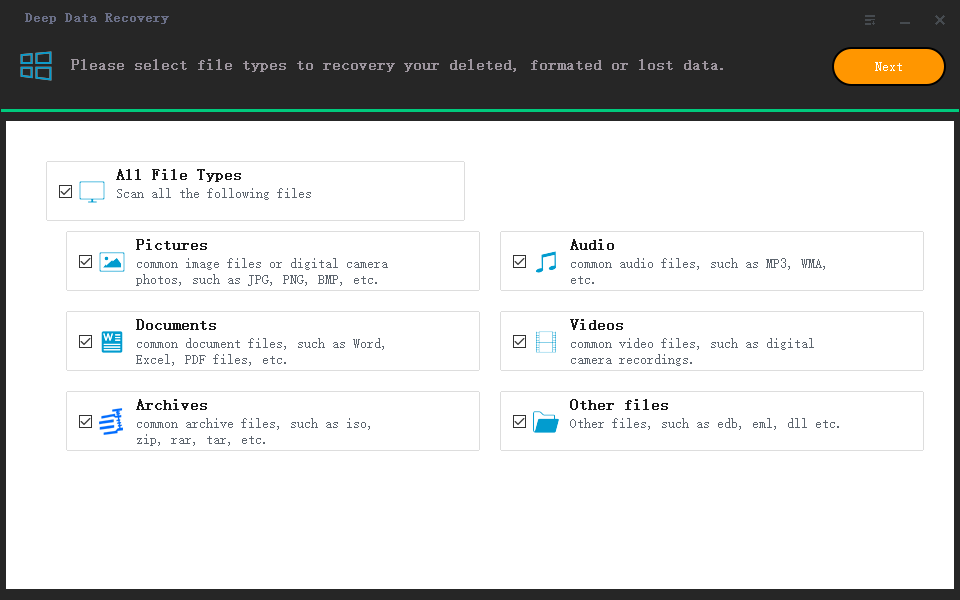
Step 1: Select file types that you want to recover
Step 2. Select the location
To recover lost music, voice recordings, and other audio files, navigate to the location where they were stored and click "Scan" to initiate the recovery process.

Step 3. Preview the audio files
The scanning process for a disk takes time, which varies based on the disk's size. During this process, you can recover files. In the left panel, click on "Audio" and preview found audio files by clicking the "Preview" button.

Step 4. Restore lost audio files
Select all found audio files and click "Recover". Choose a safe location on your PC or an external storage device to save these files and click "OK" to confirm.
Conclusion
To resolve the 'EAC3 Audio Not Supported' issue, consider installing the EAC3 codec for MX Player, converting EAC3 to a format compatible with MX Player, or using a video player that supports EAC3 audio format.
You can opt for Qiling data recovery software to securely and effectively recover lost files. This guide is designed to be easy to understand and comprehend, and we hope it has been helpful in your data recovery needs.
Related Articles
- 10 Word Repair Fixes to Open and Repair Corrupt Word 2016/2019
- USB Flash Drive & External Hard Drive - Everything You Should Know
- JPG Recovery: How to Recover Deleted or Lost JPG/JPEG Files
- How to Recover Data from External Hard Drive (4 Ways Available)