How to Enable/Disable Windows Boot Manager in Windows 11/10
Help! Boot Manager Keeps Popping Up
You can try disabling the boot manager from appearing at startup. To do this, go to your BIOS settings (usually by pressing F2, F12, or Del when starting your laptop), navigate to the "Boot" or "Advanced" tab, and look for an option to disable the boot manager or set it to not show at startup. Save your changes and see if it resolves the issue. If not, you may want to consider reinstalling your boot manager or seeking further assistance.

What Is Windows Boot Manager (BOOTMGR Definition)
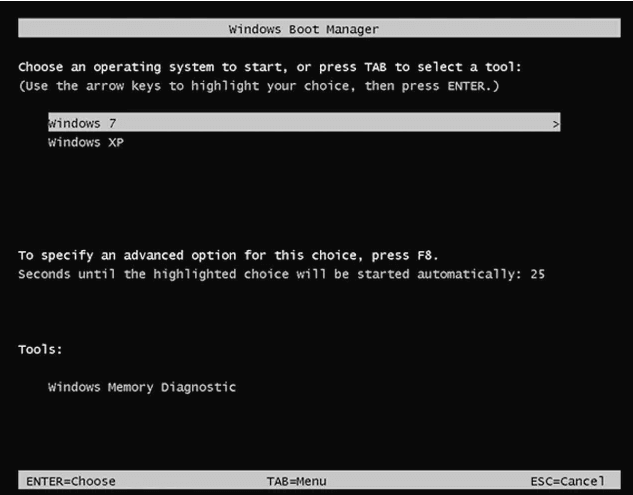
Windows Boot Manager (BOOTMGR) is a tool that helps boot the operating system, particularly when multiple operating systems are installed on a computer. When a Windows 10/8/7 computer starts, it calls up the Boot Manager, allowing users to choose which operating system to start.
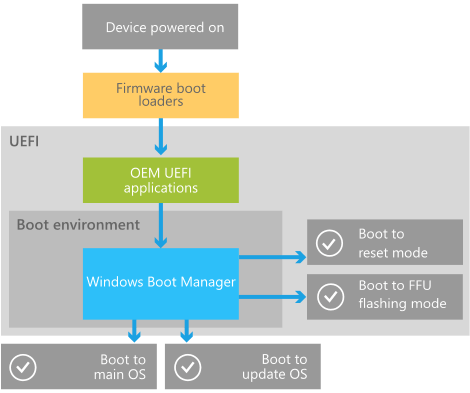
Inside the boot environment, individual boot applications started by the Boot Manager provide functionality for all customer-facing scenarios before the device boots. This process is illustrated in a high-level diagram from Microsoft, which shows the flow of events as the device prepares to start up.
Windows 10 always enters the Windows Boot Manager interface when booting. While you can't remove the Windows Boot Manager, you can adjust its behavior by using the Command-Line to enable or disable it, or by modifying the default behavior through the System Configuration tool, effectively reducing the time it waits for you to respond.
Solution 1. Enable or Disable Windows Boot Manager with CMD
To enable or disable Windows Boot Manager, you must run a command prompt as an administrator. Follow these steps to do so: [insert steps].
Step 1. Type cmd in the "Search Windows" box next to the Start menu.
Step 2. To run Command Prompt as administrator, right-click on the search result and select "Run as administrator".

Step 3. Once the command prompt pops up, type in the following commands and press "Enter" after each one.
- bcdedit /set {bootmgr} displaybootmenu yes
- bcdedit /set {bootmgr} timeout 30.
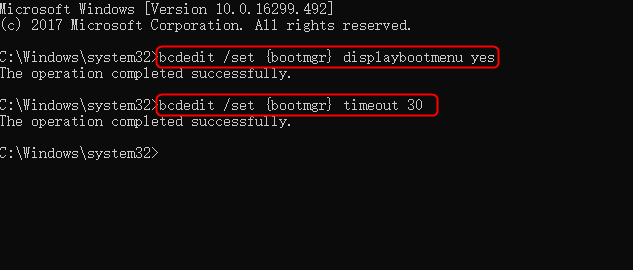
The timeout value determines how long the boot manager is displayed, allowing you to specify the time in seconds according to your needs.
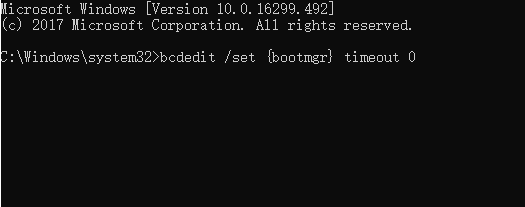
Step 4. To disable Windows Boot Manager, type `bcdedit / set {bootmgr} timeout 0` and press Enter.
Solution 2. Modify Windows Boot Manager with System Configuration
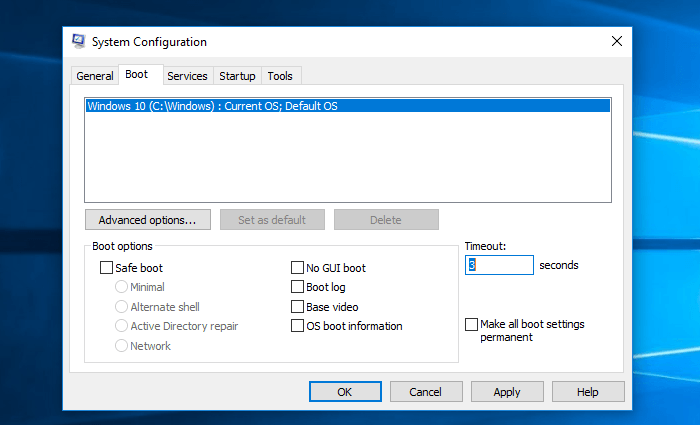
If you are not familiar with CMD, you can also open System Configuration to modify BOOTMGR. Here are the steps:
Step 1. To open the System Configuration utility, press the Windows + R keys simultaneously, type "msconfig" in the Run dialog box, and hit the "Enter" key.

Step 2. The "Boot" tab should be selected on the System Configuration window that opens.
Step 3. The timeout time should be set based on the specific requirements of the task and the capabilities of the system, rather than simply setting it to the lowest possible time. While 3 seconds may be a low timeout time, it may not necessarily be the best choice for all systems and tasks.
Bonus Tip - How to Safeguard Your Data in Windows 10/8/7
To avoid extra data loss problems, protect your data first by backing up files with file backup software. If data is lost, you can use Qiling hard disk data recovery software to recover it. Deep Data Recovery can also help recover essential data from any disaster.
Restore data with Qiling data recovery software.
Step 1. Select file types and click "Next" to start
Launch Deep Data Recovery, select the file types you want to recover, and click "Next" to begin the process.

Step 2. Select a location and start scanning
Hover over the partition/drive where the deleted files were stored. Click "Scan" to find lost files.

Step 3. Select the files you want to recover
After the scanning process is complete, select the deleted files you wish to recover. You can filter the results to show only specific file types, or search for a file by name using the "Search files or folders" box, which is the quickest way to find a specific file.

Step 4. Preview and recover deleted files
Preview the recoverable files, select the desired files, and click "Recover" to transfer them to a new storage location, bypassing the original disk where the data was lost.
Conclusion
If you encounter the Windows Boot Manager interface when booting up, don't worry, it's likely due to old system residual files not being deleted. You can refer to the above methods to delete them, which should repair the issue.
Related Articles
- How to Fix Windows Media Player Encountered a Problem While Playing the File
- How to Use Deep Data Recovery
- How to Fix Dell No Hard Drive Detected Error
- Recovered Files Won't Open or Not Opening