How to do System Restore via Bootable CD?
This article discusses how to restore system using QILING Disk Master to avoid system reinstallation when Windows can't boot normally, and refers to the last tutorial "How to do system restore" for answers about why system restore is needed and preparations before system restore.
If Windows can't boot, you can't run the restore software on it. To restore your system, you'll need a bootable CD or USB drive that can run QILING Disk Master from a disc. First, you'll need to create a bootable disk, which you can learn how to do by following the tutorial on "How to make a bootable CD".
Disk Recovery features for Qiling Disk Master
You can recover your computer's system files and programs to an earlier state when everything was working properly by restoring your computer to a previous system restore point. This process will undo any changes made to your system since the last restore point, effectively reverting your computer to a previous state.
- System restore You can quickly restore your entire Windows system backup in minutes to the original or new location using a WinPE bootable media, allowing for fast and efficient recovery.
- Data restore Quickly recover your entire disk or partition backup in minutes to the original or new location, restoring your data with ease.
- System migration Migrating your system to a solid-state drive (SSD) can be a quick, effortless, and safe process that doesn't require reinstalling Windows.
- Pre-OS recovery environment If your system won't boot, you can select QILING Disk Master from the boot menu to launch Pre-OS and then recover your system.
- Perfect Defrag When using QILING Disk Master to recover a partition, it's recommended to run a quick defragmentation on the destination partition or disk beforehand. This helps ensure a smoother and more efficient recovery process.
Operating Steps of System Restore from Disc
To access BIOS and set the computer to boot from the CD-ROM, insert the bootable CD into the CD driver and set CD-ROM as the first boot device in BIOS settings. You can access BIOS by pressing the "Delete" button for desktop computers or "F2" for laptops while starting the computer, following the prompt information to set the first boot device. For detailed operations, refer to the provided link.
When the computer boots from a CD-ROM, QILING Disk Master on the disc will automatically run, allowing you to easily complete system restore operations. The process involves following the detailed steps provided.
Tips: Download QILING Disk Master, install and launch it.
1. To boot from the QILING Disk Master CD, enter the BIOS, set the CD-ROM Drive as the first boot device, and press "Enter" when prompted to boot from CD or DVD. This will automatically start the QILING Disk Master.

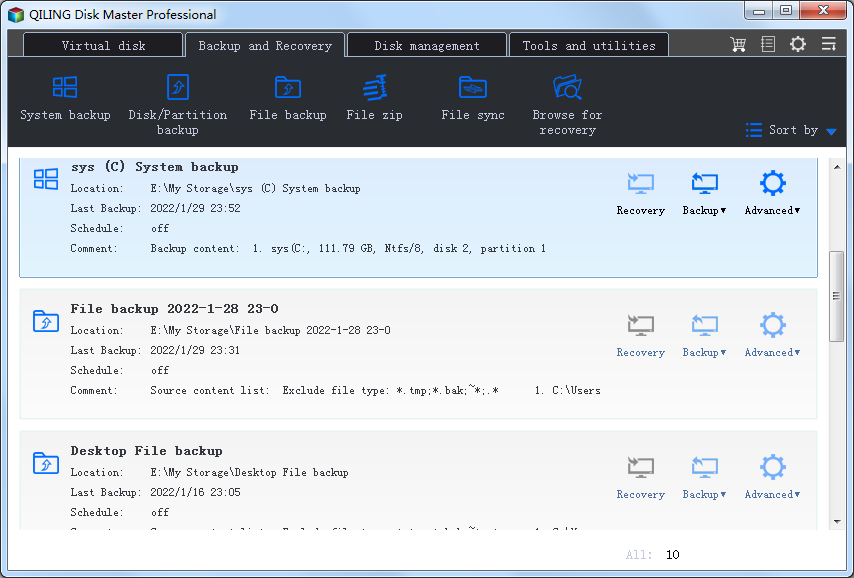
2. To restore your data, click the "Browse for recovery" button located on the "Backup and recovery" tab.

3. Browse a task file so as to select the system image file to restore, then click "OK" to continue.

4. If the image was protected by a password, you would need to enter the password to access it.

5. Select a backup version, choose the source disk or partition, and click "Next". If restoring the system, select "System Recovery to original location". If the hardware is different from the backup image, select "Universal Restore". Then click "Next".

6. If you choose to restore the system to its original location and the original partition or disk still exists, the application will skip this step.

7. After recovery, determine the location and capacity of the target partition. If there is adjacent free space, you can move or resize the partition by dragging it with your mouse.
If the destination disk is an SSD, checking this option will ensure sector alignment during the process.

8. After completing the system backup, you can choose to shut down your computer, restart, or do nothing. Simply click the "Finish" button to exit the backup process.

Tips: Set active - This function can only work for the Primary Partitions in the hard disk with MBR mode partitions, and only one primary partition can be set as active among all the primary partitions. The active primary partition is the one that allows the computer to boot.
After completing system restore, eject the bootable CD or USB flash drive. The system will automatically reboot. Then, access BIOS to reset the first boot device.
After a system backup, if new applications are installed on the current system, they won't be recovered by system restore. To recover these apps, you'd need to reinstall them, so it's best to do system backups at regular intervals to avoid this hassle.
Related Articles
- Free Incremental Backup and Differential Backup Software
- Incremental VS Differential Backup: Backup Speed, Storage Space
- How to create the Secure disk for Windows 10
- How to Set BIOS to Boot from CDROM