2022 Write Protected SD Card Format Software: Erase/Format Write Proteced SD/USB/Pen Drive
You received the "the disk is write-protected" notice because your memory SD card is currently set to read-only mode, which prevents any data from being written to it. This might have happened if you had previously set the card to read-only or if it's been formatted in a way that restricts writing. To resolve this, you can try removing the write protection or formatting the card in a way that allows writing. If the issue persists, it might be worth checking the card's settings or seeking further assistance.
Your USB drive is likely in read-only mode, preventing you from writing new data to it. To resolve this, try removing the write protection by looking for a small switch on the drive, usually located on the top or side, and sliding it to the "unlocked" position. If that doesn't work, try using a tool like the built-in Disk Management utility on Windows or the Disk Utility app on a Mac to remove any write protection settings. If you're still unable to format the drive, it's possible that the drive itself is faulty or corrupted, and you may need to consider replacing it.
To resolve the issue, you need to unlock the memory card and then format/erase it. This will remove any deleted data and prevent it from reappearing when you reconnect the card to your computer. You can try using a memory card reader or a computer to unlock and format the card. If the issue persists, you may need to consult the user manual or contact the manufacturer for further assistance.
When your SD card, pen drive, or USB drive becomes inaccessible due to write protection, you won't be able to store or transfer new data, and basic functions like installing, deleting, or moving data will be shut down. To fix this, you need to remove the write protection from your storage device.
Download the Best Write Protected SD Card Format Software
Qiling CleanGenius is the most recommended way to remove write protection from an SD card. This third-party software simplifies the command methods and enables the most efficient and quickest way to unlock a write-protected SD card, allowing you to finally erase and format the card without any restriction.
If you're not tech-savvy, don't worry! There are graphical-based solutions to remove write-protection from your hard drives, USB drives, and even SD cards, making it easy to manage your devices without needing to navigate through command lines.
Qiling CleanGenius is a tool that helps fix issues on drives without requiring command-line knowledge.
Here's an easy-Here's a brief guide on how to use this tool to get your issues sorted:
Step 1: DOWNLOAD and install Qiling Disk Master on your computer.
Step 2: Run Qiling Disk Master on your PC, select Optimization and choose the Write Protection mode.
Step 3: Select the device that is write-protected and click Disable to remove the protection.
How to Manually Remove Write Protection from SD Card, USB or Pen Drive
If the SD card is write-protected, you can try other methods to restore it to normal. Besides downloading write protection removal software, you can also try to unlock the storage device by yourself using other methods.
Method 1. Check the Lock Switch on Your SD card/USB Drive
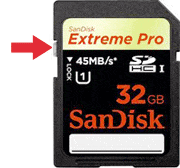
To check whether the SD card or USB drive is locked, you can check the lock switch on the device. If the lock switch is turned to the "lock" position, it means the device is locked and you won't be able to access the contents.
Check if the SD card or USB drive has a switch and if it's locked, unlock it.

Method 2. Check the SD Card/USB Drive's Properties
To remove write protection from an SD card or USB drive, go to My Computer, click on "Devices with Removable Storage", right-click on the SD card or USB drive, and select "Properties". From there, choose to remove the write protection.
Method 3. Disable Write Protection in Registry
- Connect SD card or USB drive with PC, click Start.
- Type regedit in the search bar and click it.
- Select the "HKEY_LOCAL_MACHINE" and click "System".
- Find "Current Control Set" and click "Control"
- Check if a key named "Storage Device Policies" exists, and if so, change the "DWORD value" to "0" and press "OK" to save the change.
If you can't find the key named "Storage Device Policies", create a new key called "Storage Device Policies" under the "Control" key, then create a DWORD value called "write protect" under this new key, and finally double-click it to change the number.
- Notice:
- If you're unable to remove the write protection on your SD card or memory card, you can't format it, and Qiling's free format tool can't format a write-protected device directly.
How to Free Erase/Format the SD card or USB drive
After removing the write protection, you'll be able to access and move data on the SD card or USB drive, so it's recommended to transfer all data first and then format it.
If you still can't access an SD card or USB drive, or need a more direct solution, you can use Qiling Partition Master Free to thoroughly format it.
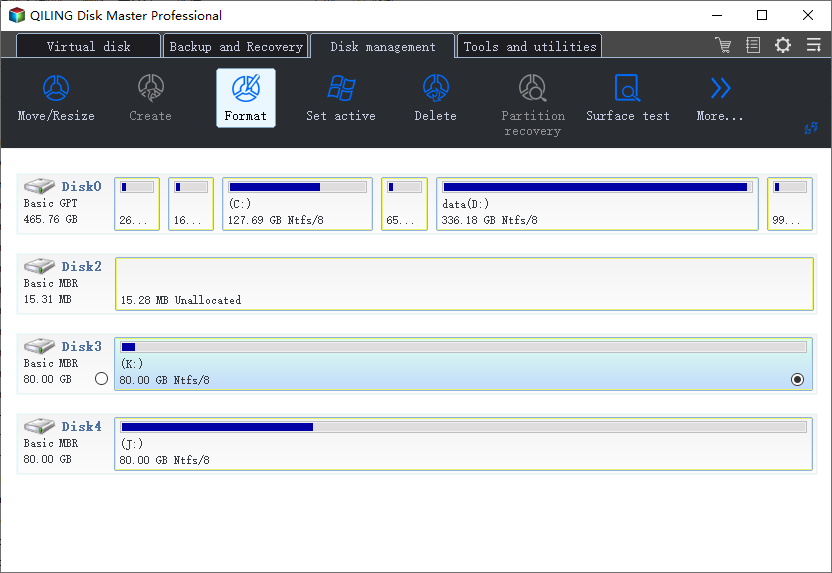
Step 1. Select the USB drive to format.
Connect a USB drive or pen drive to your computer, then download and launch Qiling partition software. Next, click on the USB drive you intend to format and select the "Format" option.

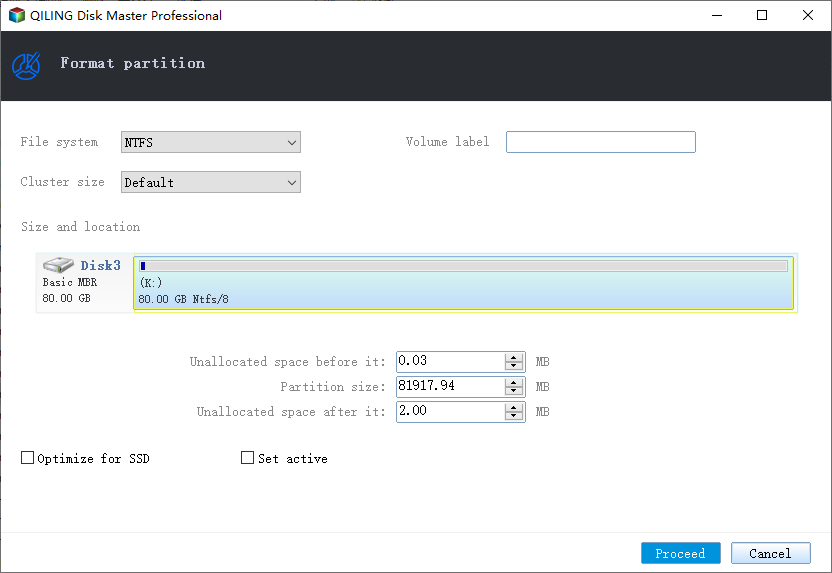
Step 2. Set the drive letter and file system on USB.
Assign a new partition label, file system (NTFS/FAT32/EXT2/EXT3/EXT4/exFAT), and cluster size to the selected partition, then click "Proceed".

Step 3. Check "OK" to confirm formatting USB.
1. Click "OK" if you see the Warning window. If you have important data on it, back up the data in advance.
Related Articles
- (3 Free Methods) How to Remove or Delete Partition Windows 11/10
- How to Clone HDD to 250GB/500GB SSD Without Reinstalling
- How to Fix White Screen of Death on Windows Computer
- How to Fix (GPT) Hard Disk Partition Not Recognized in Windows 11/10