How to Move Desktop Folder to Another Drive on Windows and Mac in Simple Ways
If we talk about the Windows or Mac PC, all the user files and folders are stored in the C:Users, followed by the username. In the C drive, you can see a handful of folders that includes Desktop, Downloads, Music, Documents, Pictures, etc.
So, there are times when you run out of storage space on your primary C drive, and hence moving these folders to another drive seems to be the best option to free up space. This way, you can use the valuable space on the system drive for games and apps that benefit from the performance and speed of the SSD.
So, if you have GBs of data in the Desktop folder, then it's defiantly a good idea to move Desktop folder to another drive on Mac and Windows. But if you are unaware of how to do it, then we are here to help you! This article will show you the ideal ways to easily change the Desktop location on both Windows and Mac.
How to Move Desktop Folder to Another Drive on Windows in 2 Ways
If you are running your Windows 10 PC on a relatively small partition of your Hard Drive or a small SSD and running out of disk storage space, then you can take into consideration moving the Desktop folder to another drive.
You can change the Desktop location on Windows PC in 2 ways! The first way will help you move the desktop folder to another drive by using the default Windows 10 feature, and another method will introduce an excellent tool that will help you complete the entire process within no time.
So, let's look at how each of them works!
1. Use the Properties Option
By using the Properties Option in Windows 10, you can quickly move Desktop folder to another drive. Always remember that you can move the folders that you wish to move instead of moving all of them.
Here's a guide on how to use the Properties option to change the Desktop location!
Step 1. Open File Explorer by clicking on its related icon on the taskbar or by tapping on the File Explorer icon in the Start Menu.
Step 2. Now, in the left navigation panel of the File Explorer, you will see multiple folders under Quick Access, including Desktop. You simply need to right-click on the Desktop folder and then click on "Properties" to open Desktop Properties.

NOTE: You cannot move multiple folders at once.
Step 3. Switch to the "Location" tab and click the "Move" button.

Step 4. Now, select the location on any drive (except external drive) and finally click on "Select Folder" and then the "Apply" button to move the Desktop folder to the new drive.

That's all that you need to do to move the desktop folder to another drive on Windows PC by using the Properties option.
2. Use a Larger Folder Move Tool - Qiling Disk Master Free
If the above-stated method didn't work for you to change the Desktop location, you can consider doing the same by using an advanced tool that works wonders for moving large folders from one location to another on Windows PC. Qiling Disk Master Free is a top-notch tool with a Large Folder Move feature to help you move the Desktop folder to another drive.
The Qiling Disk Master tool moves data, applications, and folders from one location to another or between 2 PCs with or without a network. This tool has three transfer modes that involve Transfer via Network Connection, Transfer Locally and Transfer via Images Files.
The Qiling Disk Master tool boasts a variety of features that involves:
- Auto transfer
- Move a PC game to another drive, no need to reinstall programs
- Free transfer assistance
- Migrate all the old PC files to the new Windows 10 PC
- Recover programs and files from dead PC
- Highly supports Windows 10/8/8.1/7/Vista/XP
- Move everything securely and quickly
So, changing the Desktop folder location in Windows PC is no longer a problem with the Large File or Folder Move feature of Qiling PC data transfer software.
Step 1. Run Qiling Disk Master on your PC. Choose "Large File Cleanup" > Click "Start" button to move on.
Step 2. Select the disk you want to scan, click "Scan."
Step 3. When the scan completes, files larger than 20M will be listed. Choose the wanted files and target drive to move. (You can choose the triangle icon to select destination or click "Browse" to pick the wanted place.)
Step 4. Click "Move" button, then check files on the pop window. Then click "Move" button again.
How to Move the Desktop Folder to Another Drive on Mac
Before beginning with the process, always make sure you have a current backup because that way, you can retrieve everything to how it was before changing the Desktop or Home folder location.
So, here's a guide on how to move the Desktop folder to another drive on Mac!
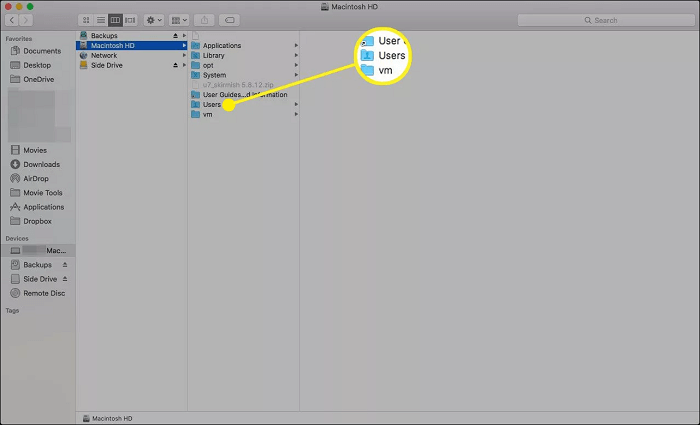
Step 1. Using the Finder to navigate to the Users folder. For most Mac users, the path is /Macintosh HD/Users.

Step 2. Here, select the "Home" folder and drag it to the new location on another drive.
![]()
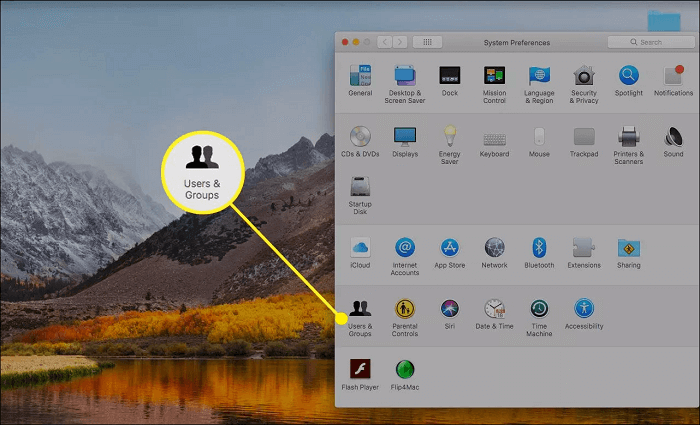
Step 3. Click on the "System Preferences" icon on the Dock and select "System Preferences" from the Apple Menu.

Step 4. Simply tap on "Users & Groups". Then, click on the "Lock" icon and enter your administrator password.

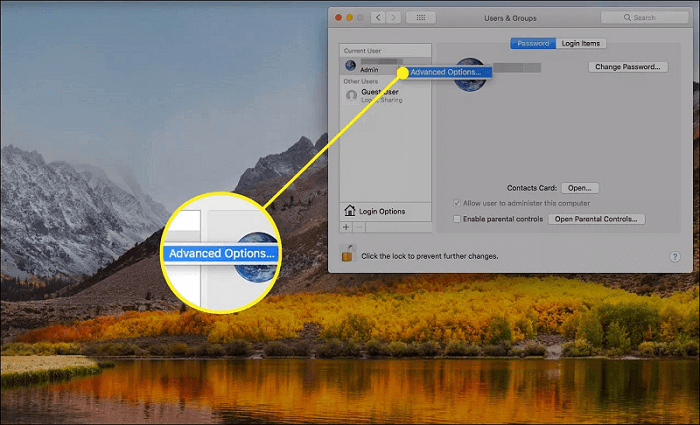
Step 5. From the list of user accounts, right-click on the account whose Home folder you have moved and choose the "Advanced Options" from the pop-up menu.

Step 6. Here, tap on the "Choose" button located on the right side of the "Home Directory" field.

Step 7. Now, go to the location where you have moved the Home folder to and select the new home folder, and hit the "Open" button.

Step 8. Tap "OK" to dismiss the "Advanced Options" sheet and then close the "System preferences".
That's all! You can restart your Mac now and see that the Home folder is in the new location.
Conclusion
This was all about how you can move the desktop folder to another drive on Mac and Windows! No matter which method you choose above to change the Desktop location, you will surely get excellent results.
But if you ask us, then we will recommend you to try moving the Desktop folder to another drive by using the Qiling Disk Master tool, as it will get your work done flawlessly within a couple of minutes.
Related Articles
- How to Move Downloads Folder to Another Drive on Windows 10 or Windows 11
- How to Factory Reset Windows 11 without Moving Apps/Programs
- How Do I Transfer My Netflix from One Device to Another?
- How to Transfer Spotify Playlist|Change Spotify Install Location - Qiling