SFC and CHKDSK: How to Run SFC and Chkdsk | Difference Unveiled
Page Content:
What Is SFC?
How to Run SFC Scan in Windows 10
What is CHKDSK?
How to Run CHKDSK Command in Windows 10 Step by Step
Any Simple yet Powerful CHKDSK Alternative?
The Difference Between SFC and CHKDSK
Both SFCand CHKDSK are closely related to file corruption detection. However, there is a clear difference between the two. This article will attempt to provide a perspective that can explain each of them.
What Is SFC?
SFC stands for System File Checker. This is one of the popular utilities of Windows 10. Its function is to help the administrator to check file corruption that has occurred. This tool is effective for fixing problems with registry data. SFC is applied to the latest versions of Windows, such as Windows 7, 8,10, and Vista.

SFC allows the user to open access to a command prompt window. Opening that access will trigger a system scan that can show if the file has been corrupted. When you are scanning with SFC, it is recommended that you do not close the prompt window until the process is complete.
When scanning, SFC may send a message stating that it found no violations of file integrity. If SFC can repair the corrupted files, it will message that the system found the corrupted files and fix them. If the utility cannot handle it, the user can perform the replacement manually.
How to Run SFC Scan in Windows 10
Here comes the fun part. To run the SFC, you have to follow the instructions correctly, as mentioned below.
Step 1.Go to the elevated command prompt by right-clicking the start menu icon. Select the Command Prompt (Admin)from the list. You can also navigate the command prompt using the shortcut keys Win + X and then select it.

Step 2.After running the command line, type the following command mentioned below to run the SFC scan. Make sure not to abort this process and wait for it to complete. The result will be displayed after the scan is complete.
Step 3.Press Enter on the keyboard after typing. It will start looking for corrupted or lost files on your PC.
How does this command scan your PC?
This command is beneficial for those who have some problems related to file corruption on their PC. It scans all protected system files and replaces corrupted files with a cached copy located in a compressed folder C: WindowsSystem32dllcache. You can navigate to this folder using the hierarchy mentioned above.
SFC Scan Results:
After the process is 100% complete, if all goes well, you will receive the following message Windows Resource Protection did not find any integrity violation, as shown in the image below.
If the SFC Scanner displays the following message, Windows Resource Protection found corrupt files and repaired them successfully. The details are included in the CBS.Log% WinDir% N N -LogsCBSCBS.log. Then you can check the components using the following method described below.
- Navigate to the command prompt and type the following line of code followed by entering Key on the keyboard.
- Findtr / c: »[SR]»% windir% \ N-LogsNCBSNCBS.log> »% user profile% N-DesktopNsfcdetails.txt
If you want to repair corrupt system components, type the following command and hit enter at the command prompt.
Dism / Online / Cleanup-Image / RestoreHealth
The text at the end of the above command, i.e., text, contains details of all the SFC scan programming performed on the PC with date and time. Open the file sfcdetails.txt from the desktop, and you can see the details of the analysis.
If the SFC Scanner does not solve the problem for you, try SFCFix, a third-party tool that reads from the CBS.LOG file to repair corruptions.
What is CHKDSK?
It is a command in Windows and does ecosystem. Its function is to verify the integrity of the file system on a partition of the hard disk or floppy disk. The CHKDSK command has several parts, the one we will show you below talks explicitly about the analysis, but this is not the only thing that CHKDSK can do. Given this, we will show you how you can observe all the possible actions with the tool.

- For this, you will enter the Windows command console again. Go back to the start menu, search for "cmd," and run it as administrator.
- Anyway, this time, you will write the following code "chkdsk /?" and hit the Enter key.
- By typing the above command, you will display all the information related to the CHKDSK command in the command console. In the same way, the parameters that you can use if you want to use a specific tool will be indicated.
- Just write the code that is shown after the CHKDSK command. For example, "chkdsk c: l," "chkdsk c: f" or "chkdsk c: v" and so on with any other specific command.
How to Run CHKDSK Command in Windows 10 Step by Step
Many people wonder how to disable disk checking or CHKDSK when starting Windows, but the truth is that the CHKDSK command can be handy. For this reason, through this guide, you will learn how to use or execute the CHKDSK command in Windows 10 to check if your drive partition has a problem.
The command or CHKDSK can be very efficient in knowing the problems that our storage unit has. We recommend using a diagnostic and repair tool within Windows if you notice performance or stability failures.
Believe it or not, the hard drive is often the main culprit that the computer freezes or does not work correctly. Using CHKDSK, you will check if a disk partition error is the cause of the equipment failures, but first, you have to know how to use the CHKDSK command. Just read the following guide to learn the basics of this process.
- The first thing you should do is go to the Windows start menu. Once there, look for "cmd."
- When the result of the Windows command console appears, right-click on it and select the option "Run as administrator." This is very important since it will be necessary for us to access the options as an administrator to make changes to the equipment.
- Once the Windows command console is displayed, type "CHKDSK," followed by the number of the drive you want to analyze, in the following format "chkdsk c:" (or any drive letter you want to check) and press the Enter key.
- Wait for the process to finish, after which you will display a summary of your drive. Also, Windows will tell you if it found a problem with it. If you cannot find the solution to your situation, you can repair the Windows 10 system with the DISM, and SFC commands.
Any Simple yet Powerful CHKDSK Alternative?
Windows Command Prompt is useful in resolving most hard disk issues and file system errors on a computer, however, not all people can make full use of all the complex command lines. As you see, there are various CHKDSK commands that are designed to tackle specific drive problems. Only those with advanced computer skills have the technical know-how to avoid mistakes. For average users like most of us, CHKDSK command is not an optimal choice to check and repair hard drive partition errors.
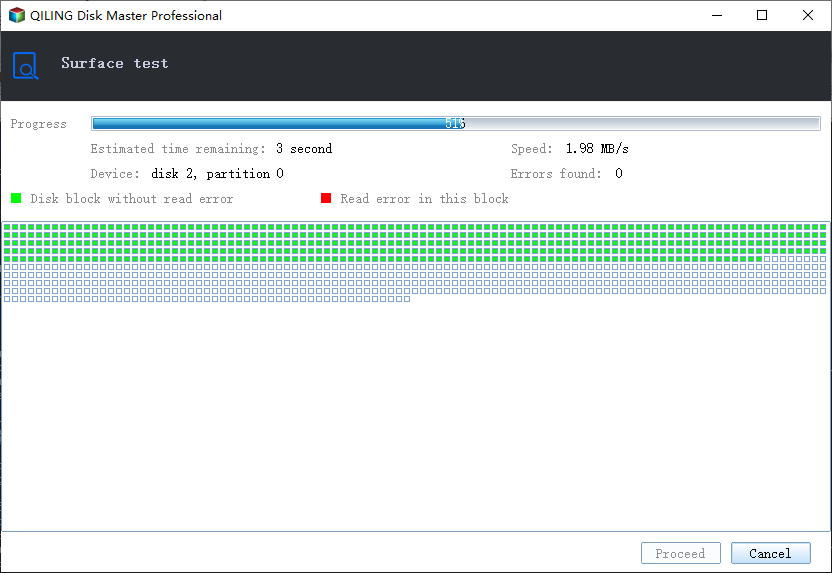
We have a more intelligent program that can be a perfect alternative to the Windows CHKDSK utility - Qiling Partition Master. It's an all-round disk & partition manager software that provides users with a collection of practical fucntions to maximumly utilize their disk partitions like resize/move, delete, format, hide, copy and clone. It's a third-party solution that simly covers all the demands in managing a Windows hard drive and partitions. See how it works to run a check disk on a drive:
Step 1. Open Qiling Partition Master on your computer. Then, locate the disk, click the partition you want to check, and choose "Surface test".

Step 2. In the Check File System window, click "Proceed" to start.

The Difference Between SFC and CHKDSK
If CHKDSK does its function to detect errors on a specific partition on the hard disk system, SFC can detect file errors on a Windows 10 system and try to make repairs. If SFC detects a corrupt or missing system file, it will automatically replace the system file with a healthy version. When Windows 10 encounters a BSOD and displays a missing file message, it means it's time to run SFC.
Conclusion
Both have almost the same function, which is to detect file errors. However, SFC has its specifications for the Windows series mentioned above. Not only that, but SFC will also automatically take action, unlike CHKDSK, which tends to only "report."
Related Articles
- Fix "We could not complete the Updates/Undoing changes" Error Windows 11
- Effective Fixes for Hard Drive Not Detected in Windows 10 Installation
- How to Remove Partition on External Hard Drive in Windows 11/10
- How to Fix SSD Full for No Reason